V-berth carpet project

starcrafttom

Active member
Susan and I are in the middle of carpeting the v berth of our 22. If I knew how hard finding close cell foam was I would not have done it at all. the only place in the area that has it is a hard ware store in bellingham. We call or went every where else looking for it and could not find it any where. Home depot ( home dumb a$$) cant decide if they have it or not and if they do they don't know where it is.
Any way we now have the foam (with lots of help from Ruth) and have glued in about half of it. We used contact cement applied with a brush. it really worked well until the temp dropped off then the cement stopped setting up and we had to stop for the night. Tomorrow will be the rest of the foam and then the carpet.
After we are done the patterns will be made available again to who ever needs them. I will post picture's of the project after we are all done.
Another project I got done today was replacing the foam in the captains seat. I only opened up the back of the seat and pulled out the middle piece of foam. I replaced it with a piece of thicker more dense foam that Susan got from the free pile at the factory dinner. I used the trash bag trick to slide the new piece into the middle and it worked just fine. I have always hit bottom and was riding right on the wood in the old seat so this is a great improvement. I'm also raising the foot rest storage bin on the captains side under my feet. Adding 3 inches to it.
We have not been out in the boat at all this year and we need to get all these projects done before Friday harbor. I am also thinking of changing the counter and moving the sink and cook top. Well it was nice weather for projects at least.
 
starcrafttom":176ltmsj said:
I am also thinking of changing the counter and moving the sink and cook top. Well it was nice weather for projects at least.

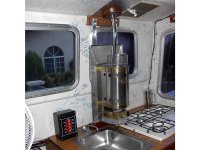
TOM- Would be a great time to put in a new cooking stove and heater as well, if you haven't already put the Wallas either into orbit or on the bottom of Puget Sound.

If you're not uncomfortable with it, propane can give you both a great heater and is totally unequalled as a heat source for cooking.

7 pages of ideas in the Cabin, Interior-Photos Forum:

Force_10_Cozy_Cabin_Heater_in_Sea_Wolf.jpg
Click on photo for link to FORUM.
 
yeah I was reading those very pages last night until 1 am. I'm most likley going to install a airtronic or something allong those lines. Warren want my wallas for his new 22 and I will install a propane or white gas cook top. If I'm just using it for cooking them I might just run the hose to one of the gunnals and use the little bottles. I have a bunch of them and a refill attachment so it does not cost much to use them.
 
The cheap back packing pads sold at Walmart and sporting good stores are closed cell foam. Fishing supply houses have closed cell foam, and it is readily availabe on the internet.

Good project. I prefer to just leave the foam bare, or put on a fabric, rather than a thick carpet. Easier to clean.
 
Fishing supply houses HERE don't have the foam. we looked. They can all order it for you but no one has it. I should have thought of the back pack material. We will be covering it with a thin carpet made for the purpose. The only place here that has it in stock is Perfect fit in tukwila, another long drive for me.
 
If the boat will float, then ye must put that project on hold for prawn season. Will be interested to see your project. Do you have any concern about mold on a surface you have glued into place?
 
In this climate their is always concern with mold. the bare hull gets mold on it just sitting in the drive way. Mold can be fought with heat and a dehumitfier.
 
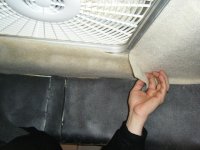
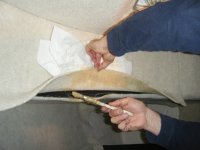
Well we have all the foam in and will get the carpet in later in the week. Here's a few photos of the process for the peanut gallery.

spring_2009_120.sized.jpg


spring_2009_125.jpg


spring_2009_124.jpg


berth_foam_02.sized.jpg


The can is for rolling out the air bubble's. We had a fan sucking the fumes out the front hatch.
 
Hi Tom,
Nice project and photos. I have a sort-of related question(s) raised by one photo. What size is the access hatch to the area below the berth? Did you put that hatch in? Did you pull foam out so as to have access to the entire under berth area or did you use a hatch liner to make a smaller storage area below the hatch? I am awaiting warmer weather to start my bow storage project.

Thanks,

Mark
 
Warren, Yes Yes and yes. I love questions :wink:

Dont worry taxes are already done. :shock:


Mark, I have three hatches in the front. One in the middle and one to each side. They where put in by the factory when they were fixing leaks and stress cracks. All the foam under the berth was removed and the insides coated with a heavy coating of some sort, the same thing that is used on the floor of the galley.
 
We looked at the vapor barrier at home depot and its very thin and the little bottle pop when you press down on them. its not close cell foam but mini bubble wrap between two plastic sheets. It might work but susan said NO.
 
Looking real good!

We tried the bubble wrap, and it detiorrated under salt water conditions. We still use some of the windshield (car) material for windows to cut heat loss or gain (when air conditioning), but as a permant "fix" what Tom is doing is the right way to go.

There also used to be a PVC foam, with a finished surface, about 1/8 to 3/16 " thick, I think something like Someville?"--I cannot find it anymore. It was French made and imported to Canada--that was a good solution, which glued directly onto the fiberglass, and then was a finished surface.

Cannot wait to see the finished product.
 
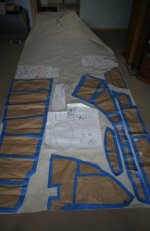
Well last night Susan and I cut out the carpet from the patterns. We left about a 1/2inch around the patterns for extra and ended up trimming a bit. Its better to have to much then not enough
2009_999_2.sized.jpg

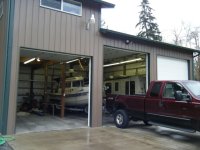
Dave was nice enough to lend us his shop for the day. The weather bozo's had me convinced it was going to ran. I can't install the carpet with out having the front hatch open and a fan in it. Big thank you to Dave and family.
carpet_berth_014.jpg

After a little trial and error I figured that the easiest way to apply the glue was to use a brush and apply it on to the foam that I already installed. Then you can lay the carpet right on it and slide it around until its in the right spot. If you tried to apply the glue to the carpet it just took up to much glue and soaked thru. Better to just coat the foam.

We started on the ceiling first and worked our way down from there. We left a little over lap and then cut the edges off with a carpet knife.

carpet_berth_016.jpg

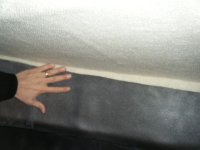
Now I was really surprised at how much the Polyester dulled my razor. I had to change the blade a lot. So if you are going to do this buy a stack of blades. Where ever the different pieces meet meet you can push the edges into the crack between the foam pieces

carpet_berth_018.jpg

Now a great tip for the edge around the hatch and the end of the glass around the door is to leave a little space between the foam and the edge. This way you have a space to push the carpet edge into and it will look great.

carpet_berth_017.jpg

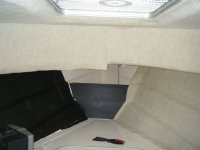
Above you can see one edge that has been pushed into the frame edge and the front piece I have not cut yet. A three to four inch paint scrapper is great for doing this.I wish I had done a little more planning for the edge's and how to terminate the carpet at the bulk head.

Now the vertical walls of the over head have to meet the horizontal ceiling of the front deck. you could cut them where they meet and push the edges in to the crack made by the two foam edge's meeting, as we did in other area, but we decided to over lap the vertical piece over the other piece. We left the bottom edge long so we could do this. In this case you have to apply glue to the bottom side of the over lap and then roll it over the other piece.

carpet_berth_019.jpg

So total time spent on this was 10 hours over three days. Total cost was three small cans of contact cement and three cheap brushes=$20. Six rolls of foam= $100. 18ft of carpet 72" wide= $80. So around $200 buck. Not waking up at night screaming after rolling over and planting you bear ass on a cold hull=priceless.[/url]
 
OK, I was going to say something about your BEAR ass, but instead let me say: :thup :thup looks great! That's going to be a nice upgrade for comfort!

Best wishes,
Jim
 
Back
Top