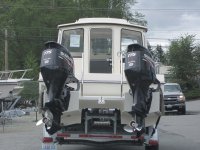
Sea trial new Tomcat, Mt Vernon WA

Beflyguy

New member
Joined
Feb 22, 2010
Messages
147
Reaction score
0
C Dory Year
2009
C Dory Model
255 Tomcat
Vessel Name
Seven Please
It looks like my new Tomcat has its 175 Suzukis and the 16X21.5 props and is ready for a sea trial. The boat is at Master Marine in Mt. Vernon WA and I wonder if there are any local Tomcat or C-Dory owners that would be willing to come assist with looking the boat over for things that need addressing before I take possession. This Saturday is the likely date and I want to promise at least lunch and/or dinner for the help. TIA
 
I just looked over my pre-purchase checklist. I'm not sure what you have done already so I'll list a few things off the top of my head:

You basically want to test and inspect 'everything'. Sounds funny and obvious but many do not check such things as the wipers including the auto position (when switch off mid window should return to side), all lights, windlass up and down, fridge (turns on and gets cold), fresh water into sink/shower/hot water heater/head (look for leaks around all fittings), take a close look at and test the shower sump. Add a few gallons of water and make sure water flows everywhere. My shower sump had broken knobs leading into the box...the dealer replaced the box without cutting off the tip of the sealed knobs and just put the hoses right over them. I had to get down there with a small saw to cut off the end of the closed plastic knobs so water could flow through.

Connect shore power and make sure you get hot water after about 20 minutes or so. Make sure your onboard charger works. Take a multimeter with you and take readings on the batteries with engines off and shore power disconnected. Then, connect shore power and turn on the charger. You should read higher voltage on the bats. Disconnect shore power and fire up the engines - take readings on the bats again to make sure they are higher than your original readings (also check the voltmeters on your dash with engines running). They should be at about 14v or above.

Do you know what all the bat position switches mean on yours? On mine, starboard switch position 1 means starboard start bat, position 2 means house, and both means starboard start and house. On the port side switch position 1 means port start bat, position 2 means starboard start bat, and both means port and starboard start bats. Make sure you try starting your engines from EVERY bat selector switch position and taking voltage readings from the bats - but DO NOT switch the bat switches while the engines are running. (Longer story as to why but this minimizes the potential for damaging the diodes on your engines). On my vessel this test revealed a broken starboard bat selector switch.

Take a look under the edge of the roof where it mates to the walls of your cabin (i.e. the "hat"). C-Dory often did not seal this seam completely. It's not a big deal to talk a caulking gun and seal this seam but buying new the dealer should fix everything.

In terms of sealing....check to see the engine rigging holes are properly sealed. Mine were initially wide open holes without any sealant of sleeves. They put in sleeves for the primary controls and I later sealed around all the hoses with Boatlife Lifecaulk.

Make sure your bilge pumps work from the helm switches. You probably would not be able to easily test the float switch unless you got down there and took them out of the case. Again - test every single switch from the helm, look at every single gauge, etc.

Also on the portside aft locker in the cabin, remove the access hatch and make sure you can turn your raw water intake on/off. With it on test to make sure the washdown pump is working.

Make sure all windows slide open and closed.

Make sure all three macerators work (head and both fish boxes).

What else...stick your head into every access point with a flashlight to just take a look around...you can look over most of your fuel tanks for example, water tank, bow storage areas, anchor locker storage and drain holes (you will probably have to fix these at home btw).

Make a point to run her in reverse...not a crazy RPM but a decent RPM and steer back and forth a few times....look/listen for telltale Seastar helm pump problems (hissing sound or leaking hydraulic fluid). This would indicate a bad pump. Hissing or leaking fluid while in reverse is not necessarily 'just a bleed issue'.

I have the Suzuki 150's....make sure you get WOT RPM's in the correct range. For the 150's it's >5000. I suspect on your 175's it will be >5200 or something like that. My engines are on the lowest bolt hole (farthest in the water) and without trim my WOT is 5000. When I trim up I can get 5600 port and 5550 starboard and GPS speed of 41 knots with bottom paint. You will no doubt get a little more...with no bottom paint you will get a few knots more.

Test everything with your engines...trim all the way up and down (make sure the trim limiters are set correctly to get everything out of the water when full up). Make sure you get correct charge, cooling water stream, and make sure your cavitation plates are on top of the water when running on plane.

That's all I can think of off the top of my head....I'm sure others will chime in with more.

Good luck and enjoy!
 
captain matt,
your suggestions are right on, not just for c-dory but any purchase.
isn't it sad that the "buyer beware" needs to be applied to a new purchase, especially when the purchase price is well over 100k. doesn't speak well for the manufacturer.
best regards
pat
 
patrick and linda":1b9romyw said:
captain matt,
your suggestions are right on, not just for c-dory but any purchase.
isn't it sad that the "buyer beware" needs to be applied to a new purchase, especially when the purchase price is well over 100k. doesn't speak well for the manufacturer.
best regards
pat

It is discouraging...showroom boats that have never seen water require several hours of inspection with power, water, notepad, digital camera, and a multimeter.

I discovered this applies to $1M vessels as well...imagine?!?

I think the overall build of our C-Dory's is good though and with some effort from owners they can be tip top. Seal up the core penetrations, snug the hoses, test the systems, and stay on top of maintenance and she will be tough as nails :thup
 
Boats are amazingly complex, with numerous systems installed. Just like you need to inspect a house you are buying, you should inspect a boat. They are made by human beings, and things can get missed.

We have found that the Fluid built boats were overall well done with few issues. I'm sure you'll like the boat.
 
Thanks for the great list Matt. I will print out your list and check it all.
 
Even though I bought my Tom Cat from Master Marine and am somewhat underwhelmed by their lack of participation in this group and their lack of imagination in rigging (as opposed to EQ and others) I do need to say that when we took delivery of our Tom Cat in November of 2006 we had no issues post-delivery. Whether we had a particularly trouble-free boat manufactured or whether Master Marine did a particularly good job of pre-delivery checking, I cannot say. One factor may have been Jeff Messmer's (now with Ranger Tug) involvement in the sale.

I hope your experience with the Tom Cat is as good as ours! It has been a remarkably well-built boat for us, one that we plan to keep for several more years (we had been thinking of moving up to a trawler but have decided against it.)

Warren
 
Excellent list by Matt: I would also check the Wallas stove (or other)--in our case the fuel line was not tight, and thus no light. The shower faucet fittings under the galley sink/stove, leaked very soon after delivary. The shower drain was not hooked up at all (under the shower pan--interesting challange, thru the inspection port---and that may have been because the shower sump pump was not wired properly, and thus would not pump out water from the shower sump (which is located under the hatch, under the floor of the galley sink.

Also the fore deck hatch leaked--because the cutout for the hatch was too big. Put a hose on every hatch door and hit the windows from the side (you can force water through the windows, with a hose in a good installation.

Check to be sure that the wiring at the batteries is labled--or that at least the dealer tell you what each wire is, and take a labeler with you. For example the stove fuse will be back there--and this is critical in resetting the stove it it fails to light. Be sure that any 12 volt positive terminals are covered, to prevent arcing.

Check to be sure that the battery charager is hooked to all batteries (this has been a problem in some boats). You will need to take a digital volt meter with you for this. Make sure that the batteries are all "off" when charging from the charger. Have the battery switches explained and a diagram made. Pay attention to the drains for the anchor locker--for example in my boat, one of the outside drains was never drilled, and one of the inside drains (to the side foreward bulkhead locker) was never drilled. Thus, water could not really get out of the anchor lockers on either side.

Look under the fore deck to be sure that there is backing under the fore deck cleat. Check for leaking along the rub rail (take a hose along the rub rail and check inside. Also some of the boats have had a problem with bad anti siphon valves on the fuel tanks.

I would back down hard--this is when the Sea Star helm pumps fail. Check the steering, to be sure that it is not spongey or a wide deadband in the center (signs of air in the system). Check for parallelism of the two engines. Have the liquid tie bar and alignment explained.

The deck boxes will leak--so you have to live with that. Check for leaks around the all around steaming/anchor light on the cabin top. Not sure if Matt suggested that you check the refer on both 12 and 110 volts--but do.

Good luck--and you will really enjoy the boat!
 
I always remember Bob's story of removing a large amount of Bostic mastic from some plumbing joints and the time and effort it took to remove it that I would check the joints. Probably a non-issue today but it got my attention of how a simple project can takes hours to complete b/c of how it rolled out of the factory
 
thataway":2dt209qq said:
Also the fore deck hatch leaked--because the cutout for the hatch was too big. Put a hose on every hatch door and hit the windows from the side (you can force water through the windows, with a hose in a good installation.

Thanks Bob. Did you mean to say you can force water through the windows?
 
C'mon befly, glass is not permeable. He means if the gaskets leak. Check it out.

Charlie
 
The side windows will leak if hit with the full pressure of a hose. There are basically channels with a "fur" type of substance in the channel, and between the two panes of glass in the side. If you hit the full force of the hose thru the top, botttom, or back of the panes, some water will force thru. There may be a little spay which gets in the channels in very heavy weather, but no serious water intrusion. A hose can give a false test.
 
Accomplished the sea trial and went through the very helpful checklist. The performance was stunning. The boat was lightly loaded with little water and maybe 1/4 fuel. We had four people including Ben and Jerry from Master Marine. They were very helpful and seemed happy to have a checklist and a good list of corrections needed.

There was a little difficulty starting one motor, had to pump one bulb some.

There was also some adjustments needed to the Glendinning electronic control to try and sync the controls.

When the motors were trimmed pretty well down, the boat jumped up on a plane very quickly without the bow coming up very much. When I had them trimmed up a bit (not sure of the number) they lost some bite at mid rpms.

I tried to look at the cavitation plate at max speed but all I could see was white foam. Jerry had me look on the outside of the motors and that was better but still very confused water.

The motors are on the lowest bolt holes available on the Armstrong bracket as far as I can see.

Performance

29mph 3850rpm 5.83&6.18gph
31mph 4000rpm 5.89&6.39gph
49mph 6100-6200rpm no fuel #s

Jerry said when he had the boat out with just him, the motors ran over the max rpm limit into the built in limiters.

List of corrections

Replace 1 interior light bulb
Repair pump for shower sump
Repair leak at bottom of cockpit door
Repair leak at bow hatch
Exchange props to 16X23"
Repair syncronize function of electronic controls
Make center gauge read all three batteries
Install a positive catch on drawer under helm seat
Make common trim control adjust engines more evenly

One question I have is how dry the bilge should be. There was just a little water in the area of the rear bilge pumps but otherwise there was dampness evident pretty much everywhere in the bilge and around the transom and what looks like mold on hoses etc. Since this is a new boat, although having been built at least a year ago, should I insist on a completely dry bilge?

Also, Bob suggested checking the backing on the bow cleat. There were four stainless fender washers. Is that good enough?

I put some photos in my album.
 
Can you explain the leaking cockpit door a bit more? I'm trying to figure out how it would even be possible for the door to leak...I'm wondering if you spotted water pooled inside the cockpit (just through the doorway)?

The motors should start fast and easy. Was the bulb soft? Did you start it up again after running it for a while? I'm curious if it fired right up easy after it was run for a bit. What did they do to get it started?

In terms of the props loosing some bite...were they trimmed up pretty high? Meaning, were the engine cowls angled down toward the transom? Were you going in a straight line or in a turn? In a turn, the inside prop will loose a little bite and rev a bit higher than the outside engine.

My WOT speed with 150's is 40.5 knots on the GPS (the other day I hit 41.5 knots but I had a little current helping me). I also have bottom paint which shaves a little bit off top speed. My engines are on the lowest bolt hole. If I leave them all the way down my max RPM is 5000. When I trim them up I can get farther into the range (the other day for example I got 5600 port/5550 starboard). I have been able to get higher RPM's but did not prioritize max possible RPM's during my run the other day. I could probably have my engines lifted a hole or two to get closer to the max RPM range without as much trimming. I have wondered how much more speed you should/could get with the 175's vs. the 150's. Yours obviously does not have bottom paint which will give you a little more top end speed. Conditions and weight will dictate max speeds of course. You can trim the engines a bit higher on flat calm water but need to get them under a bit more in chop obviously. I have the 16 X 21.5 props. It will be interesting to hear about your sea trial with the 16 X 23 props.

In terms of the shower sump...I'm not sure if you can actually remove just the pump...they will probably have to replace the complete shower sump box. If they do, make sure they cut off the ends of the shower sump 'knobs' or hose port ends (they are delivered with closed hose port ends).

The mold will happen inside the sponsons/transom. I would look around inside to see if there is a water intrusion spot. Verify the rigging holes are sealed (throttle and fuel cable holes). Mine were delivered without any sealant I filled them with Boatlife Lifecaulk (filled around the cables). My rub rail rivets went all the way through the transom in several spots and allowed some water in..before that discovery I could never figure out why I always had water in the starboard sponson. This past winter I found the tell tale mold waterfall in front of the some of the rivets.

All in all it sounds like a good sea trial. I would be curious to hear more about the rev limit issue (prop issue, shaft length correct, trimmed too high) and how you determined you had a leaking door to the cockpit. I'm not familiar with your particular engine controls...mine were adjusted but still not perfect. Also, do you have a voltage meter at the helm? There should be one for each engine (not each battery).
 
To the specific question__I would probably increase the backing with an aluminum plate, and slightly longer bolts if necessary. The concern I have is that most likely this cleat bolts were just drilled thru the balsa cored deck--and no epoxy was used to line the hole, or undercut, of the deck, and thickened epoxy put there, to take the compression of the bolts. (some boats are built with plywood in the way of where cleats go--C Dory does not seem t have done this. The cleat can pull up against the fender washers and crush the core--it would take a signfificant load to do this, but if you have the time, in the long run, fixing the way that the bolts go thru the deck and a backing plate will serve you well in the long run.

I wonder what RPM the dealer got with the boat with only one person? My understanding is that the rated WOT is 6200 RPM and the Rev Limiter starts to tap in at 6350. I sure hope that the engine was well broken in before he reved her up to over 6300.

I suspect that your hard start/push the bulb could be one of two items---one could have been the boat had been run out of gas (It happend to me on my sea trial)--or the other the anti siphon valve. Since you got up to 6200 RpM--I suspect the former.

Now as to the prop--I wonder if you really want to go to the 23" pitch? I would want to know what you fuel consumption is at 15, 18, 22, 25 mph--these are speeds where you will be running the boat most of the time. I suspect that you will probably never again run the boat this light. I wouold personally stay with the 21.5" pitch. It is well proven and gives good economy.

As a calculate it you are getting 2.4 miles a gallon at 29 and 2.52 at 31 mph, which is excellent, and slightly better than most of us are getting (but we have much more weight aboard)
The closeness of the speeds and fuel flow--are not the best way to do a fuel curve--start with 4 mp, then 8 10 12 15 18 20 22 etc--and that will give you a better idea of where you will have the best economy. (I realize that this is just a sea trial)...What fuel flow system do you have? Another question is why the difference in the flow rates? almost half a gallon an hour in the one at 31. If it is a turbine transducer system, it might be calibration--if from the computer in the engine, they it should be accurate--and might reflect the counter rotation gear in the lower unit.

As for the cavitation plate--many of us have put on the Permatrim--it allows the bow to be pushed down and a better ride in heavier chop at lower speeds. Also a slightly better stern lift. My plate runs right on the top of the water.

Some moisture aft is normal. You can clean that up. As for moisture in the bilge elsewhere--I don't have any. BUT my boat sits on a lift, with the stern down by about 5 degrees, so if any water gets in, it all goes aft. I do get a little bilge water--not sure where it comes from--but I might have the bilge pump come on every few months or so--I have to suspect around the aft seat etc--but I do have a full camper canvas. The only other place might be around the engine tubings, or rub rail--and don't see any sign of that.

How are the rotation of the engines mounted? Most of the Cats are rt hand rotation on the port side and left hand rotation rt side. This gives more stern lift. It is also opposite of most boats. I find that this way of rigging gives better performance.

You should loose bite with the props only if you are getting near the trailering position (I assume that you have guages--if not you need them). I start with the engines, just below half down, then slowly bring them up until the RPM speeds up--and speed goes up. You will get the hang of it.

The boat does jump up on a plane--mine is still about 5 to 6 seconds from idle to 25. I am heavily loaded.

Congratulations--and good luck on getting all of these issues fixed. When they pull the foreward hatch frame, have the balsa core sealed with epoxy. I actually built a fiber glass rim around the cutout with epoxy, after undercutting it, and filling with epoxy and cabosil.
 
matt_unique":2ttri8kz said:
Can you explain the leaking cockpit door a bit more? I'm trying to figure out how it would even be possible for the door to leak...I'm wondering if you spotted water pooled inside the cockpit (just through the doorway)?

I had Jerry spray water around the boat and it came in at the bottom of the door. The boat was on the trailer and so a little by the head. There was a small plastic shim at the bottom of the door opening that we thought made the door shut not so smoothly and I suggested that it could be trimmed up a bit allowing the door to shut more firmly.

matt_unique":2ttri8kz said:
The motors should start fast and easy. Was the bulb soft? Did you start it up again after running it for a while? I'm curious if it fired right up easy after it was run for a bit. What did they do to get it started?

The bulb was checked and found to be flat. It was massaged and the motor then started. This just took a couple of minutes.

matt_unique":2ttri8kz said:
In terms of the props loosing some bite...were they trimmed up pretty high? Meaning, were the engine cowls angled down toward the transom? Were you going in a straight line or in a turn? In a turn, the inside prop will loose a little bite and rev a bit higher than the outside engine.

When the motors lost bite, they were trimmed up quite a bit after a high speed run.

matt_unique":2ttri8kz said:
My WOT speed with 150's is 40.5 knots on the GPS (the other day I hit 41.5 knots but I had a little current helping me). I also have bottom paint which shaves a little bit off top speed. My engines are on the lowest bolt hole. If I leave them all the way down my max RPM is 5000. When I trim them up I can get farther into the range (the other day for example I got 5600 port/5550 starboard). I have been able to get higher RPM's but did not prioritize max possible RPM's during my run the other day. I could probably have my engines lifted a hole or two to get closer to the max RPM range without as much trimming. I have wondered how much more speed you should/could get with the 175's vs. the 150's. Yours obviously does not have bottom paint which will give you a little more top end speed. Conditions and weight will dictate max speeds of course. You can trim the engines a bit higher on flat calm water but need to get them under a bit more in chop obviously. I have the 16 X 21.5 props. It will be interesting to hear about your sea trial with the 16 X 23 props.

The 49mph was in a lake from a gps few seconds average. Trimming up after a few degrees did not seem to change the top speed.

matt_unique":2ttri8kz said:
In terms of the shower sump...I'm not sure if you can actually remove just the pump...they will probably have to replace the complete shower sump box. If they do, make sure they cut off the ends of the shower sump 'knobs' or hose port ends (they are delivered with closed hose port ends).

I will retest everything that failed the first test.

matt_unique":2ttri8kz said:
The mold will happen inside the sponsons/transom. I would look around inside to see if there is a water intrusion spot. Verify the rigging holes are sealed (throttle and fuel cable holes). Mine were delivered without any sealant I filled them with Boatlife Lifecaulk (filled around the cables). My rub rail rivets went all the way through the transom in several spots and allowed some water in..before that discovery I could never figure out why I always had water in the starboard sponson. This past winter I found the tell tale mold waterfall in front of the some of the rivets.

So should I have them dry out the bilge completely and then do the hose around the boat test?

matt_unique":2ttri8kz said:
All in all it sounds like a good sea trial. I would be curious to hear more about the rev limit issue (prop issue, shaft length correct, trimmed too high) and how you determined you had a leaking door to the cockpit. I'm not familiar with your particular engine controls...mine were adjusted but still not perfect. Also, do you have a voltage meter at the helm? There should be one for each engine (not each battery).

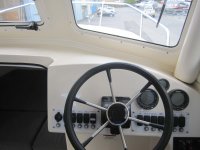
The electronic controls had voltage available for each starting battery at each larger multifunction gauge. The single small gauge in the center would toggle through the various functions but would display the voltage of one battery three times on successive key punches instead of each battery in turn.

IMG_1901.jpg

Thanks,

Brian
 
thataway":2lkp0050 said:
To the specific question__I would probably increase the backing with an aluminum plate, and slightly longer bolts if necessary. The concern I have is that most likely this cleat bolts were just drilled thru the balsa cored deck--and no epoxy was used to line the hole, or undercut, of the deck, and thickened epoxy put there, to take the compression of the bolts. (some boats are built with plywood in the way of where cleats go--C Dory does not seem t have done this. The cleat can pull up against the fender washers and crush the core--it would take a signfificant load to do this, but if you have the time, in the long run, fixing the way that the bolts go thru the deck and a backing plate will serve you well in the long run.

Hi Bob,

This sounds like a very good idea, but maybe something I will have to do myself. I guess you never know when you might have to put a significant load on the cleat.

thataway":2lkp0050 said:
I wonder what RPM the dealer got with the boat with only one person? My understanding is that the rated WOT is 6200 RPM and the Rev Limiter starts to tap in at 6350. I sure hope that the engine was well broken in before he reved her up to over 6300.

The manual says that the over-rev system activates if the rpm exceeds maximum (6100) for more than 10 seconds. The break-in allows full throttle operation after 3 hours running time for 5 minutes or less.

thataway":2lkp0050 said:
I suspect that your hard start/push the bulb could be one of two items---one could have been the boat had been run out of gas (It happend to me on my sea trial)--or the other the anti siphon valve. Since you got up to 6200 RpM--I suspect the former.

It may have run out of gas prior to the sea trial.

thataway":2lkp0050 said:
Now as to the prop--I wonder if you really want to go to the 23" pitch? I would want to know what you fuel consumption is at 15, 18, 22, 25 mph--these are speeds where you will be running the boat most of the time. I suspect that you will probably never again run the boat this light. I wouold personally stay with the 21.5" pitch. It is well proven and gives good economy.

I think I'll just try them out for a good test and see how they do.

thataway":2lkp0050 said:
As a calculate it you are getting 2.4 miles a gallon at 29 and 2.52 at 31 mph, which is excellent, and slightly better than most of us are getting (but we have much more weight aboard)
The closeness of the speeds and fuel flow--are not the best way to do a fuel curve--start with 4 mp, then 8 10 12 15 18 20 22 etc--and that will give you a better idea of where you will have the best economy. (I realize that this is just a sea trial)...What fuel flow system do you have? Another question is why the difference in the flow rates? almost half a gallon an hour in the one at 31. If it is a turbine transducer system, it might be calibration--if from the computer in the engine, they it should be accurate--and might reflect the counter rotation gear in the lower unit.

Yes, I will test the boat out more thoroughly at different speeds at the next opportunity. The flow rate differences I believe were due to the throttles not syncing correctly (the rpms were not matched at the time). The flow gauges use Suzuki's SMIS system which I believe uses load to calculate fuel use.

thataway":2lkp0050 said:
As for the cavitation plate--many of us have put on the Permatrim--it allows the bow to be pushed down and a better ride in heavier chop at lower speeds. Also a slightly better stern lift. My plate runs right on the top of the water.

The Permatrims sound good. I think I should have looked aft at some speeds below WOT.

thataway":2lkp0050 said:
Some moisture aft is normal. You can clean that up. As for moisture in the bilge elsewhere--I don't have any. BUT my boat sits on a lift, with the stern down by about 5 degrees, so if any water gets in, it all goes aft. I do get a little bilge water--not sure where it comes from--but I might have the bilge pump come on every few months or so--I have to suspect around the aft seat etc--but I do have a full camper canvas. The only other place might be around the engine tubings, or rub rail--and don't see any sign of that.

I looked down all the hatches and it seemed most wet below and behind the transom hatches. I'm sure rain is the culprit since the boat has not been in the water much but has been subject to our Northwest weather.

thataway":2lkp0050 said:
How are the rotation of the engines mounted? Most of the Cats are rt hand rotation on the port side and left hand rotation rt side. This gives more stern lift. It is also opposite of most boats. I find that this way of rigging gives better performance.

It looks like the motors are installed that way.
IMG_1839.jpg


thataway":2lkp0050 said:
You should loose bite with the props only if you are getting near the trailering position (I assume that you have guages--if not you need them). I start with the engines, just below half down, then slowly bring them up until the RPM speeds up--and speed goes up. You will get the hang of it.

It does have gauges but the lake was short and the throttles not syncing made it tricky to get everything done safely.

thataway":2lkp0050 said:
The boat does jump up on a plane--mine is still about 5 to 6 seconds from idle to 25. I am heavily loaded.

That sounds excellent.

thataway":2lkp0050 said:
Congratulations--and good luck on getting all of these issues fixed. When they pull the foreward hatch frame, have the balsa core sealed with epoxy. I actually built a fiber glass rim around the cutout with epoxy, after undercutting it, and filling with epoxy and cabosil.

I will request that.

Thanks again.
 
OK...sounds good Brian.

My cockpit door needs a good pull to latch fully shut. I have the shim on the bottom as well. I'm sure you can get that resolved.

In terms of the backing on the bow cleat, I probably have just the fender washers as well (will double check next time out) but I find I only use that cleat to tie to a dock. The cleat location behind the windlass makes it pretty much unusable except for when you are at the dock. I installed two cleats on the bow (see my album) and used rectangular steel plates for backing and filled the (foam) coring with thickened epoxy. I use these cleats when anchoring and when on my mooring.

I don't think I've ever had a bone dry bilge. I will get some water in there from rain. We'll see if that changes this year after I removed portions of my rub rail and sealed some of the rivet tubes with 4200. I had three or 4 that showed water leaking in. If I still find evidence of water running down from these tubes I will probably run a thin seal of Lifecaulk or something around the top of my rub rail where it meets the hull. It looks like your model year has drain plugs...open those up and drain it completely before you do your next water test to see if you can find the source.

Good luck - it sounds all OK to me based on the fixes you have already identified.

I will be interested to see how you make out with the 16 X 23 props. I believe you will be the first to run them.

I had my first long(ish) cruise of the season yesterday covering about 40nm. Returning to Boston I had some decent slop and chop and Napoleon ate it up. With just 1750 nautical miles cruised thus far the hull impressed me again....
 
The Suzuki SMIS gauges read actual fuel used by the engine from the engine computer. I'm not sure you can get different voltage readings on the SMIS gauges other than alternator output per engine, but I'd have to check a manual to be sure. The gauges get their power from a common 12V source, and tehre are no individual leads to the various batteries.
 
Matt Gurnsey":1ddc5g9y said:
The Suzuki SMIS gauges read actual fuel used by the engine from the engine computer. I'm not sure you can get different voltage readings on the SMIS gauges other than alternator output per engine, but I'd have to check a manual to be sure. The gauges get their power from a common 12V source, and tehre are no individual leads to the various batteries.

Hi Matt,

The larger port gauge indicated that it was reading the port battery and the starboard gauge the starboard battery. The small gauge in the center we first thought we weren't pressing the button fully because as we cycled through the readouts, it didn't seem to want to get out of the battery reading mode. Then I realized it took exactly three button presses to cycle out of that reading and so I believe it was trying to present all three batteries. I'm not actually sure which battery it was reading since I didn't have a chance to check. I also don't know where the voltage is read. I assume the motors would know their start battery/alternator voltage, maybe the SMIS system itself would read house battery voltage from the system power? I have some manuals and installation guides but have not looked completely through them yet. Jerry seemed to think it was just a programming issue.

Best Regards
 
Back
Top