Ray
New member
- Joined
- Dec 13, 2011
- Messages
- 271
- Reaction score
- 0
- C Dory Year
- 2007
- C Dory Model
- 25 Cruiser
- Vessel Name
- Seaweed
So I called and couldn't get anyone to return calls, looked around all over online and nothing looked right or exactly what I wanted for an arch. I preferred aluminum over stainless, so that limited things quite a bit.
So I drew up my own drawing:
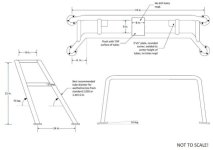
I sent it to a local guy who does aluminum T-Tops and he took care of me.
No amount of measuring and PDF's via email would have been accurate, so I had to make up some black Starboard "wedges" (round) to offset the irregularities of the C-Dory roof and the welder. The nice thing about a round wedge is that you can just spin it until it takes up the space at the right angle.
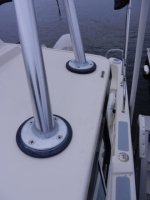
I drilled holes for all my "stuff", present, and planned, then added grommets and pull-strings for each hole. The yellow in the middle is the string.
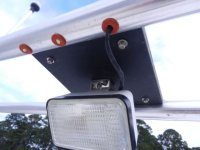
I brought the wires down in the starboard aft corner, and into the head. The cabintop hole edges were sealed with epoxy. I used some fairly rigid, mesh harness stuff that was split down the side. [http://www.cabletiesandmore.com/WrapAroundSleeving.php] It was expensive, but it looks great, and I only needed a few feet. It is large enough in diameter for any anticipated future stuff.
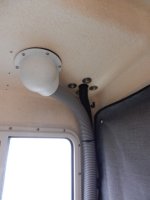
I ran the wires down to 18-24" off the floor and then into the space behind the head wall with a plastic grommet. A fish-tape was then used to pull the wires to the space under the galley. (that wiring documentation is upcoming)
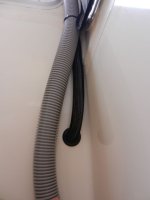
So here is an overall photo with the anchor light and VHF antenna (down). Radar will have to wait for the till to recover from this year's projects!
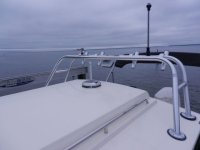
Here is a photo with the cockpit light and ebay rod holders.
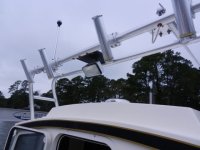
Side view:
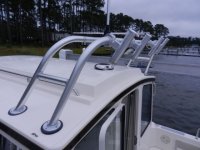
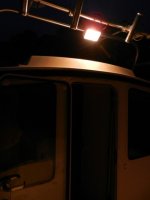
Cockpit light on:
And finally a tip - I needed a way to hold the wiring (and Airhead vent hose) into the corner of the head area. As usual, I didn't want to make any more holes anywhere.
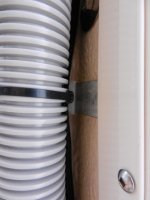
I made some short pieces of aluminum "tabs" with a tie-wrap anchor on one end. I bent them a bit at that end to angle everything into the corner. Then I just pinched the tabs into the window frame by loosening and re-tightening the screws!
Here's a close-up of one of them:
All photos and some of the text are in my album.
Ray
So I drew up my own drawing:

I sent it to a local guy who does aluminum T-Tops and he took care of me.
No amount of measuring and PDF's via email would have been accurate, so I had to make up some black Starboard "wedges" (round) to offset the irregularities of the C-Dory roof and the welder. The nice thing about a round wedge is that you can just spin it until it takes up the space at the right angle.

I drilled holes for all my "stuff", present, and planned, then added grommets and pull-strings for each hole. The yellow in the middle is the string.

I brought the wires down in the starboard aft corner, and into the head. The cabintop hole edges were sealed with epoxy. I used some fairly rigid, mesh harness stuff that was split down the side. [http://www.cabletiesandmore.com/WrapAroundSleeving.php] It was expensive, but it looks great, and I only needed a few feet. It is large enough in diameter for any anticipated future stuff.

I ran the wires down to 18-24" off the floor and then into the space behind the head wall with a plastic grommet. A fish-tape was then used to pull the wires to the space under the galley. (that wiring documentation is upcoming)

So here is an overall photo with the anchor light and VHF antenna (down). Radar will have to wait for the till to recover from this year's projects!

Here is a photo with the cockpit light and ebay rod holders.

Side view:

Cockpit light on:

And finally a tip - I needed a way to hold the wiring (and Airhead vent hose) into the corner of the head area. As usual, I didn't want to make any more holes anywhere.
I made some short pieces of aluminum "tabs" with a tie-wrap anchor on one end. I bent them a bit at that end to angle everything into the corner. Then I just pinched the tabs into the window frame by loosening and re-tightening the screws!
Here's a close-up of one of them:

All photos and some of the text are in my album.
Ray
