A new "Thataway"

thataway":2evjn9sk said:
ssobol":2evjn9sk said:
I know that Toyota stuff lasts a long time, but boy!

The 1794 is the luxury upgrade, like Ford King Ranch. 1794, refers to the year that the ranch land purchased by Toyota for their Texas plant, was established by Spanish colonist Juan Ignacio de Casanova.

Bob, I think you should change your name to "Encyclopedia". What a wealth of knowledge. May you enjoy many fun filled years in your 25.
 
Jake":12ehiziz said:
Bob, I think you should change your name to "Encyclopedia". What a wealth of knowledge. May you enjoy many fun filled years in your 25.

He is the Sheldon (for anyone that has watched Big Bang Theory) of C-Brats!

Dr Bob's mind is amazing!
 
Thanks for the kind words, but the last few days has been brute force cleaning. First the C Dory 25, including Marie doing all of the upholstery. That was done, when I put the 22 up for sale. Almost immediately I had 2 offers, and so I started "deep cleaning" on the 22. Everything out of the boat, that would come out easily. Scrub down all of the walls under cabinets and overheads....Conclusion; the C Dory 25 has almost 2x the surface area inside.. I just finished the last "hose out and mop dry. Clean boat for new owner! We are putting down underlay pads underneath the bunk cushions on the 25 as we did on the 22. We used cheap closed cell foam back packing pads from Wal Mart.

I tried a different technique for "Grooving" the 3/4" thick starboard I am mounting the two fish finder transducers on. I used a "Fein Saw" 1" wide wood cutting blade (the Fein saw oscillates and will cut flush. I put a grove out 45* 3 horizontal cuts almost all of the way across the 10" piece, and 4 vertical cuts. The area between the 45* outward cuts was cut away. This gave me about a 1/2 Keyway, for the G Flex epoxy to fill on the back of the Starboard piece. I made sure that all of the "keyways" were filled with epoxy before I put the Starboard against the pre-coated hull. I put two screws in the plugs which were installed for the current transducer, which held the piece in place until the epoxy went off. The heads of these screws were counter sunk, so they were flush with the surface.
 
thataway":1apysm6w said:
We are putting down underlay pads underneath the bunk cushions on the 25 as we did on the 22. We used cheap closed cell foam back packing pads from Wal Mart.

And the reason we are doing this?
 
I have found that using either insulation pads or a material like "hypervvent" keeps any mold from growing under the V berth cushions. Also seems to decrease the condensation. We take the foam pads up the side walls of the hull. We will have them at least below the shelf in the 25--and probably all of the way to the ceiling. We did that with the 22 and our first 25. It seemed to help in AK--at least if there is condensation on the sides of the hull, it does not run onto the sleeping system.
I also put "Dri Dek" on the bottom of all lockers to keep any items off the hull. Again, these areas are totally clean, except for what falls down under the Dri Dek.

I am trying a cheaper brand in the 25--we will see how it works out. West Marine is $6.29 plus tax, for each 12 x 12 square. The other is less than $3 each. My guess is that the "other" will be much harder plastic--but the reviews say they can but cut with scissors, so cannot be too hard? I'll review them when they arrive, tomorrow...
 
thataway":3ka7s0mq said:
I have found that using either insulation pads or a material like "hypervvent" keeps any mold from growing under the V berth cushions. Also seems to decrease the condensation. We take the foam pads up the side walls of the hull. We will have them at least below the shelf in the 25--and probably all of the way to the ceiling. We did that with the 22 and our first 25. It seemed to help in AK--at least if there is condensation on the sides of the hull, it does not run onto the sleeping system.
I also put "Dri Dek" on the bottom of all lockers to keep any items off the hull. Again, these areas are totally clean, except for what falls down under the Dri Dek.

I am trying a cheaper brand in the 25--we will see how it works out. West Marine is $6.29 plus tax, for each 12 x 12 square. The other is less than $3 each. My guess is that the "other" will be much harder plastic--but the reviews say they can but cut with scissors, so cannot be too hard? I'll review them when they arrive, tomorrow...

I'm going to try the insulation pads. The only time I've really had a problem with condensation was in SW Florida in December and I was shocked how much condensation there was. Soaked the sheets that were touching the hull.
 
My v-berth is now all 'RV type' carpet, top, bottom, and sides, huge improvement. I then made a lattice out of cedar strips to go underneath the mattress for more air flow. No more condensation.

Martin.
 
IMG_0399.sized.jpg
Finally got the graphics and electronics finished up. (photos of interior will follow as it is finished)--but we added a RayMarine Quantom (CHIRP) Radar, a second MFD (7", the boat came with a 9")--enough room side by side in front of the helm. A Standard Horizon 2200, with Hailer, fog signal, and AIS receiver, with a Marcom 6dB gain antenna finished out the VHF line.

We have installed the vinyl loop spaghetti floor mat below: 4' x 13' gave us just enough mat to do the main isle, entrance step, mats under each seating area and the head. Deckadence is ordered for the cockpit, but the distributer is out of the color we wanted, so that is not yet done. We are putting a few finishing touches on the storage, such as Dri Deck in each compartment, LED lighting inside cabinets, etc. I bought a red LED fixture at Worst Marine for $6 on sale last weekend. I found the exactly same fixture on Amazon for $3.40 each---"Garden lights"--not "marine lights"...!!

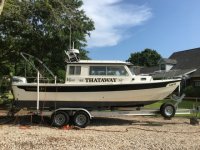
When ordering the graphics, I neglected to ask the vendor how "long" the "THATAWAY" was in the font I selected....it is huge--but we got it in place.

Getting hot during the days--with temps inside the boat at noon reaching over 100*--time to turn on the air conditioning--or launch and go boating! We are doing the work early in the mornings and late in the afternoons.
 
OH WOW, I love the Graphic. You did great! It is readable from more than 50 feet away, like a boat name should be. (I hate to see names so small, an fonts so unreadable you have to be on top of them to read the name.) Always kind of figured, whats the purpose. :lol:

Nice to be getting caught back up on the site. Won't last long, Race to Alaska starts next week so will be on the water for that. AND there is a new race, the Seventy48 which is a person powered race (no sails) that runs for 2 days just prior to the R2AK start. Will be doing safety boat for that one too.

Enjoy your new 25 and all that you can do in/with it.

Harvey
SleepyC :moon

JC_Lately_SleepyC_Flat_Blue_070.thumb.jpg
 
Another big job done: I pulled all of the cockpit access plates (two, 6" on floor, two 6" on the "step" and two 4" above the step. All had evidence of water leaking under the plate, and above the caulking. Also several missing "O" rings. I will replace with new plates, and use silicone grease on the "O" rings. There was less core rot and water intrusion that I had imagined. The aft (over bilge pumps, had a small area which went back to the end in the center aft, the starboard step, had a small area which went to the bottom end of the step, and a little on the sides. Over drilled all of screw holes, and connected to routed out area. All routed out at least 3/8", coated dry balsa core with 2 coats of "neat" epoxy, and then filled to the edge with thickened epoxy. Total time about 4 hours. Helped that I have a powerful flexible shaft which has both 1/4" and 1/8" collets, and can use Dremel tool or router bits in the flexible shaft. Smoother up the balsa with a sanding "flapper" wheel, to avoid any rough balsa edges.

Getting down to very few projects--and looking forward to using the boat and having a few nights aboard before the Mississippi River/ Cumberland/ Mississippi River trips!
 
Back
Top