Water Under Aft Cockpit in 07 Venture

Congratulations, Casey. I hope this really is the end of your search. I put coloring in my water tank, and couldn't detect any of the colored water under the floor. Soooo . . .

But I haven't pulled the water tank and inspected it carefully, and my test may not have involved filling the tank to the brim. What is the nature of the leak. Like Dr. Bob, I'm curious if it's an actual crack, or a loosened fitting. Are pictures possible?

As you say, the inspection plates are probably a good idea, regardless of the source of the water. I'm still planning on installing 2 or 3.
 
Somehow I feel vindicated ... well, at least I found the damn leak!

Dr. Bob - can you steer me to a source for the plastic welding thingy (professional term, excuse me...) you described? Yes, my watertank appears to have had the fitting installed in the manner you describe. My first impression was that they'd use "hot glue" to seal it, but your technique was probably correct. When I chipped-up pieces of the sealant/weld around the flange of the fill fitting, it cracked almost as though it was brittle. (PS: Are you and Marie coming to Powell for the CBGT in September? I recently decided to head to AK for July&August, but hope to be back for the CBGT.)

I'm conducting my own little "experiment" while writing this. I've used Gorilla Glue for a variety of projects and found it to be nasty, but excellent stuff. I cut a stamp-sized piece of the same plastic, and am giving it a 'go. I'll recheck it in the morning to see if/how the Gorilla Glue works. With my luck it'll probably work very well -- and will expand and glue the watertank to my workbench. Stand by for another report in the AM.

Bill/NoroLim - yea, I still think the inspection ports are a very good idea. I installed two (one inside the cabin door, and another between the fuel tanks). Were I to do it again I'd probably just do the one inside the cabin door, but in a way it's comforting to know there's not water farther aft.

As for pictures, I took one, but frankly you can't see where the water was leaking - so I'll try to describe it. The fill fitting has a 3/8"? flange around the base, glued/welded to the tank. I found that this flange was leaking ...gushing, but ONLY when the tank was filled to the max, then it Gushed-out almost around the entire diameter of the flange. BUT IT WAS ONLY OBVIOUS WHEN THE TANK WAS FILLED TO THE MAX LEVEL. Neither of the other two fittings (overflow hose and hose to the waterpump appear to be leaking).

Knowing this, a field-expedient-remedy would be to NOT fill the tank to the Max level. Duh....

Stay tune for the results of the Great Gorilla Glue Experiment!

Best,
Casey
 
Well, the jury is in....

The bad news is Gorilla glue doesn't adhere very well to the high density polyethylene in our water tanks.

But the good news is I didn't glue the water tank to my work bench!

...back to the drawing board.

Best,
Casey
 
What is "resin sealer"?

I drilled my first hole for an inspection plate between the fuel tanks in the cockpit sole. To my considerable surprise and delight, it appears to be bone dry under there. (But back to square one on the source of the water in the cabin.) The cut went perfectly, and I'm planning to install the plate in the next couple of days.

I've got the West Systems 105, 205, and 404 materials at hand and am planning to undercut the opening, over drill the screw holes and fill with thickened epoxy, etc.

I'm trying to figure out one last piece before I begin the installation. The packaging for my Beckson deckplate says to coat any balsa or foam core material with "resin sealer" before filling the undercut and over-drilled holes with epoxy filler. What is "resin sealer" Is it just unthickened epoxy resin (105) mixed with hardener (205), but not with filler (404)? I assume that would mean that a thin application with a brush is called for?

Or is there a separate product known as "resin sealer"?

Thanks for any advice or information.
 
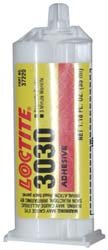
Casey- If you're still searching for a sealer for the tank and fittings, and don't want to use heat, here another product that may work:

0478350-11.jpg
Locktite HDPE Glue
Click on the image to visit their site, etc.

Another alternative would be to take the water tank to an RV repair shop and have it "welded" there.
They have low temperature torches for welding HDPE water and septic tanks.
I believe Harbor Freight also sells one, but I'd just let a pro fix mine if the glue didn't seem to work well enough.

Joe. :teeth :thup
 
Actually, I just finished the watertank repair and reinstallation yesterday. While talking to a friend in Cottonwood (AZ) who owns/runs a RV repair facility, he recommended some stuff called "ProFlexRV" (www.GeocelUSA.com/r ). He claimed that his repair tech's use this stuff on their "challenging jobs ... it'll stick to anything."

I tried it, and so far, so good. After drying overnight I filled the tank to the brim and NO LEAK! Yeah!

My repair was actually a combination of the ProFlexRV sealant in addition to a newly fabricated locking nut and gasket both inside and outside the tank. (Recall that I installed an access port on the tank a few weeks ago, thus I had access to the tank interior.)

The final repair has the filler neck entering the ragged tank hole with a gasket backed by a stiff 1 1/2" nylon washer with a similar arrangement inside, and the whole assembly has sealant between each layer and finally sealant added outside (a few hours later). It isn't pretty; but I think it'll work, and I Never plan to take it apart. (If there is a "next time," I'll just replace the tank.)

When reinstalling the tank I may have discovered how the filler neck came to leak in the first place. Putting the tank in place is not a problem, but when you bend/twist the filler hose (use a heatgun to make it more pliable) the hose seems to apply enough torque that it may have cracked the original plastic-welded-fitting. The angle of the hose coming down from the deck fitting isn't quite right and requires the large, stiff hose to make some unnatural bends (a right angle fitting would have worked better). I opted to just heat and bend the hose into position, and it seemed to work. But I suspect that's how the fitting flange cracked to begin with. Of course the expedient solution would be to simply not fill the tank to the level of the filler neck; use 12-15 gallons in the twenty gallon tank, and the water level won't even rise to the level of the filler neck; thus, no leaky. But that's not my way;I prefer to spend a week doing something a person of normal intelligence could address by not filling the tank as high. sigh....

...now let me tell you about the 44 tiny ball bearings in the dinette slider assembly that are released when you dismantle it. On second thought I'll save that story for another day.

Best,
Casey
 
Hi,
I just did three 6 1/2" inspection deck plates. One in the cockpit,one in the rear of cabin floor and one forward where the port potty normally resides. I found very little water in the rear cockpit area had to reach into center to feel it. The rear of the cabin there was about a gallon, up in the furthest forward one was another gallon. It seems like there was a depressed area almost like a miniture detention basin under the forward bunk area hole. I just used a generous amount of marine silicone seal on the underside of the deckplates and fastened them down with #8 stainless steel machine screws with washers and nylon locknuts. Then cleaned up the excess silicone. I did not seal the edge of the cuts with epoxy. I did epoxy the floor of my anchor locker up to the drain hole. Now I see what happens next. All water appeared to be fresh water. It will be nice to at least see what is going on down there now. Thanks Ross for the great suggestions.
D.D.
 
Hi Cassey,

Great work describing the water tank leak. We just had the cover off over the tank, and everything looked okay. But, I see we need to revisit the tank, fill it and see if we have the same leak. However, if it did leak, it would run down on top of the cabin sole in our boat which is a single molded piece surrounding the tank and progressing into the cabin proper and not drain under the cabin sole.

If a repair is necessary, I like the idea of an inspection port on the top of the tank to facilitate a repair.

We used an epoxy resin with hardener to prep the inspection undercut before using the epoxy putty. We've also used regular resin the same way on other undercuts. You have to wait a bit for the hardener to kick in, or it will drip out. Use just a little as it goes fast after it kicks in.

Thanks for the great report.

Tim & Dave Kinghorn
 
Your welcome DD
I don't know who has or has not an exhaust vent on the side of their boat for a stove. Those that do have, are you sure that you've ruled out water coming in the exhaust vent? I haven't done a test on the SS flex exhaust pipe or fittings, but I feel that it would be very difficult for them to hold water. I saw a soot line on the hull leading to the bildge on mine.
My cure was to stop the water from coming into the boat with a better exhaust cover on the outside.
My boat is dry, have a look at the exhaust vent fix in my photo album.
Hope this helps.
Cheers :smile
Ross
 
Well, I drilled some more holes. It took three to find any water, and not much at that. Which is good, but I'm pretty much back to square one on where the water came from. My two most (relative term) favored theories now are accumulated condensation, or water tank filler tube. I hit no gushers and I'm glad I will have the inspection ports, at any rate.

My boat is an '06 23 Venture, hull #28, built by Cape Cruiser. Both the cockpit sole and the cabin sole have foam coring sandwiched between fiberglass. There is blown-in foam between the cockpit sole and the hull that fills the void completely at the forward end of the cockpit. However, at the aft end of the cockpit, there is little or no blown-in foam where the separation between sole and hull decreases to practically nothing. There is also blown-in foam beneath the V-berth sole. There is no blown-in foam under the cabin sole. There is no support stringer down the middle of the cockpit. Your experience may vary, as is obvious from many of the posts here.

I drilled three 4.5" holes: one between the fuel tanks in the cockpit sole; one just aft of the cabin door, again in the cockpit sole; and one just forward of the cabin door, in the cabin sole. I also pulled the filler plug in the V-berth sole (under where the Porta Potti sits). All were dry except for the hole just forward of the door, and I knew there had to be water under there because the water I found under the Wallas that started this whole adventure was sloshing in and out of the runway for wiring and the water supply hose that passes beneath the cabin sole just forward of the door.

The only other place I might eventually put an inspection plate would be forward on the cabin floor just aft of the V-berth. I might do that if it turns out that whatever water gets in wants to settle forward and cannot easily be removed through the hole drilled near the door.

Pictures are here:

http://www.c-brats.com/modules.php?...ame=gallery&file=index&include=view_album.php

Bill on NORO LIM
 
I was wondering if anyone had any follow up on is issue. I had the shop pull the gas tanks when it was in for service this spring and they said the bolts where not sealed so they sealed the bolts up. I have not had the chance to do much boating this summer but when I have there has been water in the cockpit once I get underway. There is not water in the cockpit when the boat is sitting flat and the water that does appear is not a lot. Maybe 1/2 gallon. The boat is listing to the starboard side so I am concerned and need to tackle this before old man winter shows up. So I was wondering if anyone had anymore insight before takle this project. Here is my action plan and comments would be great.
1. Seal anchor locker.
2. Check my wallas exhaust for any water coming in and address with a new port fitting.
3. Check my water tank for possible crakes in the lines.
4. Add sealant to the seal by the door on the deck.
5. Install inspection plates by the gas tanks and by the door inside the cabin and in the portapoty area.

Any recommendations on the order I should tackle these tasks or if some tasks are not needed.

My boat has been in a boat house all summer and only washed 3 times.

Thanks in advance Doug
 
Hi,
For the anchor locker I mixed up some two part epoxy from West Marine and after removing all my rode vaccumed my anchor locker and removed the outside clam shell and filled the anchor locker right up to the drain hole. After it set up a little I cleaned up the the area outside on the hull with acetone and reinstalled the clamshell.
If you suspect the water tank to be leaking adding some food coloring to the fresh water tank might be a good way to trace to see if that is leaking. I removed my fuel tanks, pulled my fuel pickups and cut the bottoms on a 45 degree angle and made sure I did not have anti siphon valves as some reported the anti siphon valves to be a problem sticking and not allowing fuel to be pulled from the tank. I checked for plugs under the fuel tanks which I found none. and reinstalled them using marine silicone on the phillips head screws that hold them in place. I drilled three six holes for inspection plates one as far forward under the bunk as I could while allowing enough room to be able to work a jig saw. I drilled another inside the cabin just inside from the cockpit. The third I did at the rear of the cockpit off of center as some of the boats had a spar or strength member running down under the middle of the cockpit floor. I think some water might still be getting in from where the rub rail is attached. I only found about a gallon of water total. Read posts from The Pacific Wander and look at his photo album. I thought it was better to be safe than sorry. Check all caulking joints in your cockpit area where it meets the rear of the cabin and where it seals the cockpit floor. I hope this helps.
D.D.
 
Thanks so much for the response... I dont understand what you mean by this part.....

I drilled three six holes for inspection plates one as far forward under the bunk as I could while allowing enough room to be able to work a jig saw. I drilled another inside the cabin just inside from the cockpit.

Do you mean three holes? Where did you get the inspection plates...

Once again thank you in advance and I am hoping that I can solve this dilema.... Doug
 
Doug,

I think your plan of action is appropriate. From my experience, I would probably move the water tank inspection to #1.

I checked the hoses carefully, tightened all the fittings and still had leaking. It was not until I physically removed the water tank and filled it that I noticed the leaking was coming from around the nylon flange as it entered the tank itself - the hoses were fine, it was the darned flange.

If you remove the water tank the natural tendency is to grab the filling flange as a handle. I believe doing that flexes the flange slightly and caused it to leak, and the leakage simply wasn't noticeable until the water was filled to the level of the filler flange, and at that point the leaking was Very noticeable.

In my case the simplest "fix" would have simply been to not fill the tank to the top ... but no, I couldn't do that - too simple. I removed it, rebuilt it (in typical over engineering fashion) and put it all back together, and no leaks! In my case, I don't think the anchor locker (now resealed...) had anything to do with the problem. Likewise with the cabin/cockpit seal. ...but it was interesting to cut holes in the boat for the 6" Deckenson inspection ports ($20/ea at West Marine) and get them installed - and the ports DID facilitate drying the area beneath the cabin and cockpit deck.

Good luck!

Best,
Casey
 
No Worries":167qya7o said:
Thanks so much for the response... I dont understand what you mean by this part.....

I drilled three six holes for inspection plates one as far forward under the bunk as I could while allowing enough room to be able to work a jig saw. I drilled another inside the cabin just inside from the cockpit.

Do you mean three holes? Where did you get the inspection plates...

Once again thank you in advance and I am hoping that I can solve this dilema.... Doug

Here you go Doug, worth a thousand words. Six inch inspection holes, inspection covers and frames are available at most all marine stores.

P1010578.jpg

Charlie
 
Sorry it was three six inch holes, as Charlie mentioned, if you use Beckson deckplates if you take off the cover and flip it over and use a sharpie magic marker goig around the cover it will give you the perfecct sized hole which I thought was 6 and 1/8 inch. I drilled three two inch holes with a hole saw and used a jig saw to finish up the holes. Some recommmended sealing the sides of the holes with epoxy. My photo album or the Pacific Wande have more details. sorry for the confusion. Thanks Charlie for posting the pictures and picking up my slack. :)
D.D.
 
Hi Doug,

I'm not clear how your tank hold-down bolts were sealed. Did they simply put a sealant like silicone around the bolt, or did they do as Dr. bob suggests and drill it out oversize, undercut the edge, fill with an epoxy, and drill a new hole before replacing the hold-down bolts?

How is the water getting into the cockpit? It might be under the cockpit deck and pushing up through a crack or even around the bolts. Did they check through the bolt hole for water before putting them back?

If you have a list, it is highly likely it's water under the cockpit and/or cabin decks.

I agree with Casey, I would check the water tank first. We've been using the boat a lot this summer, and only get a tiny bit of water under the cabin deck which seems to only occur if we've had water over the bow. We've sealed the chain locker, but I suspect if the water tank has a leak, it would slosh out in heavy going.

We'll revisit the water tank at the end of the season and let you know what we find.

Tim & Dave
 
I will have to check with the shop on how they sealed the bolts. Do you think I should start with the inspection mounts to figure out where the water is located and what I am dealing with?

On the water tank is the leak coming from the tank itself or the fitting on the deck? I have not used my water tank at all this year. I Have washed the boat a few times so it is making sence that the water could be coming in from the gas tank bolts. If I do the inspection plates first would that help me troubleshoot where the water is coming in?
Tim & Dave Kinghorn":dtlmurjr said:
Hi Doug,

I'm not clear how your tank hold-down bolts were sealed. Did they simply put a sealant like silicone around the bolt, or did they do as Dr. bob suggests and drill it out oversize, undercut the edge, fill with an epoxy, and drill a new hole before replacing the hold-down bolts?

How is the water getting into the cockpit? It might be under the cockpit deck and pushing up through a crack or even around the bolts. Did they check through the bolt hole for water before putting them back?

If you have a list, it is highly likely it's water under the cockpit and/or cabin decks.

I agree with Casey, I would check the water tank first. We've been using the boat a lot this summer, and only get a tiny bit of water under the cabin deck which seems to only occur if we've had water over the bow. We've sealed the chain locker, but I suspect if the water tank has a leak, it would slosh out in heavy going.

We'll revisit the water tank at the end of the season and let you know what we find.

Tim & Dave
 
Hi Doug,

If you the time, read all 11 pages on this thread--especially see Ross on p. 4 & 5 of Pacific Wanderer, Oldgrowth on p.5 of c-voyager, and Casey on p. 10.

You could take out one of the lag bolts holding down the gas tanks amidships (by the sump) and check for water under the cockpit deck by sticking a rolled up paper towel down the hole.

At a minimum, a 4" inspection port in the forward berth area, under the porta-potty and one aft between the tanks would allow you to determine whether you have water under either the cockpit deck or the cabin sole. In cutting the aft inspection port, be aware that some c.c. have a spar down the center between the tanks.

If you have water coming up in the cockpit, you most likely have water under the deck and probably under the cabin sole. The inspection ports will allow you to remove any water, dry out the area, and keep a check on any future water intrusions.

A number of us have gone through this drill (see Ross), and it has solved most of the water intrusion problems that have bedeviled us.

Happy boating!

Tim & Dave
 
Back
Top