Hi Michael,
Nice to hear about your 22 and how things are going with it. I hope you'll post more about your projects (it's fun to follow along), and maybe some photos too

I'm glad you're getting some useful info from this thread.
**************
Now I think I'll post about something that I understand, which is taking care of the core on my 22 so that it stays nice and dry (how I like it

). I was going to wait to post until this was finished, but since someone asked about it, and since it is basically "structurally" done, I figured I'd bring anyone interested up to where things are now.
When we last saw the transom drain in my 22 Cruiser, I had removed the original brass drain tube (which seemed to be installed straight onto the bare balsa core, with very little sealant) and eliminated the very small bit of damp core that was just beneath it. (Then I put the project on hold while I did the splashwell drain tube.)
I wanted to replace the transom drain with something that was corrosion resistant (brass is not, especially in salt water, where I would like to be able to spend some time), and I also wanted the core to be protected, with no nagging, "Well I
think it's probably good" on my part while I was relaxing at anchor. A bonus would be a piece of hardware that was easily replaceable, if I used something that might ever need replacing. After considering the various options I came down to two top choices:
1) Basically re-create the function of the brass tube but with a pre-formed fiberglass tube. Difference from the original install being that I would cut out the core for a certain distance around the perimeter, fill that with thickened epoxy, and then also bond the tube in with epoxy. That would then take the usual "Thermos bottle stopper" style of drain plug that goes into the brass tubes (1" ID tubing; 1" plug).
2) Close out the core entirely and use one of a number of available garboard drain fittings (basically a flanged fitting with a screw in plug).
At first I leaned toward option #1, but I was still undecided. So I decided to switch gears and do the splashwell first, using the fiberglass-tube method. Since there really isn't the option to close out the core in the splashwell, option #1 was my choice there (protecting the core with a wide annulus of thickened epoxy around the tube, and then bonding in the tube as well).
After re-doing the splashwell drain, I felt good about the fiberglass tube method, so from that angle I was good-to-go with it for the transom drain; but I decided I still wasn't totally keen on the "Thermos stopper" plug style. Not that they don't work fine, but using an existing one is different from choosing to install one vs. something else when you are starting from scratch either way. Since I was trying to decide between the two options, I had to choose somehow, which came down to details and preference.
Ultimately, I decided to go with option #2. I decided on a basic concept (knowing that it might change slightly as I went along), which was that I would remove the core completely from the area where the drain tube had been, add layers of fiberglass for strength and to close out the new edge of the core, and then ultimately install some sort of garboard-drain style drain. No worries about core, plenty of strength, and a drain plug I felt confident in - and which could be replaced easily in future, if needed or wanted.
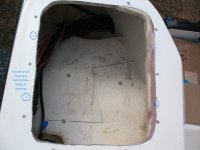
Here is a photo showing the original transom sump. It's depressed, but fairly shallow, and there is still core under it - it's just thinner than the main hull core. You can see the brass drain tube from before I removed it, and also that I removed the fuel tanks and cleats and epoxied those holes, along with a few where the bilge pump hose was attached to the transom.
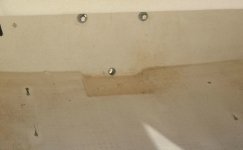
I pencilled in a "sunrise" shape on the transom, inside of which which I wanted to remove the core and the inner skin - leaving the outer skin intact. I planned on enough room for an epoxy fillet and then for the glasswork join the transom again and flatten out in the center. I needed to keep the transitions gradual enough so that fiberglass would lie nicely over them (it does not like abrupt transitions). My plan was to cut the area out in rough sections with the Multimaster, pop out the skin-and-core "pie slices," and then finish the cut by sanding to the line and shaping with a Dremel tool.
In "wait and see what I find" mode was whether I would leave it at that, or whether I might cut the core out of the whole sump, to make it slightly deeper for the bilge pump. I figured I'd see how it looked when I got the first part cut out. In favor of leaving the sump shallower was that the drain plug would be the lowest point; on the other hand, the deeper sump would have advantages too. Sometimes I just have to get into something before deciding on the final details.
Before starting to cut, I cleared and protected adjacent areas, and taped a vacuum hose nearby to catch dust. I taped over the drain hole on the outside of the boat. Then I donned my regalia and dived in.
Here I have made the first cuts. You can the penciled in "sunrise," and also a small dark circle in the sump - that's one of two holes I over-drilled and filled earlier, that were left over from where a bilge pump was screwed down (right into the core… thankfully dry). (The bilge pump in the galley sump was held down by blobs of caulking, so no fasteners into the core.)
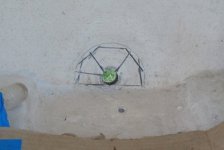
Here the upper "sunrise" shape has been removed, and I'm mulling over how to handle the bottom section. I like how the drain hole will be at the very lowest point, but I'm also thinking about how to make nice smooth fiberglass transitions, and I would appreciate a deeper sump.
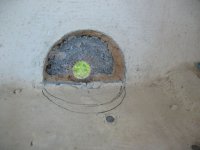
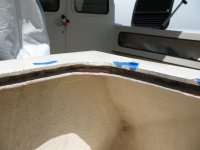
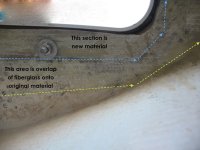
I decided to go ahead and cut out the sump. In the short, project term, it would make for nice fiberglass transitions, and long term, I'd get a deeper sump out of the deal. When I cut around the perimeter, I left the rounded edge of the top skin where it had originally turned down into the shallow sump, because it would make a nice shape for the new glass to follow as it "fell" over the curve; then fillets would complete a gradual turn onto the flat bottom area. Likewise I didn't cut the two after corners square - that would have been awkward to 'glass. Here it is mostly cut out - the wide band around the edges where I have removed the gelcoat is where I will overlap the new fiberglass. I did further cut out and shape the after corners where they transition into the vertical transom, but that was after this photo (and I didn't take another one before filleting). You can see here how the original sump is also cored, but just with thinner core than the main part of the hull.
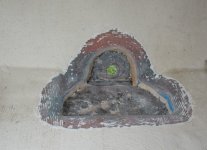
Some of the removed core and also a piece of the inner skin with core attached. The core was all dry, and the core/skins were well bonded.
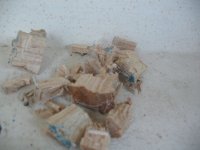
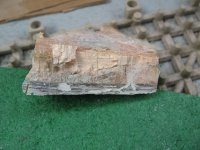
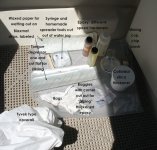
Next it was time to fiberglass. Well, no, make that time to prep for fiberglassing. I sanded until everything was smooth, and then vacuumed and tacked off. I wanted the finished product to be reasonably neat and tidy, so it would look good and be easy to clean; but given the finish of the rest of the adjacent area, I didn't have to strive for the perfection I would have if this were a molded part of the boat. Next I made patterns so that I could cut out the various pieces of 'glass. One way I make them is to take clear plastic and lay it over the area, then mark the outside perimeter right on the plastic with a Sharpie marker. Then I cut out the plastic pattern along the lines and use that to mark the largest pieces of fiberglass. After that the pattern can be cut smaller and smaller to mark subsequent pieces. I then laid the pieces out on waxed paper for wet-out, in such a way that I could remember what went where. Here is the glass before I organized it a bit better for wet-out.
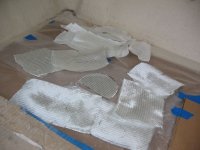
Next the the various epoxying tools were assembled (mixing cups, stir stick, epoxy/hardener, colloidal silica, squeegee, chip brush, roller, and various shaped pieces I cut out of milk/water jugs (the latter are very handy, free, and customizable). Then I mixed up a batch of neat epoxy and used that to wet out the fiberglass pieces and the sump area. I just pour the resin onto the cloth and then spread it roughly onto the cloth at this stage, because once it spreads out I have lots of working time (vs. when it's concentrated in the cup). While it sits there on the cloth it does a lot of the work of soaking in on its own. Meanwhile, I thickened what was left to a peanut butter consistency so that I could use it for filleting. The fillet provides the gradual "ramp" transitions that fiberglass cloth likes.
Speaking of the cloth, and curves and transitions. One good method for making cloth lie nicely across curves is to run it on the bias, which basically means diagonal to the weave. Of course the "problem" when you have compound curves is that it can't run on the bias for all of them at the same time. For this reason I started by making shorter pieces that could run mostly along one edge (on the bias) and then just around the corners to the point where it got finicky. Then the next piece would do the same thing and they would overlap. The main cloth I used was 4" 15 oz. biaxial tape. With biax, the fibers already run and cross at diagonals, so it was happy to lie down even when run "straight," but of course I still couldn't run it all the way around in one piece and have it lie down well. (The main reason biax is made with the diagonal crossing of the fibers is so that when you use it for tabbing or some placement where it runs across a gap or edge, you still get the strength of all the fibers. With a 90º weave half the fibers aren't really doing much where they cross the gap. Not that that was my situation on this project).
So anyway, back to the cloth, I had cut lengths of the biax to run all the way around the edges with overlaps between sections, and then cut additional pieces that would lie on the bottom and transom so that I would end up with at least three layers everywhere. Then I cut larger pieces of 10 oz cloth to lie over the top of everything, just because it's a nicer finish layer, and it was thin enough that I could coax it into place with fewer joints. I also decided to place Peel Ply over the top of the whole works. PP is a nylon fabric - sort of like a windbreaker - and it not only leaves a nice finish, but with it in place you can really "work at" the cloth without disturbing it or picking up fibers. Not that it's a big deal to wash off, but it also takes off any blush when you peel it away. I don't use it on everything, but just sometimes.
Okay, back to our epoxy (one can be so leisurely with it when typing

). I used the thickened epoxy to lay in a good fillet on all the edges so that the cloth would not have any sharp transitions.
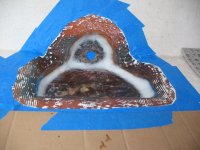
Now, sometimes you want to let the fillet really set up before you proceed, but in this case I was fine to go ahead and place the cloth with it just slightly firm. I was mindful not to "crush" the fillet or displace it as I worked. I got all the biax layers in place, and then used the roller (a metal, grooved roller) to roll around and get the air out. Biax really likes to hold air, and although you can poke at it with the bristles of a brush, or push air out by hand or squeegee, the roller works really well. I still had areas where I couldn't use the roller because it wouldn't fit, so there I had to do it by the other methods. Anyplace that cures with trapped air is not good, and may need to be cut out later and re-glassed or filled depending on size/location - so it's best to avoid that. Once I had the air out, I then placed the 10 oz cloth over the top, and then the Peel Ply, after which I smoothed it out one last time and then let it all cure to the green stage (not soft or really tacky but you can still dent it with a fingernail; this often seems to be at 3 a.m.

). Then I removed the Peel Ply and trimmed any obvious edge strands, because that's easy while it's green. That left me with this:
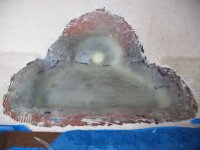
You can fair while in the green stage, but in this case I wanted to let it cure and then sand it before fairing. After sanding I vacuumed and tacked and then faired with a mixture of epoxy, microballoons, and a touch of colloidal silica (helps it to spread smoothly).
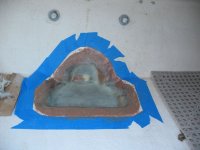
After that cured I sanded it smooth again. All the sanding/fairing stages are much easier if you are reasonably tidy in your epoxy work, so there are not great gross gobs to deal with. It also helps to sand it just when it's hard enough, but not wait much longer (it continues to harden and so gets harder to sand).
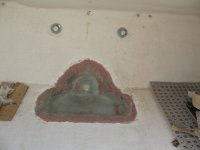
Then I seemed to have my first epoxy failure. Yes, I was trying something new without making a test panel first - my bad! Here's what happened. First of all, there is "common knowledge" that gelcoat (polyester) won't stick to epoxy. I wanted to gelcoat the sump, if possible (vs. painting it), for various reasons. The Gougeons (WEST System) had written up some tests that showed good adhesion of gelcoat over well-cured and -prepped epoxy. Yes, they do make epoxy, but they also generally do good, repeatable experiments and tests.
http://www.westsystem.com/ss/polyester-over-epoxy/
What I wasn't sure about was the definition of "well cured." Were they talking days? Weeks? Months? I called up their tech department to ask. They said probably more like days/weeks, not months, and then they also mentioned that it would help to have a slightly resin-rich epoxy mix, or at least not hardener rich, for the last layer. They explained that any "left over" hardener molecules (that didn't find resin to bond with) are what can really affect the bond. I often like to go over a faired area with one last coat of neat epoxy anyway, so I figured fine, I'd just make that batch slightly resin rich. I then decided to add some WEST white pigment, because I'm at a friend's place and he had some available. The microballoons are a sort of dark reddish-purple, and although the epoxy pigment is more of a "wash" than a solid color, it would at least help me along, color-wise.
You know how problems usually have a chain of mini-issues that add up… well, another little thing that would not have been a problem in and of itself was that I had run out of fast or medium hardener, so I only had slow hardener. It was not really cold out (low 60's), but a bit cooler than ideal for slow hardener (just means it takes longer but this would become a factor later). Well, I had other projects to do while it cured, so no big worry that way. I mixed up a batch of neat epoxy, just slightly resin rich (that felt weird, as I usually try to make it just exactly right), and then added the maximum (but no more) proportion of pigment. Then I brushed a coat onto the new sump.
I had leftover epoxy, and all the time in the world to apply it (because of the slow hardener), so I decided to do a few other jobs with it. I laid in a fillet in the anchor locker with a strip of cloth over it (between the bottom and the bulkhead). This both glassed over a hole in the bulkhead (there was a mini eye-nut there that I removed) and made for a smooth, cleanable transition (before it was a bit sunken, rough, and low). Then I went around and dabbed some on all of the former holes into the core I had filled and wanted to gelcoat later (some in the cabin where there were L-brackets holding the cabinets to the sole, some where the fuel tank cleats were, some where bilge pump hose was attached to the inside transom, and some where the swim-platform ladder was attached).
Here is the sump after the coat of pigmented epoxy.
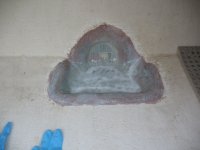
You probably know where this is going….
Next day, still tacky. Well, that's not unexpected, with the slow hardener and cool nights (50's). Next day… still tacky. Hmmm… Next day…. tacky. Uh-oh. I applied some heat (carefully) with a heat gun on low. Finally the next day (still tacky!) I called WEST's technical line and explained. I did mention that although I had used the WEST pigment, I was using System Three epoxy. Although I have used a lot of WEST over the years, I find it less easy to carry along when traveling, due to the pumps. With a 2:1 mix ratio like System Three uses, I can just carry the sealed containers and use mixing cups. They were very gracious about it and said that System Three was also a very good epoxy and to go ahead with my question. At first they couldn't think of what might have gone wrong. I retraced my steps with them and then the light bulb went on. Apparently (although I didn't see this anywhere in the literature) the pigment is basically resin. So first I made my batch slightly resin rich, and then I added…. more resin!, in the form of pigment :cry It seemed as though perhaps the resin molecules were just running out of hardener molecules to bond with. Bleargh.
I waited a couple more days and then decided to call System Three, since it was their epoxy I used. I explained again, and my main question this time was…. what were the chances it would ever harden if it was still soft now (I had saved about an inch in the mixing cup and it was still "smooshy"). They said, well, slow
is really slow in cool weather, and they recommended that rather than the shorter-duration heating of a heat gun, that I use something like a space heater and heat the area up to around 80º-90º over a longer period of time (overnight, say). So I did that for 12 hours in both the anchor locker and the transom area. It firmed up slightly but was still not cured. System Three said that they could see where it might just not cure, but… it also might.
Well after more than a week had gone by I was just sick of waiting and worrying about it, so I decided to simply remove it and be done with it so I could move on. That wasn't great fun, but it wasn't that bad either (albeit discouraging at the time). I mostly used a sharp cabinet scraper, with a bit of chiseling in the anchor locker (where I had a fillet and cloth). When I was all done nothing looked any worse for the wear and it was all back to where it was before the last epoxy application. Whew! I did save the cup with the leftover resin in it to see what would happen over time (around a month later, it's much more cured, but still a little bit rubbery, so perhaps it would have cured; I didn't want to wait around that long).
During my phone call with System Three, I also found out about an interesting product that I decided I wanted to try. It's an epoxy resin called SB-112, which was originally intended for surfboard coating. It's very clear and smooth, has more UV resistance (not that I need that), and, the reason I wanted to try it, polyester (gelcoat) is supposed to bond very well to it. In fact, the opposite of typical epoxy, you're supposed to get best adhesion if you apply the gelcoat within 16 hours, up to a maximum of 48 hours. So far I have just used it on a test panel, so can't report more than it does go on *very* smoothly and sets up quickly. I'll be re-coating and then gelcoating the test panel before proceeding on the boat.
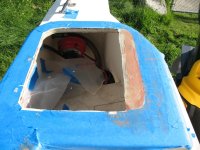
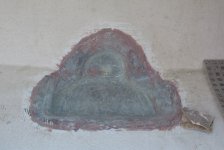
Here is the sump after removing the tinted coat of epoxy. You can also just barely see three small holes I drilled just to let any nuisance water drain (but I left the center solid for the guide bit on the hole saw for when I re-cut the main hole).
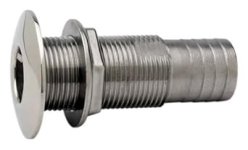
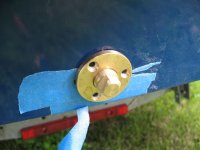
While awaiting the arrival of gelcoat (I decided to try ordering some in "C-Dory white" and "blue" to have on hand for future projects, I'll probably tint the white a bit to match the sump), I fit the new drain plug. I decided to try a Marelon drain fitting from Forespar. The plug is actually made of a slightly softer material called Hytrel™*
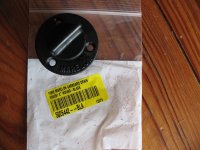
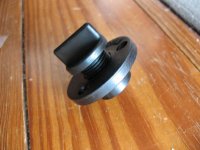
I like that it can be installed/removed by hand vs. with a tool. On the other hand, in case I don't like it, the pattern is the exact same one as used for many other plugs, including more traditional bronze ones.
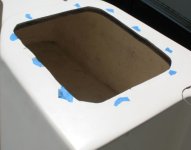
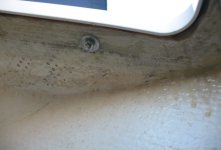
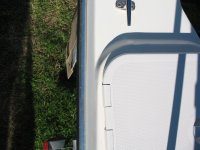
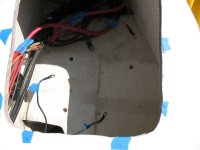
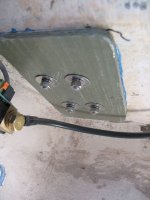
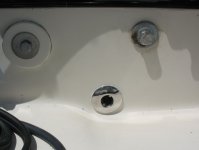
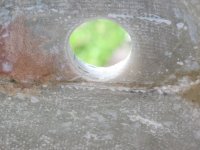
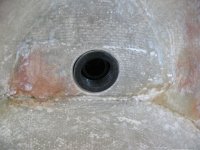
With the plugs on hand, I drilled the hole with a hole saw, just slightly undersized, then enlarged it with a file and sandpaper, to keep it snug. Here is a view from the inside (the fiberglass here will be re-epoxied and gelcoated later).
Here the Marelon fitting is are set in place to test fit. The plug is not screwed all the way in in this photo, and pardon the dust!
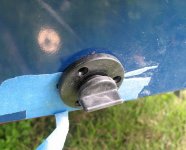
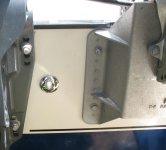
View from the inside
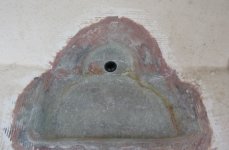
Alternative fitting (plug also not screwed all the way in).
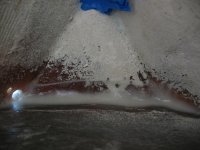
And that's where things stand as of now. It's okay to pause at this stage because it's all waterproof, there isn't any UV to speak of getting to it, and any stray water can simply drain out the hole. Next I'll fasten the plug - but I won't bed/final fasten it until after I finish the sump. I'm getting some other projects ready for epoxy (trim tab installation), and will do some test gelcoat panels with the SB-112 before I continue with this one.
Sunbeam :hot
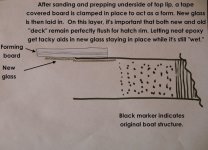
PS: I did re-do my work in the anchor locker as well. It was kind of a "bonus" job as I had already filled the disused eye-nut hole with thickened epoxy, but I wanted a nice smooth, easily-cleanable, for-sure-waterproof joint along that edge, so I combined that with glassing over the filled hole. The procedure was basically the same as doing the sump, although it's just a fillet and one layer of 10 oz. cloth tape so it went quickly. I made a pattern by sticking 2" blue tape in the locker where I wanted the cloth, cutting the ends with an Exacto knife, and then transferring it to the fiberglass tape (really it was just the angles on the ends that were anything but straightforward).
*"
DuPont ™ Hytrel ® thermoplastic polyester elastomer provides the flexibility of rubber, the strength of plastic and processibility of thermoplastic."


