Managing TC-255 storage problems

Dreamer

New member
It seems there's nothing like 2 weeks on the boat to hatch new ideas and schemes to make it work better.

The forward hatches in the TomCat are a pain. There's a ton of storage in there, the whole forward 6 feet of each hull. It's the hatch cover that is heavy and hard to get out. We had already cut the seam in the center between the two mattress halves for easier folding of the mattress.

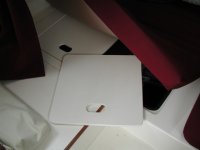
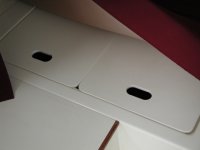
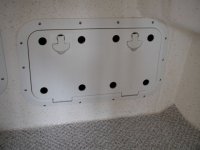
Last week Janet suggested splitting the hatch covers in two. It was an hours job to cut the covers, round the sharp corners, cut hand holes and round all the edges with a 1/8" roundover router bit. They are now very easy to use and put in place. We both reccomend it to other TC-255 owners.
P8030058.jpg
P8030060.sized.jpg
P8030061.sized.jpg
 
Roger and Janet-

Great ideas and execution!

The factory should immediately incorporate this into the design and production of the TC255!

Joe.
 
Great idea! The pull knob on the factory starboar dings up the gel coat of the bunk platform, and is hard to pull out of the way.
 
Thanks for the positive comments guys.

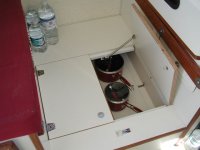
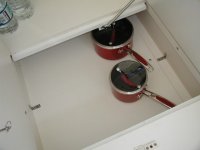
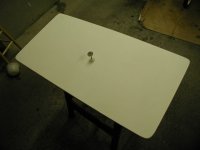
The next space we confronted was the shallow compartment under the table. We store cookware there along with large bottles of Costco water. The hatch cover is approximately 18"x24", heavy and awkward.

I cut it in half (sound familiar?), added ledgers to the sides and installed the pulls left over from the previous project. Four stainless hinges and a spring type strut completed the project. It took approximately 2 hours.

The Admiral loves it! Roger


P8040007.jpg
P8040004.jpg

P8040003.jpg

P8040008.jpg
 
It looks like those are the white things under the edge that the side spring type struts hook on. I would think their function is to support the weight of the cover when closed.

Charlie
 
Dreamer: Great work and ideas. I was about to hinge the boards on the forward section of the TC24 just before I sold her....and your idea of spliting them in half is good also. I had wondered if the spring would hold the weight of the boards....and the cusions....as to allow you to go in, prop it open, get what you want...without it slaming on you or going into some other weird spot as to cause you to just basically start over...

Great work. Be carefule showing the factory the usable spaces that we can still get to and make even more usable due to them being of the wood product.... they would soon make them of formed fiberglass and cut down the usability and storage...and call it another "improvement.." :mrgreen:

Sorry about the factory one liner there...but I just could not hold it in. Great work on your boat!!

Byrdman
 
Right on Patrick, no molded interior needed here! Here's a 1/2 hour job that should help alleviate the slightly damp, cold feel to clothes left in the forward hatches. Eight 1.125" holes in each hatch cover.
P8060002.jpg
P8060005.sized.jpg
 
Roger,
Refrsh us on what you did to make the two side lockers water tight? In mine both have a drainage to the outside of the hull (above the bottom of the locker, so water remains in the bottom)--and only the stb side of the anchor locker drains into the stb foreward side locker. As I recollect, you sealed off and gel coated the two holes on the outside, and drained thru the bottom of the anchor locker...We planned to put a tubing from the anchor locker thru the side locker to the outside, after building up the floor of the anchor locker to drain to one side...

It also appears as if you have a ventillation mesh under the bunk pad--comments?

Thanks
 
Bob,

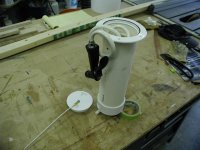
Right now the water drains to the starboard side only. It still goes through the compartment through a piece of pvc pipe in the lowest point. The anchor washdown has a drain that goes to a 1/2" tube and a new hole under the starboard clam shell. See 1/2" fitting peeking out from under cap in photo. I've never had and water standing in that compartment.

P5160034.jpg
 
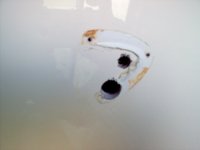
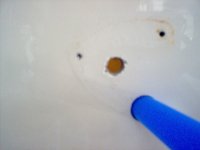
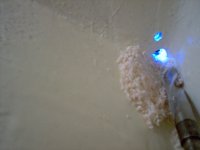
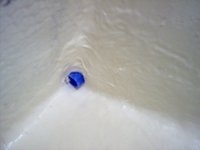
We also had problems with wet clothes in the lateral forward lockers. The drain holes were about 2" higher than the bottom of the locker. I removed the clam shells and drilled new holes, level with the locker bottoms. Note the factory hole on top.
IM000137.sized.jpg

Then placed a PEX water tube from the anchor locker, through the lateral locker and to the outside.
IM000122.sized.jpg

Drilling inside anchor locker. The factory hole is the top one.
IM000133.jpg

PEX inside anchor locker. Before 5200.
IM000129.sized.jpg

Port side view.
IM000119.sized.jpg

I cut the PEX flush with the hull, sealed the tubes inside and out with 5200, filled the old holes with epoxy and gel coated the exterior. Then replaced the clam shells. I did this on both sides of the anchor locker. Now the water drains out of the center locker and the clothes stay dry in the lateral lockers. I do like the vent holes Roger put in the hatches, and may do the same.
 
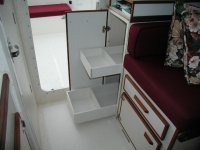
Here's the last in this series of updates. I removed the door and face frame of the rear port side "hanging locker". I then built two sliding drawers approx. 13" wide. They were mounted on bottom tracks and painted to match the DuraGuard. These will be used mostly for foodstuff. Much easier to get at and retrieve.

P8110014.jpg
 
Warren, The door is new and quite a bit bigger than the original. The teak that's missing is the top and right side of the cabinet itself. My wash down thru-hull is mounted on the bottom of the engine bracket and the pump is in the port lazarette.
 
Roger -

Another great job.

How difficult was it to remove the door and face frame? To attach the drawer rail/bottom tracks on the aft side - did you have to bolt through the cabin wall? I see the advantage in being better able to utilize this space as a pantry, etc, but I wonder about the trade off in losing the ability to store larger items that may only fit in the "hanging locker" without modifications?
 
Mark,

If you compare the photo to your intact boat, you'll see two pieces of teak mldg. missing. Once this is loosened with a putty knife and removed, all that needs to be done is remove the L shaped brackets that hold the faceplate on. We screwed a ledger to the rear bulkhead with brackets. It seems to be at least 3/4" thick.

As a hanging locker, we felt it was a huge waste of space. If we have hanging clothes, we hang them on the overhead bar at night and lay them flat on the bed during the day. With the forward hatches being so easy to access since the 1st mod in this thread, large items can go down the hatch, so to speak.

We're going to Desolation Sound next week for 10 days and will see how the 3 storage solutions work in the real world. Sometimes it's a matter of modifying your list of things to take along rather than modifying places to put them!

Roger


Back
Top