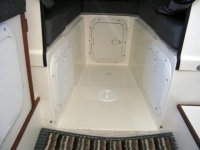
HATCH COVERS IN BERTH

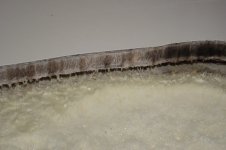
I sit corrected :oops: . In that case, when you cut holes for a hatch, I'd highly recommend undercutting the core and sealing it. Makes the job bigger but probably still worth the effort if you need storage.

Charlie
 
I would use a marine epoxy (WEST, System Three, etc.).

If you are just going to "paint" the edges, then you would use neat (plain) epoxy. If you are going to relieve a bit of the core, then you would start by painting the relieved area with neat epoxy, and then filling with thickened epoxy. If you fill to a peanut butter consistency it will not run back out.

Another option (and one I've just been trying out myself) is to use WEST 610 epoxy that comes in a caulking tube. This is pre-thickened, but, they say, can also be used "straight" onto things that you would normally wet out with neat epoxy first. I don't know that I would skip the neat step on, say, a transom area below the waterline, but I think it would work well where you are talking about (and it may work fine for the former as well, but I have not done any testing).

It's kind of an uncanny product: It flows quite well when you "work" it, but then when you let go it stays put and is thicker. Sounds impossible but that's the formulation. It's not cheap, at around $20-$22 for a tube (which is only half full), but it's so darned tidy (I have saved a bundle in gloves alone :D), and there is so little waste that it's pretty sweet. Especially if you don't have another need to stock up on the whole kit and caboodle of epoxy/hardener/thickener, etc.

(There are still things you can't do with it, so not saying it's not good to have the usual materials on hand for other things; but not everyone does other things.)

Sunbeam

PS: For some tighter areas, I dispensed the 610 without using a mixing tip (saves a tip), mixed it by hand, and then put it in a syringe. The combination of caulk tube and caulking gun can be a bit unwieldy in certain locations, whereas the syringe is small/short.
 
After reading this thread, I too am of the opinion of adding storage under the V-berth area. I was thinking about installing three hatches to gain access, but rather than putting the hatches on the horizontal planes and directly under the cushion (avoiding the hatch "bump"), I was thinking of installing them in the vertical panels. I would place one hatch forward of the porta pottie and one on the port side and one on the starboard side, just aft of the porta pottie. My question and concerns lies with the solid fiberglass vertical panel that will be holed to accommodate the hatches. This will undoubtedly take away from the structural integrity of the panels, how much I don't know. I have seen others who have done this, any comments?
 
I'll throw in a couple of comments.

First off, I can see why you are considering hatches on the vertical portion. They have advantages. One possible issue you might want to consider (if you have not already) is that, especially because the hull is sloped there, it's hard to stow as much in a locker with a side opening vs. a top opening. Things want to slide down and fall out when you open the hatch, etc. 'Course other things might outweigh that issue for your installation, and you can do something like make clear plastic fiddles (mini-walls) that fit across the bottom of the opening

On the strength: I have cut similar side openings into fiberglass "furniture," and what I did was epoxy a frame-like reinforcement around the inside of the opening. Sort of like framing a door or window in a way. After I cut the opening, I reached in and epoxy-glued and clamped the new pieces in place. If your new hatch is the flush panel/turnbutton type, the frame can double as the "stopper cleats" that keep the panel from falling into the locker (often with the lower cleat attached to the panel which you set into place first and then let the other three sides fit up to the cleats).

Sunbeam
 
Someone here did put the hatches in the vertical panels of the berth. There are pictures in one of the galleries, but I can't remember where.

As mentioned you can put more stuff in the compartments if you use a top hatch (especially the forward one). I expect to use these compartments for storage of lesser used items (i.e. shore power cable, spare mooring lines, spare anchor) which will mean constant or immediate access is not required.
 
Sunbeam":2szfrx1b said:
On the strength: I have cut similar side openings into fiberglass "furniture," and what I did was epoxy a frame-like reinforcement around the inside of the opening. Sort of like framing a door or window in a way. After I cut the opening, I reached in and epoxy-glued and clamped the new pieces in place. If your new hatch is the flush panel/turnbutton type, the frame can double as the "stopper cleats" that keep the panel from falling into the locker (often with the lower cleat attached to the panel which you set into place first and then let the other three sides fit up to the cleats).

Sunbeam

Sunbeam,
I'm sorry but I don't quite follow. Not sure what a flush panel/turnbutton type hatch is. I plan to use the old hatch covers that were on the lazarettes in the cockpit. Like many others, I expect to use the lockers for items that don't require immediate and often used items, however, the bunk itself will be covered with stuff all the time (kids, sleeping bags etc.). Dropping a hatch lid to reach in and grab an extra fender stored up under there is the what I'm thinking.
Here is what I am describing as done on "life of Riley".
V_Berth_Storage_Access_1.sized.jpg
I would think that if the cut-out hole is tight, the frame of the hatch cover will provide the necessary strength for the panel. Any thoughts or comments from those who have added access hatches this way?
Grazer
 
In the picture above, the hatches are small and there is plenty of fiberglass "wall" left so I don't think it will be a problem in the case shown. If you used wider hatches it might sag a bit it sufficient weight was on the berth when the hatch was open. A test would be to put the maximum expected weight on the berth and see if the hatch can still be opened and closed as easily as when there is no weight on the berth. If it sags you could put a strut or two from the compartment bottom to the top of the compartment to support it. Or use two small hatches instead of one big one and only open one at a time if the berth is loaded.
 
Grazer,

If you are using the pre-made hatches, then the other type I described is a non-issue. But, I'll try to make it clearer anyway.

You know how we've talked about the option on the top covers to make them either using the cutout piece, or a new piece that's similar (say, plywood). Then it rests on cleats, no hinge, and is flush. What I spoke of for the vertical panel is similar but turned on its side. So it's flush, and cleats keep it from "falling in" to the locker. To make it easier to insert them without them trying to fall back off (since they are vertical), often the bottom "cleat" is actually attached to the lid panel and not the opening. So then you can "tuck" that cleat in first and it holds the panel in place while you use the turnbutton to lock it closed. I'm bedding the Mini-Jacker right now (yay!) but will come back later with a photo or drawing, as I can understand why it's hard to visualize from my description. I did use them for years and they work a lot better than I can describe them!

Sunbeam
 
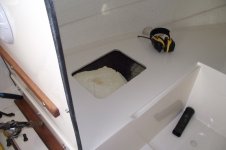
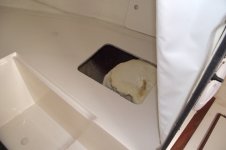
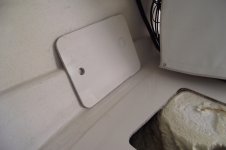
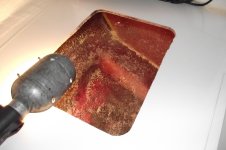
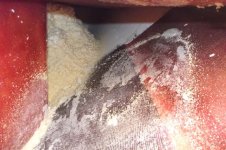
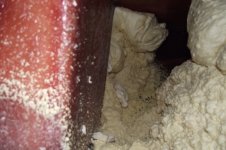
Ok, started the V-berth Storage project today. I decided to cut out to dimensions of a chosen hatch, in case I elect to install the hatch later. For right now, I think I'll try just using the carefully cut out piece as the cover. I used a jig saw and went thru 3 good scroll blades for the two cutouts. The dimensions I used were 10 5/8" x 14 1/2" as this is what the 13 x 17 Tempress hatches call for. Also, I found as the jig saw blades dulled, they actually made for a much cleaner cut, albeit a lot slower going. As has been the case with many others, I found that the voids where not completely filled with foam. Looks as though it was just poured in through the holes, then left to expand to partially fill in. I just plan on making the two storage compartments, and I will remove foam to about a foot in front of the cut out, since that is really all the storage I need. Here are some photos, that can also be found in Midnight Flyer's photo file. BTW, mine is a 2007 model. Colby
port1.jpg
strbd1.jpg
strbd1b.jpg
strbd1e.jpg
 
Looks like you're moving right along!

[Edited to remove photos since it looks like you figured it out :thup]

I don't know what kind of blade you were using, but I have found that the jigsaw blades that look like a bunch of metal dust glued on to the edge work really well for fiberglass. I think they may be meant for tile.

Sunbeam
 
I was just using a regular blade, mostly for wood. I know the abrasive blade style you are talking about, and while I have some that fit my Sawzall, I didn't have any for my jig saw. I had thought about using my rotozip tool, but felt the bit would have taken more material, making the cutout a little loose to reuse as a cover then. As it is now, the blade I used was fairly thin. I still need to sand the edges smooth, then I think instead of expensive epoxy, I will use some of that special paint made to use on brick walls in basements to seal the seepage of water or moisture. Perhaps it's similar to what you mentioned earlier. Colby P.s. yep, I had to go look thru some past threads to relearn how to add photos. ;-)
 
colbysmith":3ldssx8x said:
I was just using a regular blade, mostly for wood. I know the abrasive blade style you are talking about, and while I have some that fit my Sawzall, I didn't have any for my jig saw. I had thought about using my rotozip tool, but felt the bit would have taken more material, making the cutout a little loose to reuse as a cover then.

Plus, the rotozip would probably have thrown a lot more dust around. And true, those abrasive blades don't make the thinnest cut.

colbysmith said:
I think instead of expensive epoxy, I will use some of that special paint made to use on brick walls in basements to seal the seepage of water or moisture. Perhaps it's similar to what you mentioned earlier.

I can't think what paint I might have mentioned, so maybe that was someone else. Or in another context? (I would definitely use epoxy.)

Sunbeam
 
Ok, I cleaned a lot of the foam out of the area under my cutouts. This is where I'm concerned. The port side still has quite a bit of foam forward. (Just about even with, or slightly behind, where bulkhead is in front of porta potty) However, there wasn't quite as much foam on starboard side, so I removed all of it. What's left is in the center bow area. As you can see from the photo's, it appears that the core board ends just forward of the helm or cabin forward bulkhead. Especially on the starboard side with all that foam gone, I can flex the hull slightly. Also, with sunshine outside, I can see a light glow through the blue hull bottom. This was my original concern about if the foam was strengthening for the bow area. What have others found in this area, regarding the core board? I'm thinking with the foam gone now, maybe I should get some 5/8" plywood and cut to fit in the bottom along this area forward of where the core appears to end, and fiberglass it in. Comments? Thanks. Colby
2StrBdaft2.jpg
You can see the core ending just forward of the bulkhead. (I think that is the core.)

2StrbdBow.jpg
Here you can see I removed the foam all the way forward. I can push on the hull in this area and it seems to flex a bit. This is where I'm concerned about the strength of the hull without the foam.

2Bow2.jpg
This is the center bow area.
 
I can't speak to whether your specific hull has a problem, but I can't imagine that that foam was giving any structure to your hull. Or, rather, if something as relatively weak as that foam was still stronger than your hull (i.e. hull was weak enough that that foam would give it strength), then there is some other problem. Looking at it another way, if you were designing or rebuilding a boat, and it had a flexy hull and you wanted to properly stiffen it, spraying foam in is not how you would go about it. A couple of possible ways would be to either core it (balsa or foam, usually scored to conform to the curves), or to run stringers (fiberglassed hat-type sections) fore and aft. I don't believe this was considered necessary in the typical 22, because as far as I know none of the bow sections have either of these features.

As far as seeing light through the layup, fiberglass is somewhat translucent. Usually gelcoat or paint muffles the effect, but not always 100% . Coring does block the light out completely in the cored areas.

If there is a problem with the hull, I still wouldn't just glass in plywood. It's too flat and heavy and just really not that suitable.

Sunbeam
 
I don't think there is a problem with the hull, but the foam is very solid and would add strength where added. While the foam didnt completely fill in the void, where it was would provide more strength to the hull in that area. As you can see from the photos, it does appear the coring stops just forward of the cabin bulkhead. Foam forward of that would be like adding bracing, i think. Is this what others have seen when they remove the foam in the forward hull? That the coring seams to stop where it does in my 2007.
 
colbysmith":2hwr09xc said:
Is this what others have seen when they remove the foam in the forward hull? That the coring seams to stop where it does in my 2007.

I haven't removed the foam yet (although from other 2002's I think there is only a small bit of foam under the porta-potti sole in my vintage boat), but I have read numerous times that the coring stops just forward of the helm/v-berth bulkhead. I am under the impression that's standard build practice in the post-1986 22's. Will be interesting to see what others report.

Sunbeam
 
My '08 22 has coring that stops a few inches ahead of the bulkhead that is the aft end of the v-berth compartment. My boat came with the hatches and no foam. Since my boat came this way, it had not occurred to me to check the flex of the hull in this region. The cross wise bulkhead at the front of the berth side compartments will give support to the hull sides. The insides of the compartments are painted by the factory so there is no noticeable light leakage through the glass.

However, I have a concern if the hull is flexible in this area. I was thinking of putting a water tank in the bow compartment (instead of the cabin). To do this I was planning of putting some structure in the forward v-berth compartment to support the tank and hold it in place. This would have to be attached to the hull sides somehow and would stiffen this area up a fair amount. If the hull is designed to flex in this area (perhaps to soften the ride a little) and I put something in there that limited the flexing, I might end up with cracking of the FG around where my structure attaches.
 
Back
Top