Epoxy seal project

BRAZO

New member
I'm planning on removing factory installed hardware on our 2008 and redoing correctly with drill/epoxy. Has anyone done this and if so, what pieces of hardware need to be removed/fixed - which ones are in the balsa core?

Also, will I need to do the transom drain plug? I removed the brass fitting and the material seemed to be fine - not balsa.

Thanks.
 
I haven't done this with the exception that I did redo the screws into the sole of the cabin floor of my 22. I also had the through holes in the hull (transducer and plug) taken apart and re-sealed about 1/2 through my ownership. I'll be interested to see what you learn as you go through this. Also, the "factory" installs are not the only source of worry. A lot of the holes/components on the boat are dealer installed and the quality of those installs varies widely. Once it warms up some, I plan to deal with a few items on the Tomcat that were not installed the way I would like them to be. However, I have to admit that when I got my 1st boat, I really didn't know what to look for or what questions to ask. I'm in much better shape now due to learning from others on this site.

One thing I can say is that on a 22, you needn't worry much about the outer portion of the roof or the sides of the hull. Those are 100% glass. Areas to look at are the hatch on the foredeck, any installs in the center, cored section of the roof, installs into/through the transom, installs into the sole of cockpit of cabin, and stuff mounted to the rear bulk head. In particular, look at the wiring mount points. My limited experience suggests that the guys who wire boats will toss in a screw any place that is convenient with little thought about it.
 
On my 2007 CD the outer parts of the roof are cored and the center is not. Mine is a high top though. I can see the core where they drilled for the radar arch. I think the factory went back and forth on the roofs over the years. I would look at the anchor points for the fuel tanks, the trim tabs. the drain plug and the splash well drain, The interior would be the foot pump and the water tank anchors. The boats with the Glass interiors don't have any of those angle brackets holding all the cabinets down.
 
The different models have different core in the top. I have not seen much of the way of deck problems. If a bolt is leaking then I would pull it and then route out the core--epoxy and drill, seal on installation.

See my section on doing tabs instead of the screw brackets which I have done on the 25. Drill and fill the screw holes, then use tabs, and there will be no intrusions of screws into the hull.

I don't know how the 2008 boats were made-is it a molded interior?

If you can pull the brass drain tube, then I would epoxy around it. These are normally swaged and you should not be able to easily pull them....

2007_05_25_004.sized.jpg

"L" bracket removed, hole drilled out and epoxy filled. Then tabs of two layers of 12 oz trixial cloth made into tabs which bonded to the hull bottom and Decaboard with epoxy. 6 oz cloth will work as well.

Do the hatch, any anchor hause pipe. (Unfortunately in the past these were covered with polyester or some sealant--not adequate adherence to the core.)
 
Thanks for the replies.

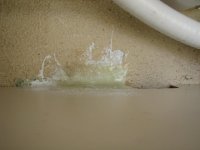
Yes, our 2008 has the molded interior. Today I pulled the starboard and port aft cleat - drilled those holes and filled with epoxy. I also took out the bilge pump that was screwed into the hull. When I drilled those holes out, it was green colored - not the balsa core - but there is no reasons to have holes in the bilge. I filled those holes with epoxy and then set the pump cage on top with epoxy.

When I first bought the boat, I had pulled the fuel tanks and epoxied any and all screw holes.

Probably not that necessary to do the deck cleats, but not that hard to do - so it'll be good to have those done.

The only holes from the dealer were 8 darn screws to hold down the batteries between the tanks. I fixed those the first year.


Question: how about the holes for the engine mounts - i would assume they need to
Be filled?
 
Took off all the hardware on the bow of the boat and the mid cleats. All have unprotected core - but all well sealed and completely dry. One advantage of marrying a girl that grew up on the farm - mother-in-law still has large out buildings to store boat in winter - dry and nice.

Now, drill out holes.
 
Sometimes having the right tools make all the difference. Went and bought a Dremel #654 bit and it works great. No over drilling the hole, just use that bit and it'll clean out the wood core without drilling the deck.

So far so good.

I did find one screw hole on the anchor line inlet that did have a little bit of grey wood - dry now, but must have had some water at one point. It was less than 1/16 of an inch of wood - but that is why I'm doing the project.
 
Yesterday I finished removing the core around all of the holes and today plan to tape everything up and fill in with epoxy.

I would highly recommend this project - it is pretty easy when you do many holes at once and even though we had no problems, the deck hardware is NOT sealed correctly in the long run. Basically the factory just coated the bolts threads with sealant and that was it.
 
Got the holes filled with epoxy and the cutouts lined with epoxy. Followed a link on the internet that went step by step. The best step of all was to fill the holes with unthickened epoxy and leave for 3 minutes - then extract the epoxy and fill with thickened epoxy. This alone probably would seal off the core with the epoxy being absorbed into the core.

So far everything has gone as planned.

Does anyone know if the fuel vent (on side of hull) is in core?
 
Here's a question for you - if the hole to be filled is essentially perpendicular to the ground, why use thickened epoxy at all? E.g. why not fill with liquid epoxy? I though the purpose of the thickened epoxy was to allow one to work it a bit (like peanut butter) to get it even at the surface when the surface is not flat or level.
 
rogerbum":f4t8218u said:
Here's a question for you - if the hole to be filled is essentially perpendicular to the ground, why use thickened epoxy at all? E.g. why not fill with liquid epoxy? I though the purpose of the thickened epoxy was to allow one to work it a bit (like peanut butter) to get it even at the surface when the surface is not flat or level.

Good question. My thought is that the unthickened epoxy might continue to be absorbed into the core via voids/etc. You'd have to then "topoff" the epoxy the next day - not sure if this would be good or not. In the instructions it calls for just thickening the epoxy enough that it still "drolls" off the stick. If it was too thick, then air bubbles would be more of a factor.

Of course, I had to really thicken the epoxy that was being applied vertically on the cutouts.
 
BRAZO":s51b166t said:
Took off all the hardware on the bow of the boat and the mid cleats. All have unprotected core - but all well sealed and completely dry.

Now, drill out holes.

Hello Robert,

If I understand correctly, you have removed the bow rail? Was there a lot of "spring" in the tubing such that it will require a lot of force to get back into position and be difficult to get it back in place? Somewhere on this site, like 2-3 years ago, someone cautioned about removing the bow rail because it would be hard to get back in position due to its natural tendency to want to straighten somewhat.

Thanks,

/david
 
SGIDave":2tshua5v said:
If I understand correctly, you have removed the bow rail? Was there a lot of "spring" in the tubing such that it will require a lot of force to get back into position and be difficult to get it back in place?
/david

Hi David,

Yes, we did remove the bow rail. I didn't notice much "spring" but there might have been a little. The rail is so light and somewhat flexible on the legs, that I don't think it'll be a problem getting it back on. It might take a few hands to get the whole thing on but I'm hoping it won't be a problem.

I'll report back once we give that a shot, but because it is light and "flexible" I just can't see it being a problem.
 
Started to put the hardware back on the boat - started with the pumpout "cover" and the anchor rode inlet. I'm using butyl tape this time around. It seems so much easier than the mess that 4200/5200 can cause. Seeing that I don't need adhesion, there is no need to use 4200/5200.

Here is the link that I'm using to do the butyl:

http://www.pbase.com/mainecruising/rebe ... are&page=1


I need a few more hands to before I can do some of the other hardware - including the hopefully easy bow rail.
 
Back
Top