Alyssa Jean
Active member
- Joined
- Nov 2, 2003
- Messages
- 2,376
- Reaction score
- 0
- C Dory Year
- 2005
- C Dory Model
- user_field_choice.c_dory_model_16_Angler
- Vessel Name
- Alyssa Jean
I had been thinking I wanted a better heating system for about a year or so. I do not cook on the Wallas that came with the boat and alsthough the unit works just fine, it is trying to do two jobs while mounted on the counter top.
So. Last week I removed the Wallas, filled in the hole, removed the sink and cheap faucet and applied a nice laminate over the existing surface. Reinstalled the sink and a new single lever, removable hand held faucet fixture.
Today I ordered the Webasto AT2000ST from Interstate Power Systems, plus a new thru hull, mounting bracket and some exhaust hose insulation from Sure Marine. Then I went out and removed the refer, and floor from under the sink (floor was an add on when we had the boat built--see my album).
Kate wants a hot air duct in the V berth. So I will do that. Anything to enhance her going out on the boat is a plus, no matter what the effort.
I have made 60mm cut outs thru both walls of the refer encloser to make the run forward under the throttle shelf. I also cut out a little half moon in the fiberglass bulkhead under the throttle shelf to pass the 2 3/8" hot air duct into the V berth. I plan on running it forward under the starboard shelf to the front of the V berth and put in a closeable vent opening there. The other duct will go at floor level just forward of the forward head bulkhead. Facing the sink it would be to the right of your right foot. I thought about running it under the head and into the compartment under the cabin step, but I don't see much advantage to doing that.
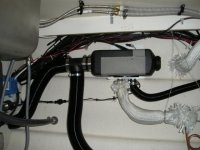
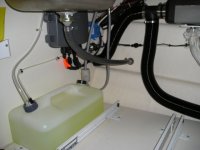
I will take some pictures tomorrow of where I am so far and then some more as I install the heater. I am planning on mounting it under the sink counter on the bulkhead. Use an appropriately sized piece of plywood 5200ed to the bulkhead for a mounting surface and braced upto the underside of the counter top if needed. I will use the existing thru hull hole that the Wallas used, but will have to enlarge it a little I think. Took that thru hull out today. The existing 15 Amp wiring will power the Webasto. The intake air for the combustion will come thru the 22mm intake hose that I will run through the same place all the wiring is under the starboard gunnel and into the storage shelf in the cockpit.
All in all. Anyday you are mucking about in a boat (whether on land or sea) is a good day.
More to come.


