thataway
Well-known member
- Joined
- Nov 2, 2003
- Messages
- 21,691
- Reaction score
- 63
- C Dory Year
- 2007
- C Dory Model
- 25 Cruiser
- Hull Identification Number
- DOR25652A707
- Vessel Name
- thataway
One common issue which comes up on all of our boats is adding another XXX electrical circuit--appliance--electronic. Almost always this includes doing either a butt connector or a ring terminal. Another thread brought up what is a proper crimp and connection.
There are a couple of good links to start with:
http://www.pbase.com/mainecruising/wire_termination
and a continuation with discussion:
http://forums.sbo.sailboatowners.com/sh ... p?t=125926
First the cut, should be a scissor type of cutting tool, which leaves a clean end--diagonal type of cutters tend to pinch the wire and jacket, and don't leave as clean a cut.
For stripping, I have a small type of scissor type with "V" on both sides of the jaws, and with different sizes of wire and insulation, you apply different amounts of pressure, to get a clean cut on insulation. I have tried a whole bunch of the "automatic" strippers. They are handy, and fast, but often I find that they cut off too many of the strands, or don't give a clean cut….
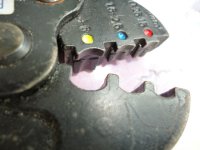
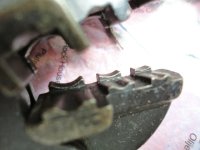
I purchased a good double crimp ratchet tool, with parallel jaws, for shrink adhesive terminals many years ago. It is made by Ancor, and the new ones don't seem to be quite as good. In the above links there are other brands listed. I don't like the "multi tools" which strip, crimp, cut etc. They don't do any well. The double ratchet crimping tool will give consistent pressure crimps, which are clean and secure.
The best connectors are marine type--with copper body/ring, have two sizes of the metal which is pressed. The larger diameter which crimps around the wire and takes some of the load on the wire insulation, and the diameter which fits the wire size you are using. The insulating covering is best if you have adhesive lined shrink tubing. Next best, if insulated, without shrink, but then you put adhesive lined shrink tubing over the crimp, and heat it with a low heat gun (not a cigarette lighter…! In either case you need the adhesive shrink to increase the strength, and avoid metal fatigue from vibration.
Remember that there are also "step down" butt connectors, which allow you to join a #10 wire to a #16 wire, or a #14 wire to a #22 wire.

The dimple on the crimp should be opposite the cut on the fitting. You never want to break the plastic insulation.

The adhesive shrink tubing should be just a little larger in internal diameter than the crimp fitting it is going over. Heat shrink adhesive lined tubing comes in a number ofl shrink factors: such as 1:2, 1:3 and 1:6. Usually I use the 1:3 factor tubing.

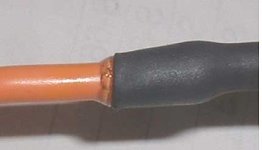
Below is a photo of adhesive leaking out of the end of a properly shrunk tubing.
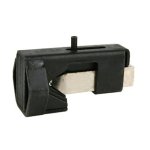
For the larger cables such as #4 thru 000. There are several choices: from hit it with a hammer or clamp in a vise multitools (lowest on the list)
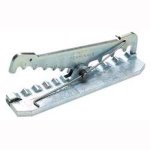
Or another type--both of these work best with a vise, rather than a hammer.
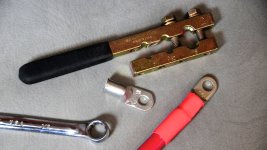
Large jawed crimpers, as used for rigging,

There are bolt drawn crimpers--again like used for rigging, which will work,
and hydraulic crimpers such as at Harbor Freight. (one problem with these is the the dyes are not exactly correct for each size of cable)

In all of these, you have to be sure that the crimp you make will be solid, since some are not specifically designed for battery cables.
I know that other C Brats have lots of experience with crimping and would like to see their suggestions.
There are a couple of good links to start with:
http://www.pbase.com/mainecruising/wire_termination
and a continuation with discussion:
http://forums.sbo.sailboatowners.com/sh ... p?t=125926
First the cut, should be a scissor type of cutting tool, which leaves a clean end--diagonal type of cutters tend to pinch the wire and jacket, and don't leave as clean a cut.
For stripping, I have a small type of scissor type with "V" on both sides of the jaws, and with different sizes of wire and insulation, you apply different amounts of pressure, to get a clean cut on insulation. I have tried a whole bunch of the "automatic" strippers. They are handy, and fast, but often I find that they cut off too many of the strands, or don't give a clean cut….
I purchased a good double crimp ratchet tool, with parallel jaws, for shrink adhesive terminals many years ago. It is made by Ancor, and the new ones don't seem to be quite as good. In the above links there are other brands listed. I don't like the "multi tools" which strip, crimp, cut etc. They don't do any well. The double ratchet crimping tool will give consistent pressure crimps, which are clean and secure.
The best connectors are marine type--with copper body/ring, have two sizes of the metal which is pressed. The larger diameter which crimps around the wire and takes some of the load on the wire insulation, and the diameter which fits the wire size you are using. The insulating covering is best if you have adhesive lined shrink tubing. Next best, if insulated, without shrink, but then you put adhesive lined shrink tubing over the crimp, and heat it with a low heat gun (not a cigarette lighter…! In either case you need the adhesive shrink to increase the strength, and avoid metal fatigue from vibration.
Remember that there are also "step down" butt connectors, which allow you to join a #10 wire to a #16 wire, or a #14 wire to a #22 wire.

The dimple on the crimp should be opposite the cut on the fitting. You never want to break the plastic insulation.
The adhesive shrink tubing should be just a little larger in internal diameter than the crimp fitting it is going over. Heat shrink adhesive lined tubing comes in a number ofl shrink factors: such as 1:2, 1:3 and 1:6. Usually I use the 1:3 factor tubing.

Below is a photo of adhesive leaking out of the end of a properly shrunk tubing.

For the larger cables such as #4 thru 000. There are several choices: from hit it with a hammer or clamp in a vise multitools (lowest on the list)

Or another type--both of these work best with a vise, rather than a hammer.

Large jawed crimpers, as used for rigging,

There are bolt drawn crimpers--again like used for rigging, which will work,

and hydraulic crimpers such as at Harbor Freight. (one problem with these is the the dyes are not exactly correct for each size of cable)

In all of these, you have to be sure that the crimp you make will be solid, since some are not specifically designed for battery cables.
I know that other C Brats have lots of experience with crimping and would like to see their suggestions.


