You are using an out of date browser. It may not display this or other websites correctly.
You should upgrade or use an alternative browser.
You should upgrade or use an alternative browser.
Sunbeam ~ C-Dory 22 Cruiser
- Thread starter Sunbeam
- Start date
Sunbeam
Active member
- Joined
- Feb 23, 2012
- Messages
- 3,990
- Reaction score
- 0
- C Dory Year
- 2002
- C Dory Model
- 22 Cruiser
I recently installed some temporary water tanks, and figured I'd write it up in case it might be of interest.
The back story is that a while back I looked at the original water tank installation, and I wasn't fond of it. A poly tank is supposed to be supported all along the bottom, and mine was a bit too wide for them to set down flat on the hull, so they just put it in "propped up." It was only touching (and thus supported) in two places -- the inboard edge on the hull bottom and the outboard edge which was resting on the hull side. That wasn't to my liking, so I removed it and made a better support. As it turned out, by simply setting it on 1/2" material (Starboard™ in this case), it fit just fine and was completely supported along its bottom. I put cleats around three edges of the starboard to keep the tank from shifting, and from pressing on the upper inboard cabinet side, and then Weld Mounted two footman loops to the hull for a strap to hold it down (I made the shelf above removable, as opposed to using it to hold the tank down as originally configured; this way I could get to some additional stowage).
Well after all this I decided to measure/mark the tank for capacity, and as I did that I apparently caused the supply fitting to start leaking :cry I considered trying to repair the tank, but I never really did like the supply fitting being at the bottom of the tank (I prefer all the fittings on or near the top, and then a dip tube for the supply access), so I decided to go with a new tank. That of course raised questions: Go with the same size? Same location? Something different? I decided to hold off on ordering anything so that I could see how the boat would trim with the water in the aft seat, and how ~20 gallons would work for my uses.
I just figured I'd go with gallon jugs and hand pouring in the interim, but then when shopping for something else, some Reliance 6-gallon potable water jugs caught my eye... As it turns out, three of them fit very efficiently into the aft seat (with storage space outboard, and even allowing me to use my installed footman loops to strap them in place. Aha, a chance to try this location, with close to the "normal" amount of water/weight. And maybe I could use the foot pump instead of pouring from jugs? Here is an overview, with all three jugs in place (18 gallons total). The view is outboard from the passageway:
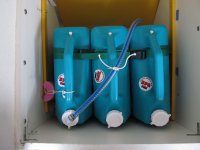
The green strap runs through the fore and aft footman loops I had already glued to the hull. The yellow platform is the 1/2" Starboard™ one I had made for the original water tank. Cleats fastened to it keep the tanks off the locker walls. The hose is the (new) one that runs to the foot pump at the galley sink -- I just left it a bit long for now. I figure I'll just switch that "supply" lid into the other tanks as I go. I think I can (carefully) fill the tanks in place with a garden type hose that has a shut off pistol-type end.
Here you can see the cleats a bit better with the middle tank removed. The white cleat is the "permanent" one I put in for the original tank; I set a longer yellow one up against it for now. Since these jugs are tall, they would have rested on the upper part of the cabinet wall otherwise, which I didn't want. The angle brackets are stainless replacements that are epoxied to the hull (I drilled and filled the original screw holes). The yellow Starboard cleats fore and aft (on the cabinet sides) are what I had put in to hold up the original shelf above the permanent water tank. The yellow piece outboard is just extra Starboard being stored there for now.
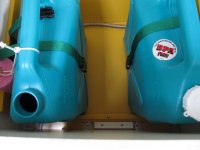
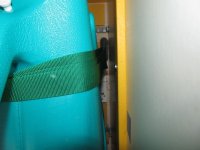
Not a great photo here, but it slightly shows the Weld Mount footman loop on one side that holds the strap. Here I used fiberglass angles for brackets (also adhered to the hull vs. using screws as originally done)
Now to get the water out of the tank(s). I used a section of 1/2" PVC plumbing pipe for a dip tube, heating it up with a heat gun and bending it slightly so it would reach the lowest point of the jug(s). Acetone gets the lettering off the outside of the pipe.
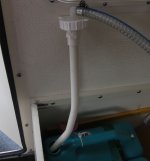
The fittings up top are pretty simple - there are just two. Starting at the hose and working down is a nylon elbow, 1/2" barb to 1/2" male NPT. I drilled a hole in the flat cap from one of the jugs to make a tight fit for the threaded side, and pushed that down in from the top. Connected to that from below is a PVC fitting that is 1/2" NPT female on top (threads onto the elbow and sandwiches the flat cap), and a meant-to-be-glued socket on the bottom side which fits the OD of the 1/2" PVC pipe. It's a tight friction fit so I don't think I'm going to need to glue it.
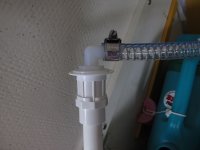
Here you can see the outer "Saturn" ring that is the other part of the Reliance jug cap. This one fitting can be shifted to the other jugs (and a solid cap moved to this jug).
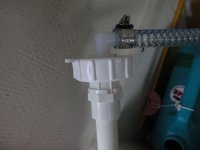
One note is that the way I have it now, I'll probably only use it when not underway, because I need to open the vent in the active tank so that I can pump water out. I think water could slosh out of this when underway (unless very smooth and the tank is low on water), so I'll likely keep them closed then. I think I could screw some small NPT male to barbed fittings into the vent holes and then run hoses up higher, but first I'll see how the whole system works, and/or how long I'll keep it vs. deciding on and ordering a new "real" tank. If it all goes pear-shaped, it's 18 gallons of water storage and I'll go to the one-gallon jug/pouring method
Sunbeam
The back story is that a while back I looked at the original water tank installation, and I wasn't fond of it. A poly tank is supposed to be supported all along the bottom, and mine was a bit too wide for them to set down flat on the hull, so they just put it in "propped up." It was only touching (and thus supported) in two places -- the inboard edge on the hull bottom and the outboard edge which was resting on the hull side. That wasn't to my liking, so I removed it and made a better support. As it turned out, by simply setting it on 1/2" material (Starboard™ in this case), it fit just fine and was completely supported along its bottom. I put cleats around three edges of the starboard to keep the tank from shifting, and from pressing on the upper inboard cabinet side, and then Weld Mounted two footman loops to the hull for a strap to hold it down (I made the shelf above removable, as opposed to using it to hold the tank down as originally configured; this way I could get to some additional stowage).
Well after all this I decided to measure/mark the tank for capacity, and as I did that I apparently caused the supply fitting to start leaking :cry I considered trying to repair the tank, but I never really did like the supply fitting being at the bottom of the tank (I prefer all the fittings on or near the top, and then a dip tube for the supply access), so I decided to go with a new tank. That of course raised questions: Go with the same size? Same location? Something different? I decided to hold off on ordering anything so that I could see how the boat would trim with the water in the aft seat, and how ~20 gallons would work for my uses.
I just figured I'd go with gallon jugs and hand pouring in the interim, but then when shopping for something else, some Reliance 6-gallon potable water jugs caught my eye... As it turns out, three of them fit very efficiently into the aft seat (with storage space outboard, and even allowing me to use my installed footman loops to strap them in place. Aha, a chance to try this location, with close to the "normal" amount of water/weight. And maybe I could use the foot pump instead of pouring from jugs? Here is an overview, with all three jugs in place (18 gallons total). The view is outboard from the passageway:

The green strap runs through the fore and aft footman loops I had already glued to the hull. The yellow platform is the 1/2" Starboard™ one I had made for the original water tank. Cleats fastened to it keep the tanks off the locker walls. The hose is the (new) one that runs to the foot pump at the galley sink -- I just left it a bit long for now. I figure I'll just switch that "supply" lid into the other tanks as I go. I think I can (carefully) fill the tanks in place with a garden type hose that has a shut off pistol-type end.
Here you can see the cleats a bit better with the middle tank removed. The white cleat is the "permanent" one I put in for the original tank; I set a longer yellow one up against it for now. Since these jugs are tall, they would have rested on the upper part of the cabinet wall otherwise, which I didn't want. The angle brackets are stainless replacements that are epoxied to the hull (I drilled and filled the original screw holes). The yellow Starboard cleats fore and aft (on the cabinet sides) are what I had put in to hold up the original shelf above the permanent water tank. The yellow piece outboard is just extra Starboard being stored there for now.

Not a great photo here, but it slightly shows the Weld Mount footman loop on one side that holds the strap. Here I used fiberglass angles for brackets (also adhered to the hull vs. using screws as originally done)

Now to get the water out of the tank(s). I used a section of 1/2" PVC plumbing pipe for a dip tube, heating it up with a heat gun and bending it slightly so it would reach the lowest point of the jug(s). Acetone gets the lettering off the outside of the pipe.

The fittings up top are pretty simple - there are just two. Starting at the hose and working down is a nylon elbow, 1/2" barb to 1/2" male NPT. I drilled a hole in the flat cap from one of the jugs to make a tight fit for the threaded side, and pushed that down in from the top. Connected to that from below is a PVC fitting that is 1/2" NPT female on top (threads onto the elbow and sandwiches the flat cap), and a meant-to-be-glued socket on the bottom side which fits the OD of the 1/2" PVC pipe. It's a tight friction fit so I don't think I'm going to need to glue it.

Here you can see the outer "Saturn" ring that is the other part of the Reliance jug cap. This one fitting can be shifted to the other jugs (and a solid cap moved to this jug).

One note is that the way I have it now, I'll probably only use it when not underway, because I need to open the vent in the active tank so that I can pump water out. I think water could slosh out of this when underway (unless very smooth and the tank is low on water), so I'll likely keep them closed then. I think I could screw some small NPT male to barbed fittings into the vent holes and then run hoses up higher, but first I'll see how the whole system works, and/or how long I'll keep it vs. deciding on and ordering a new "real" tank. If it all goes pear-shaped, it's 18 gallons of water storage and I'll go to the one-gallon jug/pouring method
Sunbeam
DuckDogTitus
New member
- Joined
- Jan 31, 2013
- Messages
- 1,034
- Reaction score
- 0
- C Dory Year
- 1988
- C Dory Model
- 22 Cruiser
- Hull Identification Number
- DOR22332K788
- Vessel Name
- C-Miner
I like the scale-ability here. It seems like if needed, you could keep more matching jugs of water somewhere and swap when appropriate, or even less and use the storage space for something else. Pretty cool and clean modification :thup
Sunbeam
Active member
- Joined
- Feb 23, 2012
- Messages
- 3,990
- Reaction score
- 0
- C Dory Year
- 2002
- C Dory Model
- 22 Cruiser
BrentB":1wm0g9ct said:thanks nice writeup
What camera model are your using?
Let me look....okay, Canon SX130. It's a "hand me down" from a buddy who's into upgrading (always nice to have!). While it is technically superior (because of being newer), I actually prefer my older Canon A630, mostly because of the flip screen (but I also like the viewfinder). I can't think of enough superlatives for the flip screen! It's especially handy for photographing things on boats that are otherwise hard to get to (such as serial numbers on inboard engines, under soles, etc.).
This camera takes much better video though, and has a better, stabilized zoom feature, so I'm trying to get used to life without the flip screen.
Sunbeam
Active member
- Joined
- Feb 23, 2012
- Messages
- 3,990
- Reaction score
- 0
- C Dory Year
- 2002
- C Dory Model
- 22 Cruiser
I had another project keep me from a hoped-for launch today (lower door hinge), so since I was going to be waiting for epoxy to cure anyway, I decided to use that time to add some vent hoses to my temporary jerry jug "tank" setup. The jugs came with those little white plastic plugs that you pull out (but they stay attached) to vent, and push in to close. I figured that if I stuck with those I would have to close them underway because otherwise sloshing could cause them to leak into the locker.
So, while at the hardware store today, I picked up three 1/4 male NPT to 5/16" hose barb nylon fittings, plus 8' of clear 5/16" hose. That ran around $7.
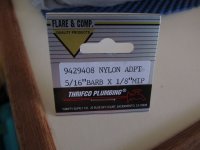
I removed the original, white vent plugs from the jugs (they just pull out) and then drilled a 3/8" hole in each jug to accept the nylon fitting. First I screwed a fitting in "plain," and then turned a half full jug upside down to check... it dripped just a wee bit. So I put a couple of wraps of Teflon™ pipe tape around them and tried it again... dry. (And of course they shouldn't have a half jug's worth of water pressure on them, with any luck since they are on the top of the jug.) Then I pushed a section of hose onto each fitting (I had checked that it would be a tight enough fit to not need hose clamps in this case).
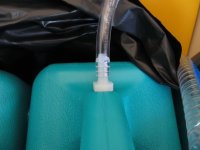
After rinsing out the tanks (in case there was plastic swarf from drilling), I put them back in the boat -- this time I decided to set them into a contractor trash bag, just to catch any slight drips or spills. I then trimmed the vent hoses a bit, and tied them up to the deck fill. Not that the fill really has anything to do with it, but it was a handy place to gather them, and the seat cushion will clear them there. The hoses compressed slightly when I tied them up, so I think they will tend to want to stay there.
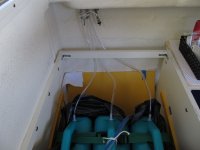
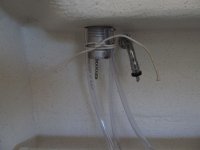
In case anyone is wondering what that is on the vent fitting, it's just a rubber expansion plug with a thumb screw in the center - sealing the vent fitting for now.
Sunbeam
PS: Epoxy is curing on the real project of the day: The lowest hinge on my main cabin door had pulled partially out. The hinges are really cabinet hinges, and they were installed just with pointy screws into the outer fiberglass skin and balsa core of the cabin. One of the screws had stripped the fiberglass enough to not want to hold. I already have better hinges "in stock," but that was supposed to be a future upgrade, not today!
So, I removed that hinge, and then hollowed out the core from all three holes (happily all dry as a bone). I made them all one hole so that instead of trying to get epoxy into three "blind" holes, I could push the epoxy into the bottom hole with a syringe until it came out the two upper ones - sort of like adding lube to a lower unit. I would have through drilled and gone to machine screws and washers/nuts on the inside, but since I'm planning on a hinge upgrade (and the holes are different), I didn't want to do that now. Plus, the two inner holes would have wound up on a sloped area of fiberglass in the cabin, complicating it. I also chamfered the holes where they went into the gelcoat.
Next I pumped thickened epoxy into the now-all-one hinge hole until it was full, then reinstalled the hinge (taped so it would not stick, as was the boat). Since two of the three holes were still gripping, I was able to use the fact of screwing in the hinge to clamp it all in place while it cures. I waxed the screws that were going into the new epoxy, so they will be removable (I have other, non-waxed screws to replace them with). When it's close to cured (but still slightly green), I'll remove the waxed fasteners, and the tape, and then bed the hinge and fasten it with clean fasteners. Another option is to just let the epoxy cure and then drill pilot holes for the screws, but I never really feel happy with that (when using "pointy" screws), so if possible I do it another way.
So it was during the gaps in that operation that I put vents in the temporary water jug setup
So, while at the hardware store today, I picked up three 1/4 male NPT to 5/16" hose barb nylon fittings, plus 8' of clear 5/16" hose. That ran around $7.

I removed the original, white vent plugs from the jugs (they just pull out) and then drilled a 3/8" hole in each jug to accept the nylon fitting. First I screwed a fitting in "plain," and then turned a half full jug upside down to check... it dripped just a wee bit. So I put a couple of wraps of Teflon™ pipe tape around them and tried it again... dry. (And of course they shouldn't have a half jug's worth of water pressure on them, with any luck since they are on the top of the jug.) Then I pushed a section of hose onto each fitting (I had checked that it would be a tight enough fit to not need hose clamps in this case).

After rinsing out the tanks (in case there was plastic swarf from drilling), I put them back in the boat -- this time I decided to set them into a contractor trash bag, just to catch any slight drips or spills. I then trimmed the vent hoses a bit, and tied them up to the deck fill. Not that the fill really has anything to do with it, but it was a handy place to gather them, and the seat cushion will clear them there. The hoses compressed slightly when I tied them up, so I think they will tend to want to stay there.


In case anyone is wondering what that is on the vent fitting, it's just a rubber expansion plug with a thumb screw in the center - sealing the vent fitting for now.
Sunbeam
PS: Epoxy is curing on the real project of the day: The lowest hinge on my main cabin door had pulled partially out. The hinges are really cabinet hinges, and they were installed just with pointy screws into the outer fiberglass skin and balsa core of the cabin. One of the screws had stripped the fiberglass enough to not want to hold. I already have better hinges "in stock," but that was supposed to be a future upgrade, not today!
So, I removed that hinge, and then hollowed out the core from all three holes (happily all dry as a bone). I made them all one hole so that instead of trying to get epoxy into three "blind" holes, I could push the epoxy into the bottom hole with a syringe until it came out the two upper ones - sort of like adding lube to a lower unit. I would have through drilled and gone to machine screws and washers/nuts on the inside, but since I'm planning on a hinge upgrade (and the holes are different), I didn't want to do that now. Plus, the two inner holes would have wound up on a sloped area of fiberglass in the cabin, complicating it. I also chamfered the holes where they went into the gelcoat.
Next I pumped thickened epoxy into the now-all-one hinge hole until it was full, then reinstalled the hinge (taped so it would not stick, as was the boat). Since two of the three holes were still gripping, I was able to use the fact of screwing in the hinge to clamp it all in place while it cures. I waxed the screws that were going into the new epoxy, so they will be removable (I have other, non-waxed screws to replace them with). When it's close to cured (but still slightly green), I'll remove the waxed fasteners, and the tape, and then bed the hinge and fasten it with clean fasteners. Another option is to just let the epoxy cure and then drill pilot holes for the screws, but I never really feel happy with that (when using "pointy" screws), so if possible I do it another way.
So it was during the gaps in that operation that I put vents in the temporary water jug setup
Mike_J
New member
- Joined
- Mar 26, 2012
- Messages
- 373
- Reaction score
- 0
- C Dory Year
- 2011
- C Dory Model
- 22 Cruiser
- Hull Identification Number
- CMC22005A1111
- Vessel Name
- Natural C-lection
Now I am trying to figure out if I can make that work with our electric pump system! I am still trying to figure out the source of a leak and suspect it may be the bottom of the water tank...
Sunbeam
Active member
- Joined
- Feb 23, 2012
- Messages
- 3,990
- Reaction score
- 0
- C Dory Year
- 2002
- C Dory Model
- 22 Cruiser
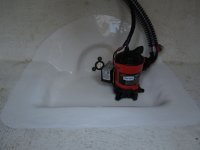
Posting in this thread the other day reminded me that I hadn't yet followed up on the transom drain/sump project, so I thought I would add a few photos of its current state. To recap the previous steps, I removed the brass drain tube, then closed out the core (i.e removed the core and then brought the two skins together with epoxy, fillets, and biaxial cloth) in the drain area to make way for a through-fastened garboard drain fitting. At the same time I decided to remove the adjacent core from the after sump. I wasn't necessarily planning on that (although it had crossed my mind), but once I was in there I realized it wouldn't be much more work, and would actually make some of the transitions easier in the way of filleting and fiberglassing. As a side bonus, the after sump ended up just a shade deeper than it was. (Unlike the 'midships sump, which is devoid of core, the after sump had a layer of core that was about half the thickness of the main hull core.)
So, here is an overview of its current state:
Compared to how it looked when I started, with the shallow sump and the brass drain tube:
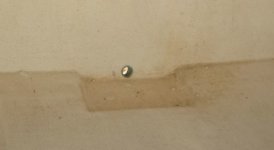
Closer view showing the new drain fitting. It's a common size/pattern; the plug screws in from the outside.
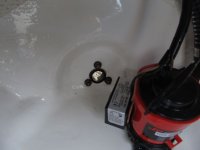
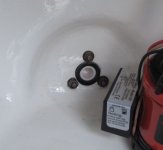
With the plug inserted. I bought a second fitting to give me a spare plug, and since they come in black or white, I got a white one and used that plug. Figured it might help slightly to see that it's in place when I look aft, instead of just black on black.
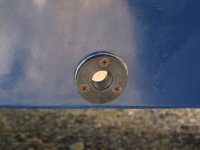
From the outside, with the plug removed (and before I finished trimming away the excess bedding compound).
So, here is an overview of its current state:

Compared to how it looked when I started, with the shallow sump and the brass drain tube:

Closer view showing the new drain fitting. It's a common size/pattern; the plug screws in from the outside.

With the plug inserted. I bought a second fitting to give me a spare plug, and since they come in black or white, I got a white one and used that plug. Figured it might help slightly to see that it's in place when I look aft, instead of just black on black.

From the outside, with the plug removed (and before I finished trimming away the excess bedding compound).

Sunbeam
Active member
- Joined
- Feb 23, 2012
- Messages
- 3,990
- Reaction score
- 0
- C Dory Year
- 2002
- C Dory Model
- 22 Cruiser
Dreamer":2rzgxguu said:Nice work!
Thank you - and coming from you I'm especially pleased (Dreamer is so nicely outfitted and upgraded).
Dreamer":2rzgxguu said:This will be the nicest CD-22 that never got into the water this Summer!
That seems to be the flipside to (at least my) projects; while one is suited up and working away, others are out on the water using and enjoying their boats as-is (or after completing projects that are now in the past). I even hear that some people manage to strike a balance :wink:
Dreamer":2rzgxguu said:Hope you get to enjoy some of the fab weather. It isn't always like this :wink:
Thanks! This sure is a beautiful part of the country.
Sunbeam
Sunbeam
Active member
- Joined
- Feb 23, 2012
- Messages
- 3,990
- Reaction score
- 0
- C Dory Year
- 2002
- C Dory Model
- 22 Cruiser
PS: Not that this makes "the hard" any less dry, but I did complete the sump some time ago - just hadn't posted about it. Right now I'm playing "Whack-a-Mole" with various things that I feel I need to take care of before launching, but that are maddeningly coming up one thing at a time, just when I'm ready to launch. So.... main engine wouldn't tilt down.... fixed. Then next, it wanted to sink down all on its own!... fixed. Then the lower hinge on the main cabin door (that I knew needed attention but actually chose to ignore for now -- yes me, really, I did!) came completely adrift so it could not be ignored... I fixed that. Etc.
If they would only all show up at once it would be simpler! Not that it's unexpected, but still. It reminds me of cruising when after all the effort to get stowed up, laundry done, check out, water tanks full, dinghy aboard and tied down, icebox full of food and ice..... and then the weather window would close. For a couple of days one could "tread gently" on the boat and supplies, but after a few days you'd just have to throw in the towel and resign yourself to re-stowing, re-icing, re-everything. Or get fed up and venture out and then remind yourself why impatience wasn't the best idea (ugh.... bad passage).
I do sometimes think fondly of past days with one of the ultimate bang-for-the-buck/time boats such as a kayak or rowboat. But... I'm cursed with the "need" to be able to live and sleep aboard. And the 22 is at least a heck of a lot simpler than a boat *can* be.
Okay, back to "the mole."
Sunbeam
Active member
- Joined
- Feb 23, 2012
- Messages
- 3,990
- Reaction score
- 0
- C Dory Year
- 2002
- C Dory Model
- 22 Cruiser
Having just used it for a month aboard, I thought I would report back on my temporary/modular water tank "system" and how it worked out.
Overall, it was a resounding success. Basically, while standing at the sink and actually using water, I couldn't tell I didn't have a "real" water tank. I'm so, so glad I rigged this up vs. trying to fit a bunch of gallon jugs aboard, or vs. having the jerry jugs but not the connection to the foot pump.
I didn't change anything about the set-up over the month -- and I tend to like to tinker.
While I think I will get a "real" water tank in the future, I found some advantages to this system; and if I were a person who often had more minimal or changing water needs (day or weekending), then I think I might just keep this (or similar).
Plusses:
1) It was cheap/easy/quick to put in (not that this is necessarily a priority in the grand scheme of things, but it did make it something I could rig up in a day, when I was going on a trip but not sure what/where I want to put in permanently).
2) It is modular. One could easily use just one or two of the jugs, or all three as I did (or more). Or change things up for each trip.
3) It is "self baffling" due to having the three separate tanks.
4) It isolates the water somewhat. This could come in handy if I pulled in with two empty and one full jug, and then took on some "bad" water. I would still have one good jug. Or if I wanted to take on rain water or some "questionable" water, I could just fill one jug with it. Also if there were a leak, there is a good chance it would not affect the whole water supply.
5) This is not unique to the jug setup, but it something I didn't like about the "stock" water tank: The supply on my "system" uses a dip tube (water is pulled out through the top of the tank). This means there is no fitting on the bottom of the tank to potentially leak and cause loss of supply (plus a flood in the cabin). When I get a new "real" tank it will also utilize a dip tube for the supply. The original tank had the supply fitting at the low point of the tank on the bottom edge; that is where the original tank developed a leak (luckily it was off the boat at the time!)
6) It was easy to portion out the water and to know how much I had aboard, with no "gauges" or looking necessary. First of all of course there are three jugs to each run dry in succession; second (I think because the "dip tube" is fairly large in diameter), it starts to "hiccup" a bit for the last half gallon or so of each jug, so I got advanced warning that the well was going to be running dry. (Side note: I thought this would leave a half gallon or more in the tanks, which I would have to combine later, but in actuality I found the three tanks almost bone dry when I went to do that - so I'm not sure I would go to a smaller diameter dip tube, because the "warning" feature was handy.)
7) It's easy to dump the jugs after the trip (but not as easy as with the washdown pump attached to the real tank, as mine was and probably will be again in future).
8 ) Easy/cheap/quick to clean out and/or replace a tank or tanks.
9) They could be filled "off site" and brought to the boat (although this would necessitate pulling the vent hoses out, etc. and wasn't ever my plan of how to use them).
Minusses:
1) Since I was not using the deck fill, I had to lift the seat cushion and put it aside, then fill each jug with a hose and "pistol grip" end fitting. Not that this was hard (and of course I'd have the hose out anyway), but it's slightly less desirable to me than using the deck fill. On the other hand, it'd be one less deck fitting if one did not already have one. I didn't spill any water (this trip). To know when they were getting full I simply put my finger in the fill hole along with the hose; when I felt water reach my finger the tank was full and I stopped filling (could control that right there with the pistol grip).
2) The three vent hoses did fall out of their string-on-the-fill a couple of times. Once I figured out that it was caused by my tilting the seat cushion instead of just lifting it out that was solved (and of course there would be better ways to terminate those hoses). Nothing could leak still, but it's something I would change for longer term use.
3) The three vent hoses made access to the good amount of stowage outboard of the tanks a bit clumsy (see above; I would/will re-route them for longer term use).
4) It's necessary to remove the seat cushion and fiddle around a bit to change tanks when one runs dry. And then the hose needed to be re-tied where I had it supported on the handle of the adjacent tank. Not a big deal, but I'm trying to list everything.
5) I noticed a slight plasticky taste to the water at first. I'm not sure if that's from the tanks or the new water supply hose in the boat though. They are both meant for drinking water. I'm not sure if that went away though with use, as I was drinking iced tea made from the water as the trip went on so it was flavored.
6) Stowage around the tanks is not as handy as with the built in shelf above the stock tank (although I didn't prioritize making it "good" either).
7) This would not play easily with a washdown pump, which I liked having on the stock single tank.
In summary: It was a resounding success for the planned use and situation. In some situations I would keep it (or similar) for longer term use. If I did that I would probably set a few things up differently (better vent routing with quick disconnects, for example).
Sunbeam
Sunbeam
Active member
- Joined
- Feb 23, 2012
- Messages
- 3,990
- Reaction score
- 0
- C Dory Year
- 2002
- C Dory Model
- 22 Cruiser
Rubrail repair
This is a long post, but I figure anyone about to do the job might like to read about and see the details. Otherwise feel free to just scroll past the text and look at the photos
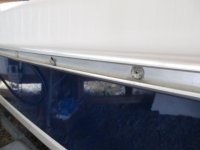
When I first looked at my 22 (before purchasing it), there was already one spot in which the rub rail was coming loose - the few inches on the port-side transom just after the 90º turn. I had read about the problem/fixes here, so put it on my to-do list. It wasn't high up on the list, however, as the fasteners only went into the self-draining port lazarette. But then as I was waxing the boat while it was in storage this winter… I saw that the rail had come loose amidships on both sides. You could see "air" between the rail and the boat, and the rivets had broken. This meant I had holes (or soon to be holes) in each side of the boat amidships. Time to fix!
(Note, these are the slightly smaller versions of each image so no-one has to scroll back and forth. The larger version can be seen in my album, after clicking twice on the thumbnail)
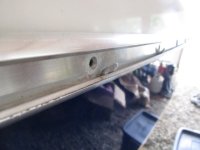
It's a little hard to see in the photo, but where the arrow is pointing you can see air (gravel shows through from ground below). It was much more noticeable in person.
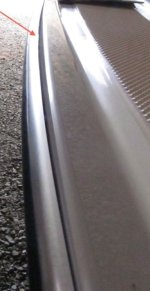
I re-read any threads I could find on the repair, to glean tips and ideas. Comfy Dory did an extensive write up, along with photos in the Comfy Dory album. This along with the accounts of others gave me a good idea what I was up against (thank you to those earlier posters :thup). Of course first I had to bemoan the whole idea: Build a boat, 'glass the hull and deck together (many boats are only bolted/screwed and not glassed) so you have a perfectly watertight vessel…. and then drill 100+ holes just to attach a rubrail, and fasten it with wimpy aluminum rivets :cry Better yet, have a design that catches and holds water…. :amgry Now granted, they were likely to want to put something there - it does cover up the unfinished looking seam between hull and deck - and it is certainly nice to have a rubrail.
I used to have a small fiberglass trailer that had a similar construction (although even worse as they used steel plates inside to anchor the rivets, which rusted and bulged), and some people removed it and went back with a modern heavy rubber automotive (such as on a light truck) "belly band" type molding that attaches with VHB tape. That might not hold up (not sure), would not stand as proud (disadvantage) and you'd have to do some smoothing of the hull-deck joint. So I nixed that idea. Then I thought of a big/heavy rubber profile that I have seen on some boats, wherein there is no metal. The rubber "gives" such that when you tighten it it basically makes a seal against the boat (and there may not be a channel to hold water against the fasteners). Also the fasteners may not be buried/covered such that they rest in the soup. I didn't look too heavily into that at this time though, because I decided not to completely pull the rails off since only a small section on each one had failed.
Backing up a little, to begin the repair/thought process, I removed the rubber molding that covers the fasteners (rivets) on our rails. What I found was that 90% of them were in good shape, but seven of them on each side (more or less amidships) were deteriorated or broken. This is where "low point" water can sit.
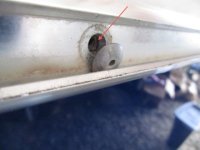
If you look closely at the tip of the arrow in the above photo, you can see the broken end of the rivet tube. That would have been at the outside of the rail, attached to the rivet head - so you can see how the rail has pulled away after the rivet head broke. Where the rail bulges it makes it look like there is "too much rail" (and indeed I found where several others had mentioned this and said they were even thinking of cutting out a small section of "extra"), but I found that when it is sucked back in with new fasteners it fits perfectly, at least on my boat.
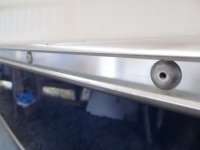
The rest of them looked pristine (although I expect that eventually they might fail).
Since I had other things on my project list, and I didn't have extensive helper availability where I am now (but I did have some, yay), I decided to repair just the rivets that had failed or were about to fail. My reasoning went like this:
1) The current problem will be fixed, literally better than new.
2) If/when future rivets fail, I may choose not to remove the complete rail, but instead to leave the middle section I just repaired, and "wing out" the forward and aft sections on both sides, so that I'm essentially doing the rest of it in four sections. I found out by doing this section that while it would be nice to remove the whole rail for some reasons, I can do it in place. And with the "wings" it would only be one or two rivets (close to the now-repaired section) that would have limited access - the rest of the rail should pull out plenty far. A side benefit would be not having huge "loose" rails to deal with.
3) Or, if I do want to remove the whole thing, and/or replace it with something different, I can always undo the fasteners I just used for the repair and take the whole rail off then.
So next I set to removing the broken rivets. First to explain (likely obvious) that where the rivets terminate on the inside is a "blob" of slightly rubbery material that covers the rivet. This was said to be 5200 in many posts. This is then gelcoated over when the whole inside of the hull is done (sprayed type, not molded). So there is the issue of how to handle that. About half of the to-be-replaced rivet's heads had fallen off and were lying in the rail gutter. The ones that were still on were mostly easy to drill off, except for a few where the mandrel was still in them (little rod blocking hole) - those were a pain. I wondered if that was steel and hence the corrosion was hastened? Once I had all the heads off, it was time to drive the body/back of the rivet into the boat and remove it. I saw where Comfy Dory had found that if he simply drove them in, they pulled off a ragged bunch of "the blob," which was a cosmetic problem. So he used a piece of thinwall pipe and from the inside, cut a circle in the blob around the rivet, so that when he drove the rivet in, only a neat circle of blob was removed. I did the same thing, utilizing a punch/cutter that you use to cut a circle of fabric before installing a grommet (#2 I think). I just rotated it back and forth (clockwise and anti-clockwise) and cut the blob that way. This worked very well.
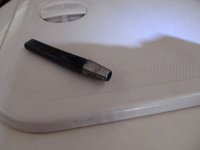
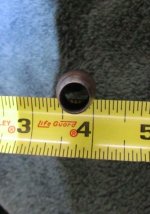
I then used a nail set in the tube on the outside, and hammered the rivet into the boat. Here is a removed tube, with circular section of "blob" on inboard end:
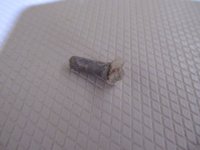
This photo shows a row of the holes after the rivets/tubes were removed:

I thought about the original problem, and debated cutting a few weep holes/slots in the bottom of the rail. For now I decided not to, as I figured it might just clog anyway. I can always go back and do it later if I change my mind. My next decision was fastener type and material. I was loathe to use stainless, since this would set up a mixed metal situation, and worse, the metal would likely be sitting in a "soup." So I thought about using aluminum machine screws, so no mixed metals. I really wasn't sure if they would be strong enough or not. I mean, it's only a rubrail, but it does take a fair bit of tension/force to hold it to the side of the boat.
So I tried aluminum fasteners in a dry fit experiment on the "worst" offender (most tension to hold together), which was the little piece on the transom just after the 90º bend. What ended up happening was the threads on the machine screw stripped. Now, this may have been my fault, as I used a plain stainless nut. Reason was I wanted to feel how it was going (for the experiment) and I only had Nylocks in aluminum, which don't provide much feel. I reasoned that an aluminum nut might not have caused this, because it would have had "just as much motivation" to keep on tightening as it would to strip, whereas maybe the stainless, being stronger, could be "lazy" and just start cutting into the threads on the aluminum fastener vs. keeping on tightening. My buddy who was helping me thought that made no difference, and either one would have stripped the screw. At any rate, I decided to skip the aluminum and go stainless. The last thing I wanted was a bunch of stripped fasteners. If I had been doing the whole rail I might have done more experimentation and not given up so easily on the aluminum.
Next I had to figure out head style. 98% of the holes in the rubrail are tapered (to fit a tapered head screw), although one or two added holes (where they needed an additional fastener) are just plain. Still, a couple of them were slightly enlarged (where the broken rivets had allowed some movement), and…. I just wanted a bit more bearing area. On the other hand, I didn't want so much "stuff" protruding (washer, panhead screw head) that it would get in the way of the rubber insert. Ultimately, I decided to use Truss headed screws, which have a wider flat head (no taper in the shank) and can be used without washers -- for plenty of bearing area but no excess height. On the inside, although I usually like to use washer/lockwasher/nut, I decided to go with Nylock type nuts for the least protrusion. It looked as though 1" fasteners would leave the screw just, juuuuust coming out the end of the Nylock (this turned out to be right, and 1" was perfect). I also thought about acorn nuts for looks (with lockwashers) but that would protrude further into the cabin. And I even bought some locking acorn nuts, but when they arrived they were some unusual alloy of stainless (forget which, but not 304 or 316) and were really ugly looking (dull, pitted, etc.) so I ruled those out. I also got some "thin" Nylocks in case that might be needed. And some 1-1/4" screws just in case. 1" and 3/4" fender washers for the inside. I bought all of the fasteners/washers/nuts in 316 alloy stainless since it is less corrosion-prone than 304. Size #10 fit perfectly (see materials list below). Another factor is that most of these aren't going to show. All the ones on the starboard side are either under the galley or behind the shift selector; the ones in the port lazarette are out of sight, and the ones on port side, while they do show slightly, are mostly out of sight under the side deck or behind the forward seat cushion. If I were doing long swaths of obvious ones (v-berth), I might have chosen the acorn nuts even if they protruded more.
To try to isolate the mixed metals as much as possible I took a few measures.
1) I got some extremely thin isolating washers from McMaster-Carr to use on the outside under the truss heads. They are sort of the feel/thickness of mylar.
2) I coated the fasteners with Tef-Gel (should also keep nut from galling).
3) I was liberal with the caulk
4) I think I may go back and put some Te-Gel on the outside of the fastener heads (in the rail behind the rubber) but not sure on that yet. Stainless does like to have oxygen contact.
Next to decide on sealant. I really like butyl and usually use it anywhere I can. I would have used it here except that since I was only doing a short section of rail on each side, I really had no way to get it in behind the rail to lay in butyl tape. The "gunnable" butyl has a lot of mineral spirits in it and I don't like it as well as the putty/tape style. And I wanted a gunnable caulk. For me that left it between polysulfide and polyether. I've had such bad luck lately in getting polysulfide that wasn't half gone off already in the tube, that I decided to use polyether. The one regret I have on this is that I have never (yet) had to remove it, so I don't know how hard that might be (butyl and polysulfide both clean up like a dream when you have to remove them). I might have tried harder to get good polysulfide if I were doing the whole rail (or used butyl). In this case I decided to use 3M4000 in a caulk tube, so gunnable.
The last thing I had some misgivings about was putting the new washers/nuts right over the "blobs" on the inside of the boat, but I somewhat reluctantly decided to try it, since others had, and it certainly would be easier cosmetically. However…. I was not at all happy with the way that worked in reality, at least on my boat. First of all, the blobs were fairly flexible. I was concerned that as they slowly compressed over time, the fasteners would loosen (or they would stay the same due to the Nylocks but the now "thinner" hull would allow the rail to loosen and to move around). Second, the hull behind the blobs is not flat (it is in the hull-deck joint area) but is concave in varying degrees, and so the washers were turning into "Pringles" as they were tightened. I just wasn't happy with it. I remember reading in one of the Pardeys' early books that when Larry Pardey was a young boatbuilder, an old sage builder once told him, "Larry, if there is any part or method you are having second thoughts about as you are putting it into the boat, just pull it out then and do it right; you'll be glad later." He did and was. So I decided not to continue with "the blobs." Of course I had to resist the temptation to just keep on going and "get 'er done," but in the end I'm glad I didn't keep going that way.
Instead, next I held the 1" washers up on the inside of the hull, centered on the hole, and traced around them with a pencil. Then I used an X-acto knife to cut a circle from the blob, and then chiseled the blob away inside the circle down to bare fiberglass. This went pretty easily and I had them all done in a an hour or so. Once I had a few of these removed "blob circles" to experiment on, I used various solvents on them. Reason is the blobs just did not feel like 5200 (polyurethane) to me. And they were such neat little blobs, and 5200 is not that easy to make perfect like that. Lastly, they seemed a bit too soft for ten-year-old 5200. Well given that mineral spirits was able to dissolve them, plus their texture, plus evidence where it was used in other places on the boat (water fill, a through hull), I think it was polysulfide. I was not at all sorry about this, as it meant it would be easy to remove/clean up wherever I wanted to (and it was). So I cut all of the subject blobs away in 1" diameter circles, sanded then cleaned up the fiberglass beneath, taped off, and then applied thickened epoxy slightly generously. When that got to the early green stage (still somewhat pliable), I wrapped a 1" washer in clear packaging tape, with a "tail" to grip on one side, and then pressed it into the green epoxy such as to flatten it perpendicular to the hull. Because of the remaining blob and the overall shape of the hull there, there was no easy way to do it the usual way (with a big straight edge like concrete). Then I let it get a bit firmer and chiseled away any excess, only leaving the 1" circle of flatness/epoxy. I also epoxy filled (and then re-drilled) a couple of the holes that were a bit sloppy in the hull.
I still had some cosmetics to think about. If I do this more extensively later (i.e. more of the rail comes loose), I will do it when I have a month or more, chisel off all of the blobs entirely, epoxy the area to make it flat, let the epoxy cure for a good long while, and then paint over the entire area (before putting the fasteners on). In this case I didn't have enough time to really let the epoxy cure (paint/gelcoat doesn't dry well on recently cured epoxy), and the fasteners were mostly in unseen areas. Still, I did chisel off one entire blob just as an experiment. What I will do this time is let the epoxy continue to cure for some time, and then after Powell I will go back and "hand paint" around the washers. For 14 holes this will not be bad, but for an entire rubrail it would be nicer to do it the other way, and let the epoxy cure, then paint (or gelcoat) nice circles around the whole area before the fasteners go on.
So (once again!) I got everything cleaned up (never figured out if alcohol affects polyether the way it does polyurethane, so to be on the safe side I cleaned/prepped with acetone), taped/masked off five ways from Sunday, cleaned and Tef-Geled the fasteners, got my helper, and away we went. Compared to all the prep and decisions, the actual job went easily/quickly (isn't that always the way), and I felt really good about having the firm/flat surface to put the washers on, vs. the resilient blobs and/or undulating hull.
The procedure went as follows:
1) Have everything masked off and prepped, all tools set out, many little squares of paper towel just in case, solvent to hand, trash bag, disposable gloves on.
2) Helper (outside boat) has container of pre-Tef-Gelled and pre-polyamide washered fasteners, plus screwdriver.
3) Inside the boat, I have the washers, nuts, spanner, and socket/driver, more gloves, towels, and trash bag.
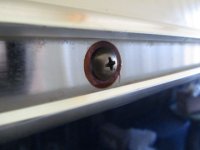
4) I put thumb over hole, while helper guns caulk into outside hole. We somewhat go by feel as to how much sealant to put in. I want a generous amount under the rail and in the hole, but not too much. I want zero sealant outside the rail (ultimately). When we judge it is just right, helper pushes fastener through hole and holds it still (not allowing it to turn) from outside. I clean off the caulk on the end of the fastener, put on washers and nut (1" washer, 3/4" washer, standard locknut), and tighten it down most of the way. We then move and do all seven in a row on one side, then I go back and tighten them further in a staggered pattern, making them fully tight (I don't subscribe to the tighten part way, let it cure, then go back method). The screw itself is held from moving by helper on the outside, so as to disturb the caulk as little as possible. I clean up the (very minimal) overflow inside the boat, then go outside and clean that up, and then we move on to the other side. Here is how they looked after fully tightening and cleaning off excess caulk, plus removing tape and masking (I don't like "beads" of caulk on the outside of things, so did not leave any caulk above or below the rail.)
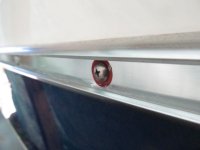
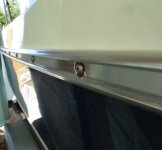
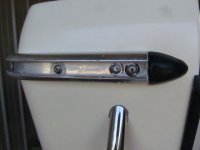
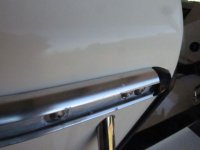
Showing the rail tucked back in to the hull - this was the worst offender in the "separated from boat" category:
And here are some views of the inside. This first is the lazarette. I had to trim a couple of the washers where they had two holes close together securing the end cap. There were never "blobs" in this area. (The larger washer below is the inside of the handrail for the swim platform.) I think I might have used one of the thin Nylocks here, but I may have been able to go back with a normal one after the initial tightening, I forget. Otherwise they all took normal Nylocks and fit just right.
Under galley, where they will never show:
Behind dinette (you can see where I experimentally removed the entire blob around one of the fasteners). I will go back and paint carefully around the washers to improve the cosmetics.
Boy-oh-boy, does it feel good to have this (almost) done! No more having 17 holes in the boat! I am now just letting it cure for a few days, then I will reinstall the rubber strip. I think I'm going to go along and put a little dab of butyl putty on/in the open end of each of the remaining rivets. I don't like the idea that water can get into the tube and just sit there against the blob on the inside of the boat (plus helping to corrode the rivet tube), and since the boat has been indoors since last October (mostly in the dry SW), and wasn't in salt previously, this seems like a good time to do that. It will be easily removed if/when the time comes. I will also go back later, after the epoxy has had longer to cure, and hand paint around the washers on the inside to make them look better, cosmetically. I have some Pettit Easypoxy in "off white" that perfectly matches the "white" gelcoat of the C-Dory (thanks to Carpy for the recommendation). I may or may not first remove the remaining "blobs" (around the new washers, as I did on the one) - still thinking on that. If/when more of the rail comes loose, I'll either just continue as I have, or possible remove it and install the whole thing afresh; I'll figure that out if/when the time comes.
Here is a list of some of the materials used:
Fasteners, from McMaster-Carr, including part numbers:
94792A626 = Type 316 Ss Truss Head Phillips Machine Screw, 10-32 Thread, 1" Length (also had 1-1/4" on hand; did not use).
91435A190 = High-temp Insulating Polyimide Flat Washer, No. 10 Screw Size, .63" Od, .004"-.006" Thick
91525A114 = Type 316 Ss Large-diameter Flat Washer, No. 10 Screw Size, 1" Od, .033"-.047" Thick
91525A115 = Type 316 Ss Large-diameter Flat Washer, No. 10 Screw Size, 3/4" Od, .033"-.047" Thick
90715A115 = Type 316 Ss Nylon-insert Hex Locknut, 10-32 Thread Size, 3/8" Width, 15/64" Height
90101A225 = 18-8 Ss Nylon-insert Thin Hex Locknut, 10-32 Thread Size, 3/8" Width, 11/64" Height (had on hand, might have used one in lazarette)
Also used:
Tef-Gel isolating paste
3M-4000 caulk in gunnable tube
acetone/denatured alcohol/gloves/plastic/blue tape/tools, etc.
My rubrail insert is in great shape, but I did find that you can still buy it new. Jamestown Distributors had the best price for the length needed, but I also found it at other chandleries. It is Taco brand, part number V12-0303 (of course check your boat in case it is not the same).
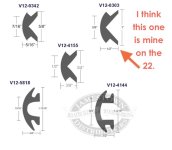
This is a long post, but I figure anyone about to do the job might like to read about and see the details. Otherwise feel free to just scroll past the text and look at the photos
When I first looked at my 22 (before purchasing it), there was already one spot in which the rub rail was coming loose - the few inches on the port-side transom just after the 90º turn. I had read about the problem/fixes here, so put it on my to-do list. It wasn't high up on the list, however, as the fasteners only went into the self-draining port lazarette. But then as I was waxing the boat while it was in storage this winter… I saw that the rail had come loose amidships on both sides. You could see "air" between the rail and the boat, and the rivets had broken. This meant I had holes (or soon to be holes) in each side of the boat amidships. Time to fix!
(Note, these are the slightly smaller versions of each image so no-one has to scroll back and forth. The larger version can be seen in my album, after clicking twice on the thumbnail)
It's a little hard to see in the photo, but where the arrow is pointing you can see air (gravel shows through from ground below). It was much more noticeable in person.

I re-read any threads I could find on the repair, to glean tips and ideas. Comfy Dory did an extensive write up, along with photos in the Comfy Dory album. This along with the accounts of others gave me a good idea what I was up against (thank you to those earlier posters :thup). Of course first I had to bemoan the whole idea: Build a boat, 'glass the hull and deck together (many boats are only bolted/screwed and not glassed) so you have a perfectly watertight vessel…. and then drill 100+ holes just to attach a rubrail, and fasten it with wimpy aluminum rivets :cry Better yet, have a design that catches and holds water…. :amgry Now granted, they were likely to want to put something there - it does cover up the unfinished looking seam between hull and deck - and it is certainly nice to have a rubrail.
I used to have a small fiberglass trailer that had a similar construction (although even worse as they used steel plates inside to anchor the rivets, which rusted and bulged), and some people removed it and went back with a modern heavy rubber automotive (such as on a light truck) "belly band" type molding that attaches with VHB tape. That might not hold up (not sure), would not stand as proud (disadvantage) and you'd have to do some smoothing of the hull-deck joint. So I nixed that idea. Then I thought of a big/heavy rubber profile that I have seen on some boats, wherein there is no metal. The rubber "gives" such that when you tighten it it basically makes a seal against the boat (and there may not be a channel to hold water against the fasteners). Also the fasteners may not be buried/covered such that they rest in the soup. I didn't look too heavily into that at this time though, because I decided not to completely pull the rails off since only a small section on each one had failed.
Backing up a little, to begin the repair/thought process, I removed the rubber molding that covers the fasteners (rivets) on our rails. What I found was that 90% of them were in good shape, but seven of them on each side (more or less amidships) were deteriorated or broken. This is where "low point" water can sit.


If you look closely at the tip of the arrow in the above photo, you can see the broken end of the rivet tube. That would have been at the outside of the rail, attached to the rivet head - so you can see how the rail has pulled away after the rivet head broke. Where the rail bulges it makes it look like there is "too much rail" (and indeed I found where several others had mentioned this and said they were even thinking of cutting out a small section of "extra"), but I found that when it is sucked back in with new fasteners it fits perfectly, at least on my boat.
The rest of them looked pristine (although I expect that eventually they might fail).

Since I had other things on my project list, and I didn't have extensive helper availability where I am now (but I did have some, yay), I decided to repair just the rivets that had failed or were about to fail. My reasoning went like this:
1) The current problem will be fixed, literally better than new.
2) If/when future rivets fail, I may choose not to remove the complete rail, but instead to leave the middle section I just repaired, and "wing out" the forward and aft sections on both sides, so that I'm essentially doing the rest of it in four sections. I found out by doing this section that while it would be nice to remove the whole rail for some reasons, I can do it in place. And with the "wings" it would only be one or two rivets (close to the now-repaired section) that would have limited access - the rest of the rail should pull out plenty far. A side benefit would be not having huge "loose" rails to deal with.
3) Or, if I do want to remove the whole thing, and/or replace it with something different, I can always undo the fasteners I just used for the repair and take the whole rail off then.
So next I set to removing the broken rivets. First to explain (likely obvious) that where the rivets terminate on the inside is a "blob" of slightly rubbery material that covers the rivet. This was said to be 5200 in many posts. This is then gelcoated over when the whole inside of the hull is done (sprayed type, not molded). So there is the issue of how to handle that. About half of the to-be-replaced rivet's heads had fallen off and were lying in the rail gutter. The ones that were still on were mostly easy to drill off, except for a few where the mandrel was still in them (little rod blocking hole) - those were a pain. I wondered if that was steel and hence the corrosion was hastened? Once I had all the heads off, it was time to drive the body/back of the rivet into the boat and remove it. I saw where Comfy Dory had found that if he simply drove them in, they pulled off a ragged bunch of "the blob," which was a cosmetic problem. So he used a piece of thinwall pipe and from the inside, cut a circle in the blob around the rivet, so that when he drove the rivet in, only a neat circle of blob was removed. I did the same thing, utilizing a punch/cutter that you use to cut a circle of fabric before installing a grommet (#2 I think). I just rotated it back and forth (clockwise and anti-clockwise) and cut the blob that way. This worked very well.


I then used a nail set in the tube on the outside, and hammered the rivet into the boat. Here is a removed tube, with circular section of "blob" on inboard end:

This photo shows a row of the holes after the rivets/tubes were removed:

I thought about the original problem, and debated cutting a few weep holes/slots in the bottom of the rail. For now I decided not to, as I figured it might just clog anyway. I can always go back and do it later if I change my mind. My next decision was fastener type and material. I was loathe to use stainless, since this would set up a mixed metal situation, and worse, the metal would likely be sitting in a "soup." So I thought about using aluminum machine screws, so no mixed metals. I really wasn't sure if they would be strong enough or not. I mean, it's only a rubrail, but it does take a fair bit of tension/force to hold it to the side of the boat.
So I tried aluminum fasteners in a dry fit experiment on the "worst" offender (most tension to hold together), which was the little piece on the transom just after the 90º bend. What ended up happening was the threads on the machine screw stripped. Now, this may have been my fault, as I used a plain stainless nut. Reason was I wanted to feel how it was going (for the experiment) and I only had Nylocks in aluminum, which don't provide much feel. I reasoned that an aluminum nut might not have caused this, because it would have had "just as much motivation" to keep on tightening as it would to strip, whereas maybe the stainless, being stronger, could be "lazy" and just start cutting into the threads on the aluminum fastener vs. keeping on tightening. My buddy who was helping me thought that made no difference, and either one would have stripped the screw. At any rate, I decided to skip the aluminum and go stainless. The last thing I wanted was a bunch of stripped fasteners. If I had been doing the whole rail I might have done more experimentation and not given up so easily on the aluminum.
Next I had to figure out head style. 98% of the holes in the rubrail are tapered (to fit a tapered head screw), although one or two added holes (where they needed an additional fastener) are just plain. Still, a couple of them were slightly enlarged (where the broken rivets had allowed some movement), and…. I just wanted a bit more bearing area. On the other hand, I didn't want so much "stuff" protruding (washer, panhead screw head) that it would get in the way of the rubber insert. Ultimately, I decided to use Truss headed screws, which have a wider flat head (no taper in the shank) and can be used without washers -- for plenty of bearing area but no excess height. On the inside, although I usually like to use washer/lockwasher/nut, I decided to go with Nylock type nuts for the least protrusion. It looked as though 1" fasteners would leave the screw just, juuuuust coming out the end of the Nylock (this turned out to be right, and 1" was perfect). I also thought about acorn nuts for looks (with lockwashers) but that would protrude further into the cabin. And I even bought some locking acorn nuts, but when they arrived they were some unusual alloy of stainless (forget which, but not 304 or 316) and were really ugly looking (dull, pitted, etc.) so I ruled those out. I also got some "thin" Nylocks in case that might be needed. And some 1-1/4" screws just in case. 1" and 3/4" fender washers for the inside. I bought all of the fasteners/washers/nuts in 316 alloy stainless since it is less corrosion-prone than 304. Size #10 fit perfectly (see materials list below). Another factor is that most of these aren't going to show. All the ones on the starboard side are either under the galley or behind the shift selector; the ones in the port lazarette are out of sight, and the ones on port side, while they do show slightly, are mostly out of sight under the side deck or behind the forward seat cushion. If I were doing long swaths of obvious ones (v-berth), I might have chosen the acorn nuts even if they protruded more.
To try to isolate the mixed metals as much as possible I took a few measures.
1) I got some extremely thin isolating washers from McMaster-Carr to use on the outside under the truss heads. They are sort of the feel/thickness of mylar.
2) I coated the fasteners with Tef-Gel (should also keep nut from galling).
3) I was liberal with the caulk
4) I think I may go back and put some Te-Gel on the outside of the fastener heads (in the rail behind the rubber) but not sure on that yet. Stainless does like to have oxygen contact.
Next to decide on sealant. I really like butyl and usually use it anywhere I can. I would have used it here except that since I was only doing a short section of rail on each side, I really had no way to get it in behind the rail to lay in butyl tape. The "gunnable" butyl has a lot of mineral spirits in it and I don't like it as well as the putty/tape style. And I wanted a gunnable caulk. For me that left it between polysulfide and polyether. I've had such bad luck lately in getting polysulfide that wasn't half gone off already in the tube, that I decided to use polyether. The one regret I have on this is that I have never (yet) had to remove it, so I don't know how hard that might be (butyl and polysulfide both clean up like a dream when you have to remove them). I might have tried harder to get good polysulfide if I were doing the whole rail (or used butyl). In this case I decided to use 3M4000 in a caulk tube, so gunnable.
The last thing I had some misgivings about was putting the new washers/nuts right over the "blobs" on the inside of the boat, but I somewhat reluctantly decided to try it, since others had, and it certainly would be easier cosmetically. However…. I was not at all happy with the way that worked in reality, at least on my boat. First of all, the blobs were fairly flexible. I was concerned that as they slowly compressed over time, the fasteners would loosen (or they would stay the same due to the Nylocks but the now "thinner" hull would allow the rail to loosen and to move around). Second, the hull behind the blobs is not flat (it is in the hull-deck joint area) but is concave in varying degrees, and so the washers were turning into "Pringles" as they were tightened. I just wasn't happy with it. I remember reading in one of the Pardeys' early books that when Larry Pardey was a young boatbuilder, an old sage builder once told him, "Larry, if there is any part or method you are having second thoughts about as you are putting it into the boat, just pull it out then and do it right; you'll be glad later." He did and was. So I decided not to continue with "the blobs." Of course I had to resist the temptation to just keep on going and "get 'er done," but in the end I'm glad I didn't keep going that way.
Instead, next I held the 1" washers up on the inside of the hull, centered on the hole, and traced around them with a pencil. Then I used an X-acto knife to cut a circle from the blob, and then chiseled the blob away inside the circle down to bare fiberglass. This went pretty easily and I had them all done in a an hour or so. Once I had a few of these removed "blob circles" to experiment on, I used various solvents on them. Reason is the blobs just did not feel like 5200 (polyurethane) to me. And they were such neat little blobs, and 5200 is not that easy to make perfect like that. Lastly, they seemed a bit too soft for ten-year-old 5200. Well given that mineral spirits was able to dissolve them, plus their texture, plus evidence where it was used in other places on the boat (water fill, a through hull), I think it was polysulfide. I was not at all sorry about this, as it meant it would be easy to remove/clean up wherever I wanted to (and it was). So I cut all of the subject blobs away in 1" diameter circles, sanded then cleaned up the fiberglass beneath, taped off, and then applied thickened epoxy slightly generously. When that got to the early green stage (still somewhat pliable), I wrapped a 1" washer in clear packaging tape, with a "tail" to grip on one side, and then pressed it into the green epoxy such as to flatten it perpendicular to the hull. Because of the remaining blob and the overall shape of the hull there, there was no easy way to do it the usual way (with a big straight edge like concrete). Then I let it get a bit firmer and chiseled away any excess, only leaving the 1" circle of flatness/epoxy. I also epoxy filled (and then re-drilled) a couple of the holes that were a bit sloppy in the hull.
I still had some cosmetics to think about. If I do this more extensively later (i.e. more of the rail comes loose), I will do it when I have a month or more, chisel off all of the blobs entirely, epoxy the area to make it flat, let the epoxy cure for a good long while, and then paint over the entire area (before putting the fasteners on). In this case I didn't have enough time to really let the epoxy cure (paint/gelcoat doesn't dry well on recently cured epoxy), and the fasteners were mostly in unseen areas. Still, I did chisel off one entire blob just as an experiment. What I will do this time is let the epoxy continue to cure for some time, and then after Powell I will go back and "hand paint" around the washers. For 14 holes this will not be bad, but for an entire rubrail it would be nicer to do it the other way, and let the epoxy cure, then paint (or gelcoat) nice circles around the whole area before the fasteners go on.
So (once again!) I got everything cleaned up (never figured out if alcohol affects polyether the way it does polyurethane, so to be on the safe side I cleaned/prepped with acetone), taped/masked off five ways from Sunday, cleaned and Tef-Geled the fasteners, got my helper, and away we went. Compared to all the prep and decisions, the actual job went easily/quickly (isn't that always the way), and I felt really good about having the firm/flat surface to put the washers on, vs. the resilient blobs and/or undulating hull.
The procedure went as follows:
1) Have everything masked off and prepped, all tools set out, many little squares of paper towel just in case, solvent to hand, trash bag, disposable gloves on.
2) Helper (outside boat) has container of pre-Tef-Gelled and pre-polyamide washered fasteners, plus screwdriver.
3) Inside the boat, I have the washers, nuts, spanner, and socket/driver, more gloves, towels, and trash bag.
4) I put thumb over hole, while helper guns caulk into outside hole. We somewhat go by feel as to how much sealant to put in. I want a generous amount under the rail and in the hole, but not too much. I want zero sealant outside the rail (ultimately). When we judge it is just right, helper pushes fastener through hole and holds it still (not allowing it to turn) from outside. I clean off the caulk on the end of the fastener, put on washers and nut (1" washer, 3/4" washer, standard locknut), and tighten it down most of the way. We then move and do all seven in a row on one side, then I go back and tighten them further in a staggered pattern, making them fully tight (I don't subscribe to the tighten part way, let it cure, then go back method). The screw itself is held from moving by helper on the outside, so as to disturb the caulk as little as possible. I clean up the (very minimal) overflow inside the boat, then go outside and clean that up, and then we move on to the other side. Here is how they looked after fully tightening and cleaning off excess caulk, plus removing tape and masking (I don't like "beads" of caulk on the outside of things, so did not leave any caulk above or below the rail.)


Showing the rail tucked back in to the hull - this was the worst offender in the "separated from boat" category:

And here are some views of the inside. This first is the lazarette. I had to trim a couple of the washers where they had two holes close together securing the end cap. There were never "blobs" in this area. (The larger washer below is the inside of the handrail for the swim platform.) I think I might have used one of the thin Nylocks here, but I may have been able to go back with a normal one after the initial tightening, I forget. Otherwise they all took normal Nylocks and fit just right.

Under galley, where they will never show:


Behind dinette (you can see where I experimentally removed the entire blob around one of the fasteners). I will go back and paint carefully around the washers to improve the cosmetics.


Boy-oh-boy, does it feel good to have this (almost) done! No more having 17 holes in the boat! I am now just letting it cure for a few days, then I will reinstall the rubber strip. I think I'm going to go along and put a little dab of butyl putty on/in the open end of each of the remaining rivets. I don't like the idea that water can get into the tube and just sit there against the blob on the inside of the boat (plus helping to corrode the rivet tube), and since the boat has been indoors since last October (mostly in the dry SW), and wasn't in salt previously, this seems like a good time to do that. It will be easily removed if/when the time comes. I will also go back later, after the epoxy has had longer to cure, and hand paint around the washers on the inside to make them look better, cosmetically. I have some Pettit Easypoxy in "off white" that perfectly matches the "white" gelcoat of the C-Dory (thanks to Carpy for the recommendation). I may or may not first remove the remaining "blobs" (around the new washers, as I did on the one) - still thinking on that. If/when more of the rail comes loose, I'll either just continue as I have, or possible remove it and install the whole thing afresh; I'll figure that out if/when the time comes.
Here is a list of some of the materials used:
Fasteners, from McMaster-Carr, including part numbers:
94792A626 = Type 316 Ss Truss Head Phillips Machine Screw, 10-32 Thread, 1" Length (also had 1-1/4" on hand; did not use).
91435A190 = High-temp Insulating Polyimide Flat Washer, No. 10 Screw Size, .63" Od, .004"-.006" Thick
91525A114 = Type 316 Ss Large-diameter Flat Washer, No. 10 Screw Size, 1" Od, .033"-.047" Thick
91525A115 = Type 316 Ss Large-diameter Flat Washer, No. 10 Screw Size, 3/4" Od, .033"-.047" Thick
90715A115 = Type 316 Ss Nylon-insert Hex Locknut, 10-32 Thread Size, 3/8" Width, 15/64" Height
90101A225 = 18-8 Ss Nylon-insert Thin Hex Locknut, 10-32 Thread Size, 3/8" Width, 11/64" Height (had on hand, might have used one in lazarette)
Also used:
Tef-Gel isolating paste
3M-4000 caulk in gunnable tube
acetone/denatured alcohol/gloves/plastic/blue tape/tools, etc.
My rubrail insert is in great shape, but I did find that you can still buy it new. Jamestown Distributors had the best price for the length needed, but I also found it at other chandleries. It is Taco brand, part number V12-0303 (of course check your boat in case it is not the same).

Sunbeam
Active member
- Joined
- Feb 23, 2012
- Messages
- 3,990
- Reaction score
- 0
- C Dory Year
- 2002
- C Dory Model
- 22 Cruiser
While I was under the galley (literally) doing the rubrail repair, I thought I'd photograph my "four-hour galley stowage" mod. I put this together last year before going to Powell. Basically, the area under the galley was just a big hole, which didn't lend itself to efficient stowage. I was on the road, so had limited access to supplies, tools, and workbenchery. I also didn't know for sure what I wanted. So cheap and easy functioning "mockup" was the order of the day.
To start, I found some inexpensive bins and wire baskets that would fit, and then designed/built a flat platform with stowage underneath. I just used basic pine 1x stock, on which I had the main cuts made at Home Depot where I bought the material. I put it together with deck screws. The whole thing is self-supporting, and it not attached to the boat at all (except a few plumbing hoses are tied into it with P clamps). Yet it is wedged in so it is all 100% tight and doesn't move around. I figured that after using it awhile I would make a better one of finished marine ply, possibly modifying it after some experience using it.
The part I had to customize/cut on my own was the three "floors" that support the bottom platform. There is one right forward, one in the center, and one aft up against the mini-bilge sump that holds the cabin bilge pump on my era boat. I made mockups of cardboard, and then used a jigsaw that I carry with me to cut the same shape out of a 1x board.
After five weeks using it on Powell (with two of us aboard), I'm really happy with it all. Sure, I would prefer more "yacht like" drawers and bins on top of the platform, but not sure I would change anything about the platform itself. Right now the boat is in "storage" mode, so the items in the bins are just various things that ended up there, not how I used it when actually underway. Here is an overview:
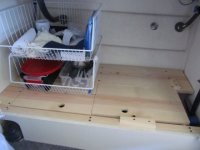
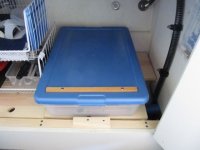
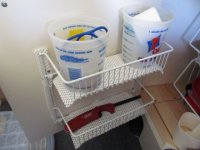
The wire bins are held down to the outboard section of the platform with small plastic clips and screws. Two tubs fit on the right side and the top one functions like a drawer. Cleats hold them in place.
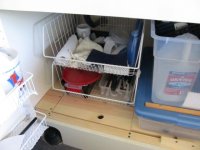
The cleat on the lid of the lower tub keeps the upper one from sliding inboard and contacting the locker door.
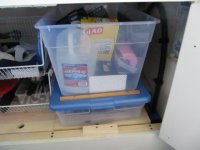
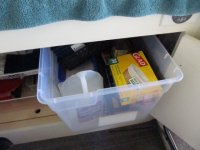
The upper tub functions as a sort of deep drawer.
Coated wire storage on door ("quickie" version of teak rack). The scoot guard is because otherwise there is some percussive resonance due to the wire.
After compartment lid partially opened. These are not hinged because I prefer hatch lids that can be slid partially open and/or removed completely.
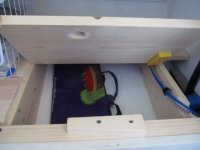
Forward compartment lid partially opened.
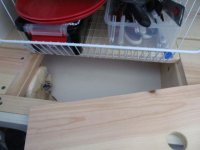
Both lids and after tubs completely removed.
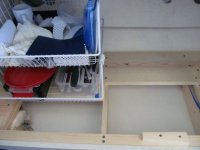
Looking forward under the forward compartment. As a part of re-plumbing I re-routed the hose that leads back to the water tank. Previously it made a big loop and then ran aft alongside the inboard edge of the galley, taking up good stowage space (and making it hard to clean). Now it leads back along the forward side of the galley, then along the hull side outboard, and then from there back to where it exits the galley and runs across to port to the water tank. I also removed the foot pump from the sole and overdrilled/filled the mounting holes withe thickened epoxy, then re-drilled them (along with all of the angles and the holes where P-clamps formerly fastened the water hose to the hull - it now only fastens to "walls" and not into the hull at all).
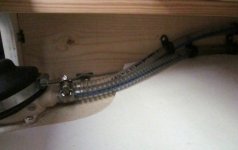
Water line as it runs aft along the outboard/hull side.
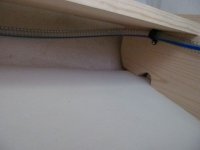
Water line as it runs along the after stowage support, and then over it to meet up with the original hole in the galley base where it goes into the cabin and then across to port.
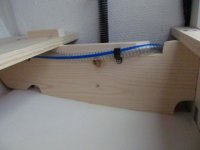
This is a detail shot of the center support for the platform. The white on the bottom is a layer of shelving foam/padding/liner that I laid on the hull. It is removable for cleaning. You can get a pretty good idea of how the whole thing was put together in this photo.
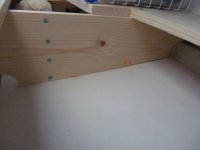
Moving up, this is a cover I made for the sink - the hole is so that if the faucet drips it goes into the sink. In this photo I have it in a varnish room. I made a similar cover, sans hole, to fit into the square hole where the Wallas used to be. It's been surprisingly handy to be able to remove that when doing various projects under the galley, although ultimately I may replace the whole countertop and likely would not duplicate that hole (unless I fit a stove there). I've found the sink cover handy for other things - if I flip it upside down the cleats that hold it in place make it a sort of fiddled tray. This was just made of a couple of pieces of scrap 1/8" ply epoxied together to make a 1/4" board and then cut out, sanded, and varnished.
To start, I found some inexpensive bins and wire baskets that would fit, and then designed/built a flat platform with stowage underneath. I just used basic pine 1x stock, on which I had the main cuts made at Home Depot where I bought the material. I put it together with deck screws. The whole thing is self-supporting, and it not attached to the boat at all (except a few plumbing hoses are tied into it with P clamps). Yet it is wedged in so it is all 100% tight and doesn't move around. I figured that after using it awhile I would make a better one of finished marine ply, possibly modifying it after some experience using it.
The part I had to customize/cut on my own was the three "floors" that support the bottom platform. There is one right forward, one in the center, and one aft up against the mini-bilge sump that holds the cabin bilge pump on my era boat. I made mockups of cardboard, and then used a jigsaw that I carry with me to cut the same shape out of a 1x board.
After five weeks using it on Powell (with two of us aboard), I'm really happy with it all. Sure, I would prefer more "yacht like" drawers and bins on top of the platform, but not sure I would change anything about the platform itself. Right now the boat is in "storage" mode, so the items in the bins are just various things that ended up there, not how I used it when actually underway. Here is an overview:

The wire bins are held down to the outboard section of the platform with small plastic clips and screws. Two tubs fit on the right side and the top one functions like a drawer. Cleats hold them in place.

The cleat on the lid of the lower tub keeps the upper one from sliding inboard and contacting the locker door.


The upper tub functions as a sort of deep drawer.

Coated wire storage on door ("quickie" version of teak rack). The scoot guard is because otherwise there is some percussive resonance due to the wire.

After compartment lid partially opened. These are not hinged because I prefer hatch lids that can be slid partially open and/or removed completely.

Forward compartment lid partially opened.

Both lids and after tubs completely removed.

Looking forward under the forward compartment. As a part of re-plumbing I re-routed the hose that leads back to the water tank. Previously it made a big loop and then ran aft alongside the inboard edge of the galley, taking up good stowage space (and making it hard to clean). Now it leads back along the forward side of the galley, then along the hull side outboard, and then from there back to where it exits the galley and runs across to port to the water tank. I also removed the foot pump from the sole and overdrilled/filled the mounting holes withe thickened epoxy, then re-drilled them (along with all of the angles and the holes where P-clamps formerly fastened the water hose to the hull - it now only fastens to "walls" and not into the hull at all).

Water line as it runs aft along the outboard/hull side.

Water line as it runs along the after stowage support, and then over it to meet up with the original hole in the galley base where it goes into the cabin and then across to port.

This is a detail shot of the center support for the platform. The white on the bottom is a layer of shelving foam/padding/liner that I laid on the hull. It is removable for cleaning. You can get a pretty good idea of how the whole thing was put together in this photo.

Moving up, this is a cover I made for the sink - the hole is so that if the faucet drips it goes into the sink. In this photo I have it in a varnish room. I made a similar cover, sans hole, to fit into the square hole where the Wallas used to be. It's been surprisingly handy to be able to remove that when doing various projects under the galley, although ultimately I may replace the whole countertop and likely would not duplicate that hole (unless I fit a stove there). I've found the sink cover handy for other things - if I flip it upside down the cleats that hold it in place make it a sort of fiddled tray. This was just made of a couple of pieces of scrap 1/8" ply epoxied together to make a 1/4" board and then cut out, sanded, and varnished.

Sunbeam
Active member
- Joined
- Feb 23, 2012
- Messages
- 3,990
- Reaction score
- 0
- C Dory Year
- 2002
- C Dory Model
- 22 Cruiser
Today (with help!) I hoisted the engine off the boat in order to accomplish a few projects. There were three main motivators:
1) The four engine mount holes (of which the lower two are often submerged) are the last holes in the transom that I have not overdrilled and filled with epoxy. I've been wanting to do that.
2) I wanted to raise the engine up two holes (1-1/2"). I couldn't see doing that, breaking whatever seal there might be on the fasteners, and not doing #1.
3) Availability of hoist and helper :thup, and the boat is under a roof.
In the process of putting it back together I'm going to take care of a few additional items:
4) Possibly add wedges for 5º more tuck.
5) Remove inappropriate sealant and go back with proper stuff.
6) Add a long aluminum bar (TH Marine, made for the purpose) between the two upper fasteners on the inside of the transom (sort of like a big washer).
7) Add larger round washers or a similar bar on the lower fasteners.
8 ) Replace the coarse-thread stainless fasteners (which are full of silicone and will now be too short anyway) with the Yamaha type coated, graded (non-stainless) fine-thread fasteners.
Here the engine is hoisted slightly. I was able to leave both the steering cable and the other rigging (wires, fuel line) attached. Right now I have lines running to the port side stern cleat holding it to port so I can work on the starboard fastener holes; after that I will swing it to starboard and do the port side ones. I "coated" everything in cardboard and blue tape to protect it, and now after finishing up for the day have a sheet draped over the engine powerhead. It's also under a roof.
The fasteners came out easily and had very VERY little sealant on them. There was no sealant in the holes whatsoever - just bare balsa core (thankfully still dry). Since the sealant was silicone amgry) I'm just as glad there wasn't more, but geez, I hate to think what this would have looked like if I'd left it alone for much longer! (Boat has basically been stored indoors, never kept in the water for long.)
It's hard to photograph the inside of a hole, and this is a pretty horrible photo, but I tried. The tan part you see is bare balsa, just how it looked when I pulled the four fasteners out.
Tomorrow I'll start Dremeling out the core - leaving the fiberglass skins as-is - so that there is at least 1/2" or more of it removed all the way around the hole, right on through. Then I'll soak the exposed balsa with neat epoxy, and when that tacks up, fill the entire hole with thickened epoxy. After it cures I'll re-drill the holes through the epoxy. This will help to seal the core, plus provide a solid annulus to resist any compression from the fasteners (there were no signs of it yet, but there are only around 120 hours on the boat).
It's a bit scary having the engine suspended by a hoist (although the hoist is now shored up with more props than are shown in the photos, and I'm going to check it again at midnight). I'll be glad when it is back on the boat!
1) The four engine mount holes (of which the lower two are often submerged) are the last holes in the transom that I have not overdrilled and filled with epoxy. I've been wanting to do that.
2) I wanted to raise the engine up two holes (1-1/2"). I couldn't see doing that, breaking whatever seal there might be on the fasteners, and not doing #1.
3) Availability of hoist and helper :thup, and the boat is under a roof.
In the process of putting it back together I'm going to take care of a few additional items:
4) Possibly add wedges for 5º more tuck.
5) Remove inappropriate sealant and go back with proper stuff.
6) Add a long aluminum bar (TH Marine, made for the purpose) between the two upper fasteners on the inside of the transom (sort of like a big washer).
7) Add larger round washers or a similar bar on the lower fasteners.
8 ) Replace the coarse-thread stainless fasteners (which are full of silicone and will now be too short anyway) with the Yamaha type coated, graded (non-stainless) fine-thread fasteners.
Here the engine is hoisted slightly. I was able to leave both the steering cable and the other rigging (wires, fuel line) attached. Right now I have lines running to the port side stern cleat holding it to port so I can work on the starboard fastener holes; after that I will swing it to starboard and do the port side ones. I "coated" everything in cardboard and blue tape to protect it, and now after finishing up for the day have a sheet draped over the engine powerhead. It's also under a roof.


The fasteners came out easily and had very VERY little sealant on them. There was no sealant in the holes whatsoever - just bare balsa core (thankfully still dry). Since the sealant was silicone
It's hard to photograph the inside of a hole, and this is a pretty horrible photo, but I tried. The tan part you see is bare balsa, just how it looked when I pulled the four fasteners out.

Tomorrow I'll start Dremeling out the core - leaving the fiberglass skins as-is - so that there is at least 1/2" or more of it removed all the way around the hole, right on through. Then I'll soak the exposed balsa with neat epoxy, and when that tacks up, fill the entire hole with thickened epoxy. After it cures I'll re-drill the holes through the epoxy. This will help to seal the core, plus provide a solid annulus to resist any compression from the fasteners (there were no signs of it yet, but there are only around 120 hours on the boat).
It's a bit scary having the engine suspended by a hoist (although the hoist is now shored up with more props than are shown in the photos, and I'm going to check it again at midnight). I'll be glad when it is back on the boat!
Sunbeam
Active member
- Joined
- Feb 23, 2012
- Messages
- 3,990
- Reaction score
- 0
- C Dory Year
- 2002
- C Dory Model
- 22 Cruiser
Me too! It's always interesting to do an experiment -- even better if it is an improvement :lol:
Today I finished reaming out all four of the engine mount holes in the transom so there would be 1/4"-1/2" inch of extra space all the way around (before the core). Solvent washed, then coated everything with a liberal dose of neat epoxy, let that tack up, and then filled the holes completely with thickened epoxy, which is now curing.
Next I have to get the holes drilled properly again (a bit nervous about this, but will cross that bridge when I come to it). I'm also going to install the tilt/trim parts I got from the Yamaha dealer.... I guess they are "valves," there is one on each side of the engine... This will supposedly fix the "slow sinking" issue I had when I would put the engine up and then leave it (such as overnight). They typically take the engine off the transom to do it, so now is the time (and if all goes well I will not have to take it to the shop).
Will be nice to have it on the transom again!
Sunbeam
Active member
- Joined
- Feb 23, 2012
- Messages
- 3,990
- Reaction score
- 0
- C Dory Year
- 2002
- C Dory Model
- 22 Cruiser
I came to post something else, and see I never updated on the motor project. I accomplished most, but not all, of my objectives. To re-cap, they were as follows, with notes as to how it went:
1) The four engine mount holes (of which the lower two are often submerged) are the last holes in the transom that I have not overdrilled and filled with epoxy. I've been wanting to do that.
This was accomplished, as noted above. Good thing, too, as the holes were basically bare (dry, whew) balsa core. Now they are thoroughly back-filled with thickened epoxy, so the core is sealed off the the transom is more "crush proof" when the fasteners are snugged up. I was a bit nervous about the re-drilled holes coming out just right, placement-wise, but they did.
2) I wanted to raise the engine up two holes (1-1/2"). I couldn't see doing that, breaking whatever seal there might be on the fasteners, and not doing #1.
This was done. The engine is now on the highest setting. I don't have my notes to hand as to the specs of the effect, but I do remember it's an improvement (will have to look at log next time at boat). Previously the Perma-trim was "buried" instead of riding along near the surface as it is supposed to.
3) Availability of hoist and helper Thumbs Up, and the boat is under a roof.
Thanks again to my super capable helper and the friendly neighbor who loaned us the engine hoist.
4) Possibly add wedges for 5º more tuck.
I would like to have done this, but after test fitting the wedges I bought, I didn't like how they reduced the faying surface for sealant (less than the motor bracket had without them). I still think the wedges would provide an improvement, but wasn't able to get the ones I (too late) realized would work better in time to mount them on this go-round (maybe when I re-power someday).
5) Remove inappropriate sealant and go back with proper stuff.
Done. Ahhh. (Stupid silicone.)
6) Add a long aluminum bar (TH Marine, made for the purpose) between the two upper fasteners on the inside of the transom (sort of like a big washer).
I did this and was happy with the results. Would do it again in hindsight. The inner transom gelcoat was fine, but I never liked how the relatively small washers sat on the gelcoat.
7) Add larger round washers or a similar bar on the lower fasteners.
The bar wasn't a good fit on the lower washers, because it depends on a totallly flat mounting surface. The upper fasteners have that, as the upper/inner transom is molded gelcoat. But the lower/inner transom is laid fiberglass, and as such is not flat enough over the entire surface. Since this was not strictly needed anyway, what I did in instead was make large "washers" out of fiberglass board (something like 3" diameter), and put them between the metal washers and the inner transom.
8 ) Replace the coarse-thread stainless fasteners (which are full of silicone and will now be too short anyway) with the Yamaha type coated, graded (non-stainless) fine-thread fasteners.
Done, and I like these fasteners a lot better. I needed slightly different length ones anyway for better fit.
9) Install Yamaha repair parts to tilt mechanism to hopefully cure "slowly sinking" problem when raised up.
I wasn't able to get this done. Reason is that I couldn't get the old ones loose (at least not with any tools I had, combined with any amount of force I was comfortable putting on them). Will leave this for the pros at some point. The shop said installing them would be easy once I had the engine off the transom; I think they were probably right, but getting the old ones out... not so much!
Sunbeam
Active member
- Joined
- Feb 23, 2012
- Messages
- 3,990
- Reaction score
- 0
- C Dory Year
- 2002
- C Dory Model
- 22 Cruiser
What I actually came here to post about, was the project of making V-berth hatches to access the space below the V-berth flat, which I did last summer.
Ever since buying my 22, I've had it in mind that I wanted to cut hatches into the V-berth flat. There were a couple of reasons for this. One is that I just don't like an "inaccessible" area in a boat if I can help it. I like to be able to get to the hull to see things, clean, possibly effect a repair, etc. Two is that I could make use of the additional storage space (keeping in mind that weight in the ends is not advantageous, but I have a number of bulky, light-for-their-size things I could stow there).
I knew that some C-Dories had foam in this bow section. If mine did, it could provide flotation, but that is not required on a boat of this size, and on balance I prefer the accessibility. Also, I knew that some of the foam "installs" were basically a volcano-mound of spray in foam right under the plug area. Not super-effective. This is a personal decision though, and some people are probably more comfortable with foam there (if so, I'd recommend checking it out, since there is so much variation and one might not have the amount they think they do - I've heard of none, random blocks, spray-in, etc.). Since many Brats reported that the foam was hard-to-get-out sprayed in foam, I was hoping to hit the "jackpot" of no foam, to make the job easier. I had taken out a ~6" round access hatch under the porta-potti area and that was totally foamed in place (bad sign), but OTOH there were no plugs in the V-berth flat (good sign?). Well, time to find out!
First I removed everything from the berth area and taped it all off (to keep the rest of the boat non-dusty), plus protected the v-berth sole. Then I used cardboard and a tape measure to "try on" different hatch sizes and placements. I knew I would not be using commercial hatches, so I didn't have the constraints of their available sizes. I planned to either make plywood hatch covers, or possibly re-use the cutouts. I like the style of hatch that sits flush with the berth flat and has no hinges - that way the option exists of sliding it partway open without having to completely lift or remove the foam (sometimes I just want to grab something small).
I purposely kept the forward edge of the two aft hatches back a bit from the forward end of the footwell, because I didn't want to compromise the integrity of the berth top by having a "thin" area there between the after hatches and the forward hatch. I also might consider glassing in mini-bulkheads at some point in future, and I wanted to leave a landing pad for that option. Additionally, I wanted to be able to slide the hatch lids far enough open to access at least some things in the lockers without having to remove the cushions, so I wanted to leave some space outboard of the hatches for that (and forward of the forward hatch).
Other considerations were whether to make the aft openings parallel with the centerline of the boat, or with the edge of the footwell (I chose the latter). I also wanted to re-use my cutout pattern for the forward hatch (by just cutting it down) so that was another consideration.
Once I had decided on the sizes, I went ahead and cut a pattern for the larger hatches out of 1/2" plywood. I didn't have a huge selection of tools at my disposal, so my plan was to run a jigsaw around on the top of the pattern, with the blade snugged up against the outer edge. I knew this would not make a perfect cut, but I felt it would be acceptable.
I then cut a batten to fasten to the top of the pattern, which would keep the pattern from falling into the hole as I neared the end of the cut. It had one center screw so I could rotate it around as I went. I used a second screw near the inboard edge of the pattern to keep the pattern from rotating or moving. The hole from each screw would later be eclipsed by a finger hole (one in the middle and one near the inboard edge - I find both convenient for different scenarios).
Next I set up a vacuum and suited up (Tyvek, respirator, goggles, etc.), then cut out the first hole. I both won and lost the lottery in that there was no "stuck in place" spray foam; but the whole thing was filled TO THE BRIM with solid expanded polystyrene blocks. Well, I'd worry about that after cutting all three holes.
I moved the pattern to the other side and cut the second hole just like the first one. Then I cut the pattern down and used it again for the forward hatch. Both additional hatch cutouts revealed solid foam blocks right up to the top.
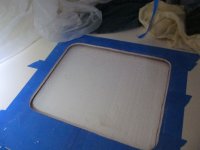
Now, how to get this foam out? It turned out to be more of a battle than I'd have anticipated. I was able to saw down partway, but none of my saws were as deep as the deep portion of the hatch (inboard). Two-foot square to the rescue! I "sawed" all the way around using the square on the deep parts (oh my aching hands), but the blocks STILL wouldn't come out. As I later figured out, here is how the V-berth must have been constructed:
1) Start out with bare hull in bow section.
2) Lay down grid of 2" masking tape over the inside of the hull, sticky side up.
3) Place pre-cut HUGE blocks of foam on tape.
4) Place V-berth flat (top) and tab it to the hull sides.
You'd think "Oh, masking tape, it's weak!" But oh no. Because it was lying right on the hull (under huge blocks of foam) there was no real good way to cut it. Well, eventually I prevailed, but I hope no-one was just outside the boat listening… No publishable photos of this part.
I swear I filled a dozen contractor bags with foam blocks. Not to mention all the little white foam balls I had to chase around with the vacuum. Ugh! Still better than having to scrape expanding foam, but not the easy job I was hoping for. It did eventually go away though (and I stopped dreaming about the foam balls coming back to haunt me within a week or so).
So that was the space cleaned up. (Much glorious space!). No signs of water intrusion, so that was good. (I had prophylactically sealed both the bow strip and the anchor locker drain and locker bottom.) Here is looking aft in the newly created port locker. At the top of the photo (aft in the boat) you can see the forward edge of the hull core (most of the hull under the v-berth is not cored).
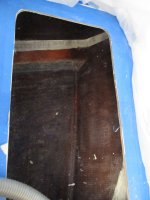
Next I hollowed out 1/2"+ of balsa all the way around the openings (the berth flat is cored) and filled the space with neat/thickened epoxy. Then I cut and fitted vertical grain doug fir cleats (to support the hatches flush with the berth top) and epoxied those to the underside of the berth flat (after prepping, etc.). Same view as previous photos but with the cutout edges backfilled and the support cleats epoxied in place:
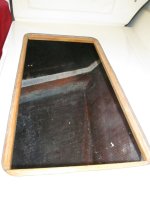
And the forward hatch opening:
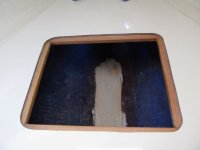
The berth top is 3/8" thick and I didn't have access to any decent 3/8" plywood, so I decided to use the cutouts for the hatch lids (may change to ply in future or may not - ply would be lighter, but the gelcoat is nice too). So I also took out 1/2"+ of core from the hatch edges and filled that with thickened epoxy, then sanded/smoothed/finished it. Same with the finger holes. Port side hatch ajar:
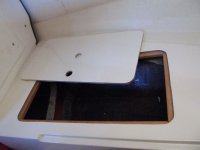
And in place:
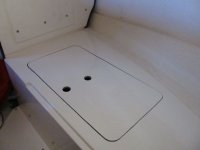
Overview taken through forehatch while still in progress:
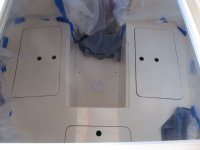
This shows the relative spacings of the hatch openings. Forward hatch and top of photo, and port-side hatch below.
And an overview after cleaning things up:
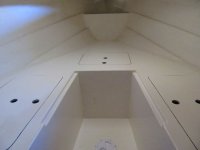
At this point, I popped the lids into place, re-installed the cushions, and headed out on a trip. Painting the inside and/or fiberglassing in any dividers or etc. is for a future project. For the time being I used foam yoga mats to line the hull, and then stored things such as a spare prop (in a duffel), a Sunbrella bag containing window screens/curtains, and a spare stove (sans canister) in the space. Basically items that are awkward/light/bulky. Glad to have the a good part of that project done, and I'm pleased with the outcome.
Ever since buying my 22, I've had it in mind that I wanted to cut hatches into the V-berth flat. There were a couple of reasons for this. One is that I just don't like an "inaccessible" area in a boat if I can help it. I like to be able to get to the hull to see things, clean, possibly effect a repair, etc. Two is that I could make use of the additional storage space (keeping in mind that weight in the ends is not advantageous, but I have a number of bulky, light-for-their-size things I could stow there).
I knew that some C-Dories had foam in this bow section. If mine did, it could provide flotation, but that is not required on a boat of this size, and on balance I prefer the accessibility. Also, I knew that some of the foam "installs" were basically a volcano-mound of spray in foam right under the plug area. Not super-effective. This is a personal decision though, and some people are probably more comfortable with foam there (if so, I'd recommend checking it out, since there is so much variation and one might not have the amount they think they do - I've heard of none, random blocks, spray-in, etc.). Since many Brats reported that the foam was hard-to-get-out sprayed in foam, I was hoping to hit the "jackpot" of no foam, to make the job easier. I had taken out a ~6" round access hatch under the porta-potti area and that was totally foamed in place (bad sign), but OTOH there were no plugs in the V-berth flat (good sign?). Well, time to find out!
First I removed everything from the berth area and taped it all off (to keep the rest of the boat non-dusty), plus protected the v-berth sole. Then I used cardboard and a tape measure to "try on" different hatch sizes and placements. I knew I would not be using commercial hatches, so I didn't have the constraints of their available sizes. I planned to either make plywood hatch covers, or possibly re-use the cutouts. I like the style of hatch that sits flush with the berth flat and has no hinges - that way the option exists of sliding it partway open without having to completely lift or remove the foam (sometimes I just want to grab something small).


I purposely kept the forward edge of the two aft hatches back a bit from the forward end of the footwell, because I didn't want to compromise the integrity of the berth top by having a "thin" area there between the after hatches and the forward hatch. I also might consider glassing in mini-bulkheads at some point in future, and I wanted to leave a landing pad for that option. Additionally, I wanted to be able to slide the hatch lids far enough open to access at least some things in the lockers without having to remove the cushions, so I wanted to leave some space outboard of the hatches for that (and forward of the forward hatch).
Other considerations were whether to make the aft openings parallel with the centerline of the boat, or with the edge of the footwell (I chose the latter). I also wanted to re-use my cutout pattern for the forward hatch (by just cutting it down) so that was another consideration.
Once I had decided on the sizes, I went ahead and cut a pattern for the larger hatches out of 1/2" plywood. I didn't have a huge selection of tools at my disposal, so my plan was to run a jigsaw around on the top of the pattern, with the blade snugged up against the outer edge. I knew this would not make a perfect cut, but I felt it would be acceptable.
I then cut a batten to fasten to the top of the pattern, which would keep the pattern from falling into the hole as I neared the end of the cut. It had one center screw so I could rotate it around as I went. I used a second screw near the inboard edge of the pattern to keep the pattern from rotating or moving. The hole from each screw would later be eclipsed by a finger hole (one in the middle and one near the inboard edge - I find both convenient for different scenarios).

Next I set up a vacuum and suited up (Tyvek, respirator, goggles, etc.), then cut out the first hole. I both won and lost the lottery in that there was no "stuck in place" spray foam; but the whole thing was filled TO THE BRIM with solid expanded polystyrene blocks. Well, I'd worry about that after cutting all three holes.

I moved the pattern to the other side and cut the second hole just like the first one. Then I cut the pattern down and used it again for the forward hatch. Both additional hatch cutouts revealed solid foam blocks right up to the top.


Now, how to get this foam out? It turned out to be more of a battle than I'd have anticipated. I was able to saw down partway, but none of my saws were as deep as the deep portion of the hatch (inboard). Two-foot square to the rescue! I "sawed" all the way around using the square on the deep parts (oh my aching hands), but the blocks STILL wouldn't come out. As I later figured out, here is how the V-berth must have been constructed:
1) Start out with bare hull in bow section.
2) Lay down grid of 2" masking tape over the inside of the hull, sticky side up.
3) Place pre-cut HUGE blocks of foam on tape.
4) Place V-berth flat (top) and tab it to the hull sides.
You'd think "Oh, masking tape, it's weak!" But oh no. Because it was lying right on the hull (under huge blocks of foam) there was no real good way to cut it. Well, eventually I prevailed, but I hope no-one was just outside the boat listening… No publishable photos of this part.
I swear I filled a dozen contractor bags with foam blocks. Not to mention all the little white foam balls I had to chase around with the vacuum. Ugh! Still better than having to scrape expanding foam, but not the easy job I was hoping for. It did eventually go away though (and I stopped dreaming about the foam balls coming back to haunt me within a week or so).
So that was the space cleaned up. (Much glorious space!). No signs of water intrusion, so that was good. (I had prophylactically sealed both the bow strip and the anchor locker drain and locker bottom.) Here is looking aft in the newly created port locker. At the top of the photo (aft in the boat) you can see the forward edge of the hull core (most of the hull under the v-berth is not cored).

Next I hollowed out 1/2"+ of balsa all the way around the openings (the berth flat is cored) and filled the space with neat/thickened epoxy. Then I cut and fitted vertical grain doug fir cleats (to support the hatches flush with the berth top) and epoxied those to the underside of the berth flat (after prepping, etc.). Same view as previous photos but with the cutout edges backfilled and the support cleats epoxied in place:

And the forward hatch opening:

The berth top is 3/8" thick and I didn't have access to any decent 3/8" plywood, so I decided to use the cutouts for the hatch lids (may change to ply in future or may not - ply would be lighter, but the gelcoat is nice too). So I also took out 1/2"+ of core from the hatch edges and filled that with thickened epoxy, then sanded/smoothed/finished it. Same with the finger holes. Port side hatch ajar:

And in place:

Overview taken through forehatch while still in progress:

This shows the relative spacings of the hatch openings. Forward hatch and top of photo, and port-side hatch below.

And an overview after cleaning things up:

At this point, I popped the lids into place, re-installed the cushions, and headed out on a trip. Painting the inside and/or fiberglassing in any dividers or etc. is for a future project. For the time being I used foam yoga mats to line the hull, and then stored things such as a spare prop (in a duffel), a Sunbrella bag containing window screens/curtains, and a spare stove (sans canister) in the space. Basically items that are awkward/light/bulky. Glad to have the a good part of that project done, and I'm pleased with the outcome.
