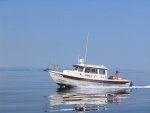
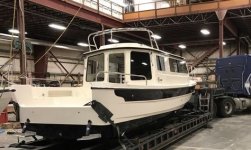
SO WHAT DID YOU DO WITH OR ON YOUR C-DORY TODAY??

What we did this weekend was go up to South Seas Plantation with our Naples Cruise Club what a nice place and with 7 boats its $2.35 a ft with elec and water .Anyway going up from Naples we stayed behind some of the big boys in our Club and stayed between 20-22 knots in 2-3 ft seas . The 23 Venture (CC) did remarkably well we burned about 25 gallon of fuel for roundtrip to Gordons pass and inside Naples bay it was about 100 miles all total .Not bad for a 115 merc CT Jim :lol: :mrgreen:
 
Lots of scraping. I have been thinking about bottom paint and in preparation for that I new I had some barnacles still attached on the bottom. I finally was able to get blocks to jack up the trailer, and raise it enough to be able to get all the way under on a creeper, (on a cold cement floor), and do the job. I tried several tools: a plastic scraper, a chisel tipped wood dowel, a rounded edged putty knife and a 1" wide piece of 1/2" teak with the corners softly rounded. The teak worked the best. It had a bevel cut end, and left less mark than any of the others, and the other end (square cut) was stiff enough to remove the barnacle root.

I have the whole bottom done, except for where the boat is sitting on the bunks. That is going to be another process.

Harvey
SleepyC :moon

IMGP6689.highlight.jpg
 
Started cockpit undercut/epoxy fasteners. Removed all fasteners and fuel tanks, cleaned, drilled out and under cut all screw holes from fuel tanks. Also drilled out some of the previous screw holes in cockpit floor. Only one screw hole had wet wood which was surprising to me for a 1989 boat.

The cabin bulkhead at both sides where it meets the floor also cleaned out voids of sealant. Doesn't seem to be wood at bottom. Drying the voids with a heater for the next week or later depending on weather.

Will use West 6 Ten thickened epoxy to fill cockpit floor and bulkhead voids. Pics of progress in album.
 
Put the new bilge pump in yesterday. It fits perfectly right into the recessed area by the drain.

Get the kicker repaired, new radio installed when it arrives, the vinyl name attached and the dinghy inflated and stowed on the roof and I'll be done with repairs and upgrades until next winter!
 
I am moving my batteries from the back to the bow area....thought it would be a simple wiring job...nope been at it for several weeks...had to put a lazaret cover and box under one of the bunks just so I could run wires thru...then had to buy and install battery switches next to the throttles...my boat never came with switches...but, it did come with plenty of foam under the bunks...lots of small rewiring too...on Friday I gave it a critical look and took the cables out...I don't like the way I soldered the terminal ends on...had to order new larger terminals so I now can be sure the ends are totally soldered in ....old terminals were of the proper size but I could not be sure there the solder encapsulated each wire...now I can be sure...I replaced the battery cable with #1 marine cable due to the longer cables...it is way more of a job than I would have ever guessed... and electrical is my thing..

Joel
SEA3PO
 
Replaced five year old mixed gel and flooded engine and house batteries with Duracell AGM from Sam's club. Replaced Guest 20 watt charger with Promariner Pronautic 40 amp charger, and added a group31 AGM to under passenger seat.
 
Waiting for March to get here and our trip down to the St. John's River gathering. Spent some time the last few weeks replacing the original battery charger with a new one. Went with the Mastervolt Chargemaster 20-3. Also noticed that one of my Lenco trim tabs was hanging lose; the bottom connector in the piston had come out some how. Got that fixed as well. Late last year I also replaced the AM/FM Stereo Radio with a newer model. Other than that, just sweeping the snow off the boat cover when necessary... And looking at charts on my computer planning for possible trips to Trent Severn later this summer, and SE Alaska next summer (2018)... Colby
 
Replaced old factory 2007 cockpit floodlights with two Lumitec Caprera2 LED floodlights. WOW! What a difference in lighting. With one off/on toggle switch you can dim and switch from white to blue. On full bright I might consider using sunscreen.
 
Under the boat again, scraping barnacle roots, the little circle of super SUPER Glue calcium deposit that is left after the barnacles are scraped off. I know this sounds scary, but after talking with several folks at the Boat Show, the common scraper seemed to be a single edge razor blade in on of those holders that retracts the blade. Held at the right angle, it takes off the deposit, but does not damage the gel coat. it will all be sanded with 80 grit before the application of bottom paint begins.

Harvey
SleepyC :moon

JC_Lately_SleepyC_Flat_Blue_070.thumb.jpg
 
hardee":37u4t8ef said:
Under the boat again, scraping barnacle roots, the little circle of super SUPER Glue calcium deposit that is left after the barnacles are scraped off. I know this sounds scary, but after talking with several folks at the Boat Show, the common scraper seemed to be a single edge razor blade in on of those holders that retracts the blade. Held at the right angle, it takes off the deposit, but does not damage the gel coat. it will all be sanded with 80 grit before the application of bottom paint begins.

Harvey
SleepyC :moon

JC_Lately_SleepyC_Flat_Blue_070.thumb.jpg

Will you be doing the bottom painting Harvey? If so that's a big job to tackle.

Peter
 
Jazzmanic":1jixf73a said:
hardee":1jixf73a said:
Under the boat again, scraping barnacle roots, the little circle of super SUPER Glue calcium deposit that is left after the barnacles are scraped off. I know this sounds scary, but after talking with several folks at the Boat Show, the common scraper seemed to be a single edge razor blade in on of those holders that retracts the blade. Held at the right angle, it takes off the deposit, but does not damage the gel coat. it will all be sanded with 80 grit before the application of bottom paint begins.

Harvey
SleepyC :moon

JC_Lately_SleepyC_Flat_Blue_070.thumb.jpg

Will you be doing the bottom painting Harvey? If so that's a big job to tackle.

Peter

Hi Peter,

Thanks for asking and the warning :lol:

N O Thank you! Since I retired, I do have more time than money, but painting is not a skill that I have acquired, not even finger painting in first grade, so I will leave the painting to a pro. I am also a bit of a detail oriented, like things "pert near perfect" kind of guy as far as the boat goes and this is something I think should be "pert near perfect" .

As much as I hate not having a color matching bottom, after spending as much time as I have cleaning up after a major screw up on my part, (spending way too long in the water without hauling out and scrubbing), I think the bottom paint is a must have. I will post more in the bottom paint threads, as to what paint and some other concerns soon.

Harvey
SleepyC :moon

JC_Lately_SleepyC_Flat_Blue_070.thumb.jpg
 
Working on the leak over the aft end of the galley on the 22. Used heat gun judiciously to finish drying any water in the core where the boarding handle on the starboard side was apparently leaking. Then I used the Dremel tool to finish cleaning up the edges of the hole, the glass on the inside of the aft bulkhead panel, and residual balsa core.

I painted the entire inside of this void with plain West Systems epoxy. Mixed Cabosil and microlight fairing compound into the epoxy, and worked it well into the voids which had been created above, lateral and below the hole.

Tomorrow I will re drill the holes thru this new epoxy and bed the handle with a 3M bedding compound.
 
Ken, Congrats, and take a breath, It's on the way and if you don't breath it won't make any difference how long or short it takes to get there :lol:

Who is hauling it down for you?

How cool. And the factory put the trim tabs on already.

Enjoy the commissioning, one step at a time.

Harvey
SleepyC :moon

January_2010_254.thumb.jpg
 
hardee":3rt8otj8 said:
Ken, Congrats, and take a breath, It's on the way and if you don't breath it won't make any difference how long or short it takes to get there :lol:

Who is hauling it down for you?

How cool. And the factory put the trim tabs on already.

Enjoy the commissioning, one step at a time.

Harvey
SleepyC :moon

January_2010_254.thumb.jpg

I am trying to focus on the present. It's not easy however, I was always the kid that drove everyone crazy at Christmas.

Mobile East Marine arranged the hauling.

I'll start a thread and take a bunch of pics before I put her in the water.
 
Cleaned the water tank site tube. Thought I could use a .30 cal rifle cleaning rod--too tight, and got it stuck.. Had to relieve the suction, and got it back out! Then went to .22 rod, with plastic slotted appliance for the patch. Dipped the patch in non splash Chlorox (more viscous). swabbed once down to water level.. Then ran a patch down to the water level and back. Then 3 dry patches--tube looks like new! Clear and no dark algae like spots. Then filled the tank half full, put in about 3 oz chlorox pulled to pumps (I have both the foot Whale pump which came with the boat, and in series, I have an electric in line Jabsco pump with monetary switch.

Also finished the project to redo the starboard step over the bilge pump, just inside the cabin bulkhead. I made a support contoured to the inside of the bulkhead, and attached it with 5200 (held in place with hot glue while the 5200 set up over 5 days. The support was to keep the middle of the starboard from flexing when it was stepped on. I had to extend it about an inch--so epoxied another 1" x 1" piece of wood. Back filled the area between this support ant the bulkhead with J B Weld "Kwick"--and put the step back in place. The screw holes for the screws holding the starboard and stripped out thru the years, so I filled the holes with toothpicks (4 pieces per round birch toothpick, set in epoxy. After the epoxy was almost set up--shaved the ends off. Then drilled the pilot holes, and put the step in place, with the screws to hold it in place.

Also made a new bracket for one of the Stereo speakers which are in the forward corners above the windshield, out of 1 1/2" x 1/8" aluminum stock, and re-installed the speakers. The old ones had fatigued and broke probably from road vibration.
 
Back
Top