SO WHAT DID YOU DO WITH OR ON YOUR C-DORY TODAY??

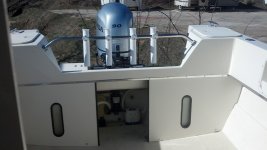
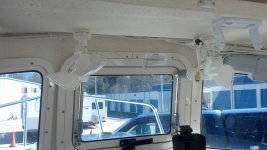
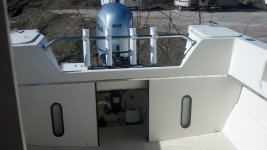
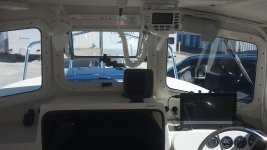
Continued maintenance and modifications...Mounted the new radar arch, reinstalled the radar antenna and mounted the new search light and 360 degree nav light. I slowing down, as a task like this once only took me a few hours to complete.
 
rogerbum":ptjy457r said:
<stuff clipped> I mounted them on some 3/4" thick red oak that I stained with a red walnut stain. This approximates the color of teak. <stuff clipped>
Fixed a typing error.

Also, a side note - I checked before the install to make sure this didn't impact my heading sensor. It's about 6-8 feet away from a position that has a measurable impact on the heading sensor.

Roger- No smiling, and keep a stiff upper (and lower) lip when you're near that knife holder!

Wouldn't want you to to have to replace any runaway fillings!

I'll bet the P-3 Orion Sub-Chasers can spot your magnetic anomaly on their way out to the arctic patrols, no? :lol:

Joe. :teeth :thup
 
rogerbum":1wsn4kdx said:
I finished the install of my magnetic fillet knife holder today. I wanted to make better use of the space just aft of the starboard side window. I bought some very strong magnets from K&J Magnetics. The ones I bought are part number BY084DCS. They are neodynium magnets with about 30lb of pull force. The size of each magnet is 2" x 1/2" x 1/4" and there are two counter-sunk holes for #6 screws. They are Ni plated and won't rust. I mounted them on some 3/4" thick red oak that I stained with a red walnut stain. This approximates the color of oak. The board was then sprayed with 5 coats of Helmsman spar varnish. The magnets are held in place with stainless #6 screws. The thickness of the oak mounting board is such that even fairly thick handled knives can be mounted without the handle interfering with the wall below.

The magnets are not cheap - they were about $8/ea. So with the cost of the wood, screws, stain etc., I'm probably into this project for around $55. However, this will hold the knives VERY tightly, and I'm not concerned about them coming down when we're bouncing around over waves. It will hold 4-6 knives depending on the size of the blades and handles.
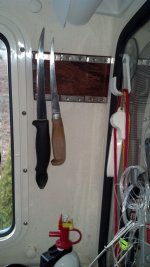
MagneticKnifeHolder.jpg

You need a backup magnetic compass right under that! You'll always be headed in the same direction! :mrgreen:

Charlie
 
How did you attach the oak to the wall?

rogerbum":1vyvs23k said:
<stuff clipped> I mounted them on some 3/4" thick red oak that I stained with a red walnut stain. This approximates the color of teak. <stuff clipped>
Fixed a typing error.

Also, a side note - I checked before the install to make sure this didn't impact my heading sensor. It's about 6-8 feet away from a position that has a measurable impact on the heading sensor.
 
Mike_J":238fhloy said:
How did you attach the oak to the wall?

rogerbum":238fhloy said:
<stuff clipped> I mounted them on some 3/4" thick red oak that I stained with a red walnut stain. This approximates the color of teak. <stuff clipped>
Fixed a typing error.

Also, a side note - I checked before the install to make sure this didn't impact my heading sensor. It's about 6-8 feet away from a position that has a measurable impact on the heading sensor.
That's easy. I cleaned the wall with alcohol and used 3M4000 (the UV resistant version of 3M4200). I just put several beads of the sealant on the back of the oak and pressed it firmly to the wall by hand. That provides a strong but not permanent bond without putting any holes in the fiberglass. I've attached the fans blowing on the front windows the same way (see my album). E.g. I attached the oak to the roof with 3M4000 and screwed the fan mounts into the oak. Ditto for my flashlight mount. If by chance, anything comes loose (and I'm pretty sure it won't), I can always use 3M5200 (which makes a near permanent bond). However, my previous experience with 3M4200 in similar applications has been good.
 
After taking a couple of weeks off due to a twisted knee (I didn't know it was possible for a knee to pop that loudly) I'm back to finishing my boat. Installed some rod holders today.

18_G.jpg

I've got two stainless rod holders for trolling that will have to wait on some different size bolts.

And, I installed two Caframo fans.

19_G.jpg

I'm out of braided sleeving for the wiring so I'll have to wait till I can have some shipped in since no one in this part of NC seems to know what it is, let alone stock it. Tomorrow a trip to the bolt and screw store and more work if the rain will hold off.
 
I fixed my seat. Susan had been using it to pop you back and tore the mounting hardware out, several times. I ended up using a large piece of alum to mount to the seat and mounted that to the top of the cabinet. It's really solid now and should survive several more years of abuse by the admiral .
 
mgarr682":i45gc1uf said:
After taking a couple of weeks off due to a twisted knee (I didn't know it was possible for a knee to pop that loudly) I'm back to finishing my boat. Installed some rod holders today.
Ouch! Glad you are back to it (I had missed your updates - it's fun to see a new boat being outfitted.)

18_G.jpg

I never noticed this before, but I guess the 22 Anglers never got the permanently installed flat cockpit floor (?) -- or did you order yours custom that way? (I can see where one might want to feel lower in the boat for fishing.)

Sunbeam
 
Sunbeam":3s3gfo9e said:
Ouch! Glad you are back to it (I had missed your updates - it's fun to see a new boat being outfitted.)

I'm glad to be back. Two weeks of hobbling around on crutches is no fun. Now I'm limping around like a true geezer but no more crutches.

Sunbeam":3s3gfo9e said:
I never noticed this before, but I guess the 22 Anglers never got the permanently installed flat cockpit floor (?) -- or did you order yours custom that way? (I can see where one might want to feel lower in the boat for fishing.)

Sunbeam

No, the flat floor does not come standard on the Angler, which is fine with me. Less weight and no dead space to fill up with crud that can't be easily cleaned out. Some excellent non-skid though. I like that.
 
mgarr682":2b708rlj said:
Now I'm limping around like a true geezer but no more crutches.
Give it a couple weeks and you might be up to middle-aged :wink

mgarr682":2b708rlj said:
No, the flat floor does not come standard on the Angler, which is fine with me. Less weight and no dead space to fill up with crud that can't be easily cleaned out.

I know what you mean. I didn't really want the built-in flat sole either, so I looked for a Cruiser that didn't have it (they started putting it in the 22 Cruiser around 2006, I believe). I thought the best combo for me would be the rounded/hull/sole and then a set of the factory floorboards that can just be set in place. Well, my boat didn't come with the floorboards, but then I lucked out and was able to buy a set that someone had languishing in their garage.

I hope your knee continues to improve,

Sunbeam
 
Sunbeam":qywextm2 said:
I thought the best combo for me would be the rounded/hull/sole and then a set of the factory floorboards that can just be set in place. Well, my boat didn't come with the floorboards, but then I lucked out and was able to buy a set that someone had languishing in their garage.

Sunbeam

Other than the weight removable wouldn't be so bad, at least it would be possible to easily clean out underneath or easily look for leaks. Several years ago a friend of mine thought the springs on his trailer had suddenly gone limp when he pulled his boat home from the coast with the trailer squatting noticeably lower than usual. A bit of checking found that the spaces between the deep-v hull and flat deck were full of water due to the drains clogged with crud. When we finally got those limber holes opened up water ran out the transom drain for a very, very long time. On the up side he had a lot less grass to mow that summer. All that salt water killed the grass in a large part of his back yard.
 
Like many of you, I finally made a platform for our Honda generator. I used 2x4s as supports and the platform is out of starboard material. All 3 pieces are independent which allow for very easy storage - nothing is screwed together. To hold the platform in place I screwed 3 brass screws into each 2x4 and then cut off the top of each leaving a nice smooth post. I then drilled corresponding holes in the platform which holds it in just the right position. The weight of the generator keeps the whole structure together.

Our other project pertains to the pilot seat, which is still the original. We have found that it lacks any meaningful back support because it is angled too far back. After looking at new seats and not particularly liking them, and not wanting to spend a large sum of money for a new one, an easy and seemingly secure fix occurred to me which I tried and it works wonderfully. I took 1" washers and bent them in half so they look like inverted taco shells. I then placed them over the seat cushion metal bracket that butts up against the seat back support bracket - one on each side. The washers fit great and provide a more secure resting point for the back. Both Mary and I ave very happy with the new adjusted position. An additional two washers can also be used to position the seat back in an even more upright position. When I did this I also removed and thoroughly cleaned the seat and built a slightly higher platform upon which it is fastened. So we now have better visibility and back support. Talk about a cheap fix, and it looks just fine too.

I have posted photos of both in our Freedom photo album, under the heading "Projects."

Rob
 
Spent a few hours today finishing up.

First, I charged both batteries yesterday and installed them today. Then I installed fuses for all the electrical devices I've installed, VHF, two fans, fish finder, PC/chart plotter and four 12 volt outlets. It all worked and no blown fuses.

31_G.jpg

Put the label maker to work on labels that old eyes can easily read.

32_G.jpg

More labels.

33_G.jpg

Figured out why the lights on my instruments were on when the anchor light was on but not when the navigation lights were. A few minutes with a volt meter to figure out how the switch worked showed that the wire supplying power to the instruments lights was connected to the wrong blade on the back of the switch. Fixed.

34_G.jpg

Well now, mount a fire extinguisher and find a feed wire from the ignition for the fuel flow meter and I'll be ready to go. I like that.
 
JamesTXSD":7b682vat said:
Freezing isn't a problem here, but the brow above the windshield sure takes a beating in the sun... kinda dead looking after 2 1/2 months of mostly sunny days... doesn't shine like the rest of the boat. I put my inner Mr. Miyagi on the job: wax on, wax off. One coat didn't do it. Two, and it was looking better. Three, and lots of buffing, and the shine was back. The wax was almost gone, so it got a 4th going over and even more buffing. She looks pretty again...

WBWaxE.jpg

that is really sharp! :thup
 
Went for a nice lunch cruise with Joel & Sue (SEA3PO) today-- the water was great and the company even better.
I noticed a spot on the starboard stern where someone had painted a small area with gray paint- about 1.5"- looks like they used my boat to match the color before applying it on their boat :evil: :evil:
 
Back
Top