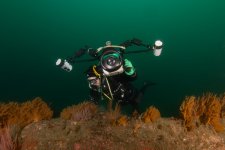
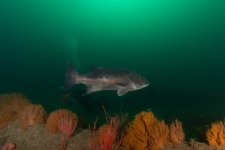
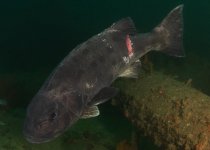
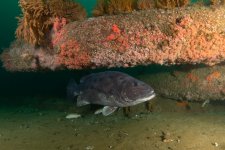
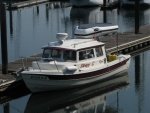
SO WHAT DID YOU DO WITH OR ON YOUR C-DORY TODAY??

If your bottom paint can be rubbed off, it’s likely an ablative paint. Most trailer boaters wouldn’t choose other options, though there are some for racers etc. As long as it is well adhered (not flaking or peeling) you can prep with your high pressure spray, or 80g sandpaper, or just a green Scotch pad (per Pettit) before Hydrocoat. You can expect an epoxy barrier coat under whatever paint they chose, likely a contrasting color, but you don’t have to scrape down to that. I used Primocon on the aluminum bracket only because I had a couple of gouges that went to bare aluminum, this requires sanding (or acid etch) to remove oxidation then immediate primer. It can also be used as a primer over an intact paint film of unknown type, but you shouldn’t need that. Then Alumacraft 2 ( a zinc product for aluminum outboard lower legs; here on the aluminum engine bracket to decrease the changes of galvanic corrosion you’d have with a copper paint over aluminum, even with a barrier primer).
My only prep on the sponsons was a good washing. Wear warm clothes for that this time of year.
I thought about getting this, but I didn’t:
https://www.jamestowndistributors.com/p ... tail/98161

Ok, I need one of those, better yet maybe two of them. Boy, are you going to be on Rosanne's sh&t list! :mrgreen: Actually, even one of those would be pretty nice. But I more or less accomplished the same thing with my bottle jacks and some short 2x4's.

I tried to find what paint came with the boat, but guess I used it up and threw the can away. I did not plan on getting that kind again later, as I wasn't impressed with it. If you go back and look at my hull, will maybe I'll just upload it here to make it easier:

IMG_1748.jpg


You can see here that top coat of blue. When I hit it with the pressure washer, in the chipped paint areas, it comes off pretty well. In other places where it seems to adhere better, the paint just dulls out some after I hit it good with the pressure washer. What's under it, that black stuff, I don't know if that was an initial bottom coat, or the expoxy primer you are talking about . I don't think it is the blue that comes off when I rub up against it, since my hands end up with black on them. A chalky black. I do like the color blue since it matches the boat pretty well, and still sets off from the white. Maybe it was you that recommended that paint you are using, earlier. But I remember some discussion on that brand and figured when I get ready to redo it right, I was likely going to that stuff. Colby
 
"What's under it, that black stuff, I don't know if that was an initial bottom coat, or the expoxy primer you are talking about . I don't think it is the blue that comes off when I rub up against it, since my hands end up with black on them. A chalky black."

Colby,

You don't need more than one of the trailer mounted lifts, just do one side at a time, and the boat won't tip over with a 12 inch lift on one side. The 10,000 lb rating would handle a TC255 (we still suspect one is in your future).

The std epoxy barrier coat would NOT be expected to be 'chalky' or rub off on your hands...those characteristics point to another ablative paint coating.

Get a new 1 inch steel putty knife and gently scrape down through the black coat in a tiny area (I suspect a prior coat of some ablative trailer boat bottom paint) until you hit either another thin, very tough epoxy paint layer, or gel coat. It would be very rare to apply any bottom paint to a bare new hull as it would not be expected to stick very well for very long compared to an epoxy barrier coat.

Although like I implied above , you could paint over rough areas of old but well adhered paint, it would look rough and likely show through. Pressure washing and sanding down to a uniform smooth surface will look better on the trailer (no one will see it when it's underwater) if you'd like to go that route.

I have been advocating Pettit Hydrocoat since it came out 5-7? years ago as a do it yourself safe and legal driveway option.

https://www.pettitpaint.com/media/3204/ ... logy-1.pdf

It works for me, but as always, Your Mileage May Differ.

Get the Right Equipment!
Cheers,
John
 
Interesting the boat Jack in the link--thanks John. I used to have a couple of house moving jacks. These were great for hoisting boats off the trailer. Thru the years these have disappeared...however there are many "screw jacks" which start at as low as $15. The screw jack can take and hold high loads, and function as a jack stand as well as a jack. The hydraulic jack is risky for painting under the boat. (You can gain clearance of the back of the boat, by supporting the hull and then putting the tongue of the trailer up. Visa versa for forward bunk areas.)
 
I have been using Pettit Vivid for all of my boats for many years. It is tough, but ablative. The current 25 seems to have Vivid black on it--needs a little touch up where it rubs on the bunks and around the water line. On the Caracal, it is over 8 years old, and still looks decent in the blue. (Multiple coats). The boat is usually lift or trailer kept, but 5 years it spent 3 months in the water at Marathon.

Most epoxy coats are grey (best), or semi transparent. If there is colored gel coat it should be the same color as the hull and roof stripes. There are still a large number of trailerable boats which have no epoxy applied before the first bottom paint. Many new boats have Vinyl Ester first for the first layers of lamination, which is more resistant to water than standard polyester gel coat. These often do not have epoxy.
 
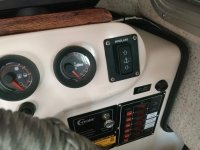
Been getting lots of little things done the last couple of days. Wrapping up the windlass install has been fun and now just waiting for my Blue Sea 50amp breaker to get here and I'll call it done.

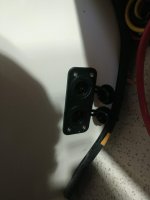
Switch is in place.
IMG_20210115_173226462_LL.jpg

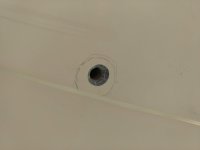
Anchor locker Drain hole drilled. Waiting for the GemLux Clamshell cover I ordered.
IMG_20210118_103812081.jpg

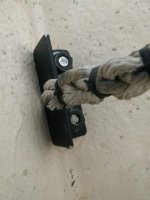
Made a bracket for the anchor rode bitter end and spliced the rode to the bracket (yeah, it's a crappy splice :cry:). The bracket is made from 1.5" aluminum angle.
IMG_20210118_134418647_LL.jpg


Yay! It works!
http://www.c-brats.com/albums/album3269 ... 520511.mp4


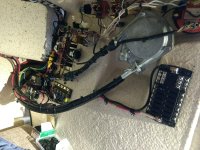
Then I added a Blue Sea 12 circuit fuse panel since I'm out of space on the stock 6 circuit switch panel at the helm. The cable run to the panel is a new pull of 8awg from the battery switch back in the lazerette. You can also see the windlass relay way over on the left of the photo.
IMG_20210118_175039356_LL.jpg


Since I removed the cigarette lighter/socket to install the windlass switch I added these 2 12v sockets low on the bulkhead near the helm. That red 4awg cable to the right is a loop I left hanging so I can add the other windlass breaker when it gets here.
IMG_20210118_174517142_LL.jpg
 
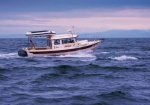
Had a great day cruising today. Did like 50-ish miles down the Columbia from Portland to St Helens and then slow ride up the Multnomah Channel. Tons of birds and even a coyote. Sandwiches, chips, and hot tea.

Just thought I’d share a great day out. Now if only the Wallas would have run for more than 10 minutes at a time...
 
Hi Chad, Sure Glad you had hot tea. What a beautiful day for a cruise. Sorry I missed you the other day. Ran out of time. Maybe next time.

Harvey
SleepyC :moon

9_Sept_Seq_2019_Cal.thumb.jpg
 
Got C-Traveler moved over from her old trailer to the new one. Transfer was done at a local marina/motorsports dealer. No travel lift, so they just used a hoist system in their shed for the stern, and a larger forklift with a strap to raise the bow. All set for more fun travels this year.
 
Yesterday I made a map of all the fuses and breakers in our boat. They are spread all over the boat. In both the port and starboard lazarette, on the overhead shelf above the helm and behind the helm.
I now have a quick reference to where the fuse or breaker is for each circuit in the boat and what type of fuse and the amperage. I have also made sure that I have multiple spare fuses for each of these circuits. I am pretty well acquainted with the electrical circuit by now, but it's easy to forget in a pinch where these fuses are located. there are 27 all together. This will make it much faster to track down a problem while on the water. Should have done this a long time ago.
 
Also, last week I installed momentary wiper switches. One each for port and starboard side that I can reach easily while traveling and another one on the port side that the passenger can reach easily. This is something that I think about doing every time we start taking spray across the windshield in choppy water. Finally got around to it and it should be nice. Not that hard to do either. When we repowered with the Yamaha last spring it left two holes in the helm dash where the Honda gauges were, since the Yamaha gauges are all in one. I was able to utilize these holes to place the momentary rocker switches for my side and already had a spare switch on the port side overhead for the passenger switch.
 
Pulled all wheels, hubs and brake calipers. I was not happy with the E Z Lube system. I did find one of the bearings which had significant corrosion, despite use of the EZ lube on each trip. One of the brake linings was worn significantly, so I will replace all.

I am changing to synthetic grease, so all traces of old grease had to be removed, Cleaning, with paper towels, split pieces of popsicle sticks, and mineral pirates,, until no traces of old grease. This is a good time to run new fluid in E-H brake system.

It is a lot harder getting up off the ground when you are 40 than when you are 85! But we got all apart, and clean--being sure that the orifices are open and good flow of grease into the bearings. The easy part Is putting it back together.
 
I didn't go down to the boat and check it, but it looks OK from the patio. No one is plowing streets, shoveling sidewalks. The piers are apt to be covered with icy snow, don't want to fall in the drink. We did a sort walk through what was once the center of Bremerton. Deserted. Not like it would have been in the 40s. Gad, I am getting old.
 
Some really cool photos PacificCoast!

Pulled all wheels, hubs and brake calipers. I was not happy with the E Z Lube system. I did find one of the bearings which had significant corrosion, despite use of the EZ lube on each trip. One of the brake linings was worn significantly, so I will replace all.

Bob, I think you've almost convinced me to install oil bath bearings on my new trailer. I really liked them on my EZ Loader under Midnight Flyer. Maybe a project for later this spring.
 
(Refer to Pacificcoast101 on page 265.)

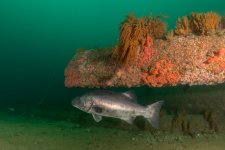
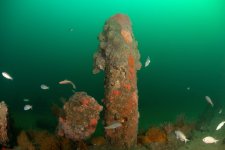
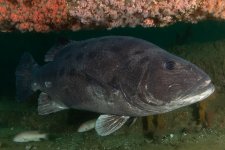
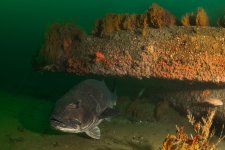
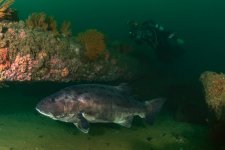
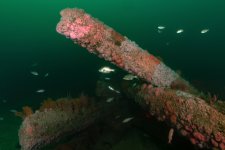
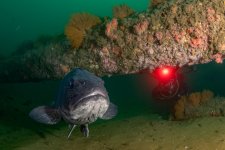
Phil, a special thanks to you and Merry for the underwater photography that you have shown us on page 265. I am always amazed at your photo quality and presentation. It's amazing that this underwater world is just below us as we motor above it. Again, thanks.
 
Well said, Gary. I agree, and my thanks as well, Phil, for giving us a glimpse at the galaxy of creatures and colors under our hulls.
:rainbow
 
Agree number three, but I think my favorite is the one looking up at the bottom of the TomCat255 that we saw a few years back.

Thanks for sharing as you go.

Harvey
SleepyC :moon

1_10_2012_from_Canon_961.highlight.jpg
 
Back
Top