stevej
New member
- Joined
- Nov 1, 2003
- Messages
- 314
- Reaction score
- 0
- C Dory Year
- 1995
- C Dory Model
- 25 Cruise Ship
- Hull Identification Number
- DOR25003K495
- Vessel Name
- Shearwater
Woo Hoo
Picked up Shearwater this afternoon and am very impressed with the new transom. Becker Enterprises delivered as promised, the workmanship is amazing. Mr Becker actually has one of the most beautiful shops I have ever seen but it was occupied by a 42 foot custom boat he is working on so Shearwater had to go blue tarp route next to the shop.
You can fast forward to my album if you just want to skip the techie details
http://www.c-brats.com/modules.php?...ame=gallery&file=index&include=view_album.php
Prep work complete and ready to start core install
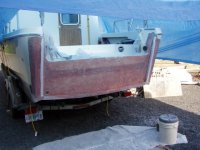
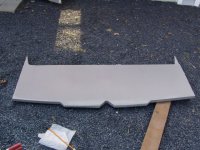
Laminated foam core
Note the cutouts along the bottom edge, HD (high density) foam is used for trim tab attachments and drain plug
Core material
HD foam section
What looks like a pencil line is actually the compression line after attempting to crush it in a vice. Tight as it could be turned by hand and compressed about 32nd of an inch or less
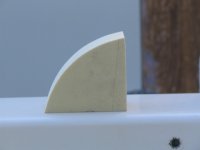
Cross section cutout of lower density foam from scupper cutout
Did a vice test on this section, compressed about a 16th of an inch and only on the back side (old glass). The front glass (port side) did not even flex.
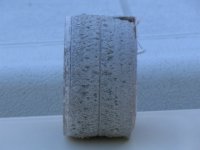
Core in transom
HD foam in motor mounts holes
Tab actuators hydraulics and mounting screws
Motor well drains
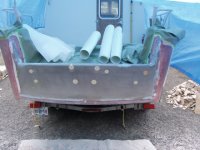
Side view of installed core
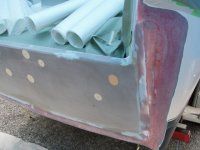
Cap cross section
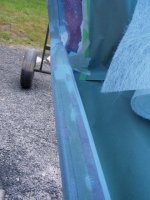
Glassed in
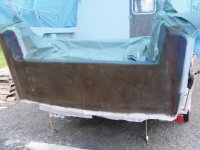
Cap glassed in
This was really the weak point in the original transom. No glass used to tie together the inside of the motor well to the cap. Could have been done when the factory did the prior repair (post toland ownership)
Don't expect it will be and issue anymore
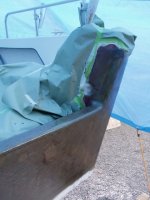
Finish work and new scuppers
The scuppers had to be installed 3/4 inch above the deck as opposed to being slightly below. Needed to do it this way because the deck is not glassed to the back of the transom. The original deck drains will be reinstalled to deal with the remaining slop.
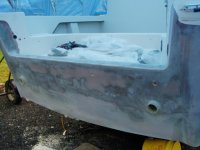
Finish work on cap
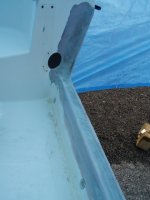
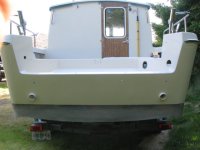
Completed transom
Well almost, I still have to put in motor well drain sleeves and the old deck drains
Need to apply barrier coat and new bottom paint also
Not going to reinstall the plug, nine years with the boat and have never used it once.
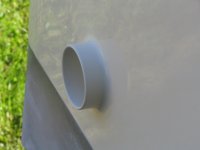
Scupper detail
3 1/2 inch rubber exhaust flapper valves will cap the scuppers. Calculated full deck drain time of 2 minutes.
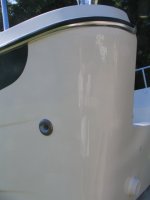
Corner seam and gelcoat match
Cannot tell that any work was done its totally seamless in color match and finish
Even with the foam core Mr. Becker stressed that any holes be over drilled, filled with thickened west system epoxy and the screw sealed with 4200 or something of that nature.
Next is to have the bed liner sprayed in over the transom cap and covering the motorwell and seats
Lot of stuff to install before the new motor goes on. Don't think I have ever had Shearwater so torn apart.
stevej
Picked up Shearwater this afternoon and am very impressed with the new transom. Becker Enterprises delivered as promised, the workmanship is amazing. Mr Becker actually has one of the most beautiful shops I have ever seen but it was occupied by a 42 foot custom boat he is working on so Shearwater had to go blue tarp route next to the shop.
You can fast forward to my album if you just want to skip the techie details
http://www.c-brats.com/modules.php?...ame=gallery&file=index&include=view_album.php
Prep work complete and ready to start core install

Laminated foam core
Note the cutouts along the bottom edge, HD (high density) foam is used for trim tab attachments and drain plug

Core material
HD foam section
What looks like a pencil line is actually the compression line after attempting to crush it in a vice. Tight as it could be turned by hand and compressed about 32nd of an inch or less

Cross section cutout of lower density foam from scupper cutout
Did a vice test on this section, compressed about a 16th of an inch and only on the back side (old glass). The front glass (port side) did not even flex.

Core in transom
HD foam in motor mounts holes
Tab actuators hydraulics and mounting screws
Motor well drains

Side view of installed core

Cap cross section

Glassed in

Cap glassed in
This was really the weak point in the original transom. No glass used to tie together the inside of the motor well to the cap. Could have been done when the factory did the prior repair (post toland ownership)
Don't expect it will be and issue anymore

Finish work and new scuppers
The scuppers had to be installed 3/4 inch above the deck as opposed to being slightly below. Needed to do it this way because the deck is not glassed to the back of the transom. The original deck drains will be reinstalled to deal with the remaining slop.

Finish work on cap

Completed transom
Well almost, I still have to put in motor well drain sleeves and the old deck drains
Need to apply barrier coat and new bottom paint also
Not going to reinstall the plug, nine years with the boat and have never used it once.

Scupper detail
3 1/2 inch rubber exhaust flapper valves will cap the scuppers. Calculated full deck drain time of 2 minutes.

Corner seam and gelcoat match
Cannot tell that any work was done its totally seamless in color match and finish

Even with the foam core Mr. Becker stressed that any holes be over drilled, filled with thickened west system epoxy and the screw sealed with 4200 or something of that nature.
Next is to have the bed liner sprayed in over the transom cap and covering the motorwell and seats
Lot of stuff to install before the new motor goes on. Don't think I have ever had Shearwater so torn apart.
stevej

