Repairs and upgrades for Hammerhead

John, thanks for that video link. That looks like something I could do! I have watched many of Andy's videos in the past. Really good stuff.

San Juanderer, thanks for the kind words. Like you say, I am consoled by the fact that I would not be able to buy the boat I will have when I'm done for any price. It should be better than new, completely bulletproofed, and fully customized. Makes me want to repower it, too, but these Hondas only have 400 hours.
 
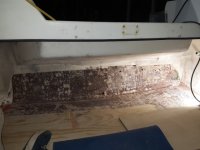
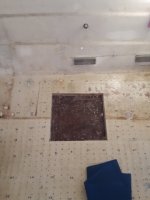
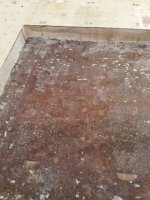
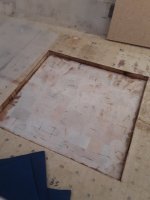
Just cut out a little more in the port side in the cockpit. You can see that there was an area of coring that didn't really adhere to the bottom skin because it dips down a little. I think the balsa wasn't able to conform well enough. That's why I'm having so much trouble on the port side. The starboard side doesn't seem to have this 'channel' that the water was able to run. I have cut it back far enough that the wood is still very wet there, but it doesn't appear to be soft.
20210104_113758.sized.jpg

20210104_114415.sized.jpg

I'm going to drill a bunch of holes and try to dry this out. I may remove a bunch of the core from the around the holes and then pour in epoxy and then thickened epoxy and try to fill this void. I think it will end up better than it started, as the boat seems to have held up well structurally even with this void.
 
You are continuing to go great work--what energy!!!

You will find all of the hatches--and the forward deck hatch while you are at it. Even the only new boat (255 Tom Cat) had wet core from just the wash down around the forward hatch. I pulled it--and found that half of the screws didn't go into the deck--the cut out was too large! I had to dry out the core, cut it back, seal it, and then add about 3/16" of glass all around the cutout!

All of the back hatches leak--there is a hatch which will fit the cutouts which is water tight--and that is what you will want to put back on. I don't have the number right at hand, but if someone doesn't, I'll look it up, and put a photo from my album.

For small areas of non skid, I have gel coated very thick, then used a Dremel tool to cut new non skid after laying out the pattern with pencil. Most areas you cannot see the difference. For larger areas, the areas as in the link are the way to go. You can roll or brush on the PVA, it does not have to be sprayed. That technique works particularly well if you are molding a new part. You can make a panel, and then cut out what you need also...

I would just cut back any obviously rotten core on the gunnel and then seal, fill and finish as you wish. A wooden plug for where the rod holders will work, put wax paper under with either a support, duct tape or even hot glue to hold until it has set up--then circles of mat and cloth to build to where you want to start the gel coat. There is no real structural strength there, so you don't need to feather in the edges on the 12/1 ratio. Another possibility is to put teak step plates over where the holes were. There are also framed rubber step plates which were used more in wooden boats, but would work to cover a defect where the rod holder was.
 
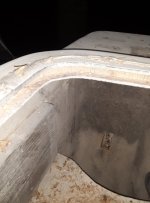
I am all done cutting! I did have to remove more from the transom, but I got all the soft core out, and now everything needs to dry.
20210108_205532.sized.jpg
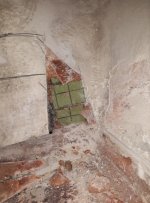
And the mystery about the patch in the corner is solved. This boat took a hit sometime and was repaired, there was some foam coring in the very corner.
20210108_191937.sized.jpg
I also made this tool from 1/4 aluminum for removing core and it worked really well when used in the drill.
20210108_213637.sized.jpg
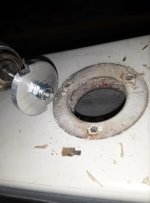
Cleaned out the lazarette hatch openings:
20210108_214626.sized.jpg

I also took some time to organize my photo album and there are more pictures there.
 
Outstanding documentation and a Job well done. It would appear that there was a very substantial hit in that transom corner. It would be unusual to have that happen in the water in the lower corner of the transom. Perhaps happened on the trailer, or when being transferred from one solid place to another (as in a storage rack)...
 
Well, had to take care of some non-Hammerhead related items the last few weeks. I haven't been running the heater out there because it got to the point that the cabin sole was reading dry everywhere. When I checked the floor again today, it read fully saturated again. I feel like the meter isn't working right or something. There are areas of coring, like up in the dash, that I know are bone dry, and it still read dry when I checked those areas. I don't know how the balsa would get wet in there unless it was soaking up moisture through humidity. The boat is under cover and has not been exposed to water.

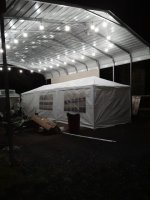
So I started the heater up in the cabin again today, and drilled holes in the cockpit sole in preparation for drying it out also. And I put up the wedding tent I bought. The idea is to get the temp up enough to be able to dry the cockpit with that big heater, and also to get the whole area up warm enough for the epoxy work later. This tent is super chintzy, but at $100 bucks from ebay will work fine for my needs. I think it is working, already it is quite warm inside.
20210130_213758.sized.jpg

Now I will spend the next few weeks moving the heater around inside, while I tackle some other projects on my list. I promised to build my sister a stern arch for their sailboat before they leave for mexico, so I'm going to try to get that done while Hammy is drying out.
 
The problem is probably that you are drying the surface and that is what the meter is reading. The core 1/4" down is still wet. It may dry with time...how long remains an unknown.

Shades of a Kadey Krogen 42, that friends of mine in the boat repair businesss, spent well over 2 years drying out a foam core. Finally used heated vacuums mats (Very expensive), with thousands of holes drilled in the laminate. The boat core remains moisture free and no blistering 10 years later.
 
clayhubler,

I've mentioned it before, but just in case......

I think you will find the heater drying method much more effective if you add a heavy duty dehumidifier into the process. It's like taking the boat down to Arizona in the summer.
 
Just ordered the balsa. I could not find it locally; the two distributors that I tried only sold in large quantities and said that it was not in stock. I was told my best bet would be to look around online. I ordered from fiberglast.com. They did not have 1.5" so I am going to have to layer the 3/4". The balsa comes in 2'x4' sheets. I'm planning to stagger the seams, though I suspect it doesn't matter much considering the kerfs in the material anyway.

I ordered 10 sheets of 3/4 for the hull and 4 sheets of 1/2 for the transom. There are discounts for quantities. My total came to $676 including taxes and shipping. I called on the phone to verify they had the material in stock, and was told the 3/4 was on backorder, but would ship out on the 16th.

I have been drying the boat this whole time. I don't think it is going to get as dry as I wanted it, but I am going to move forward with the repair. All the balsa that remains is good solid core, and there is no delamination. It feels dry, looks dry, and is strong. I have decided not to cut out the entire floor just because I am still reading moisture on a $45 meter.

There were definitely some wet and rotten areas on this boat, but after all the effort spent cutting and chipping, I know the boat was nowhere near falling apart or failing structurally. I have the tendency to go way overboard at times when it really isn't necessary, and that's why I have decided to move forward with the repair.
 
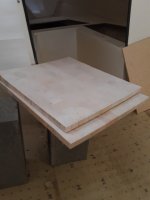
I will be installing some balsa in the hull this weekend. I am going to tackle the small repair inside the cabin first. I am a little intimidated as I have done glasswork before, but never any coring. The area I am going to focus on is roughly 18 x 24. I have ground the top of the bottom skin with 36 grit grinding disk and feel that I have a good surface for the coring to bond to. I have balsa that is 3/4 thick, so I will be putting in two layers.

Here is what I plan to do. If anybody has any advice it is more than welcome.

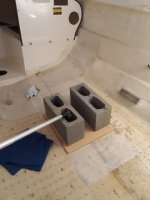
Wet out the areas to be bonded with unthickened epoxy, let it soak in. Then I will lay thickened epoxy onto the top of the bottom skin with a notched spreader. Press the first layer into the thickened epoxy and wiggle it around, like laying tile. Then I will saturate the top of the first layer of core with unthickenened epoxy and the bottom of the next layer of core, and let it soak in. Then trowel on more thickened epoxy and press the second layer on. Generous use of thickened epoxy here. Then weight it down with a cinder block and a board to spread the load.

I wonder if I should put a layer of 1708 between the two layers of core??
 
Your plan looks good. I don't believe that a 1708 between the layers is necessary. If anything, an epoxy computable thin mat might be used. The epoxy alone with the scrim of the balsa should suffice.
 
Thanks for the advice, Bob

I finished filling all the holes that I drilled today during the drying process. That was not fun, but I think it will turn out great.

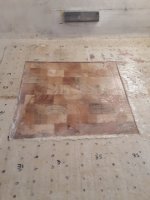
I also got the balsa glued down in the cabin. Did it just like I said I was going to and it seemed to work well. I did not put any mat between the layers, and I am glad that I didn't because the top is not far below the skin in the sole. I don't think the inner skin of the sole is more than an 1/8" thick. After this cures I will grind a bevel on the edges and glass a new upper skin over the core.

Then I'm going to grind all the excess epoxy down from filling the holes and get the inside as smooth as possible, grinding down the non-skid and gelcoat to make a smooth, flat surface. I want to put a single layer of 6oz cloth over the entire floor to make a good, smooth looking cabin sole. I feel that will ensure that the holes don't get cracks around the edges and the entire thing will be tied in really well.

I don't feel that I need to grind all the gelcoat off, just smooth it out and rough it up for the epoxy to bond to. Is this correct?

Here are some pictures from today:

20210402_164056.sized.jpg
20210402_164113.sized.jpg
20210402_164321.sized.jpg
20210402_173818.sized.jpg
20210402_182740.sized.jpg
 
Clay,
This is awesome documentation!

You, along with Scallywag's YouTube videos, really show how to fix balsa core issues.

How did you fill all the holes in your deck? I have been working on a similar project and when trying to fill a few holes, had trouble with air bubbles trying to escape. I poked them, but when I came back later, there was a void. While I was away, another bubble came up, popped and left the void.

Anyway, keep up the great work!

Patrick
 
Air bubbles were a problem, and I changed the procedure by the time I was done.

At first I mixed epoxy and poured it in, waited for it to soak in a little, then put in thickened epoxy. I had the same problems as you, and the thickened epoxy was too thick to get it into the hole and down to the bottom. And the air bubbles!

I started to mix the epoxy slower, trying to not whip air into it. I had been mixing the crap out of it, and I realized that most of the bubbles where just bubble that were rising from the epoxy 'froth'. I then poured it in over a certain area, let it soak, then poured in more until the hole was near the top. I took a chip brush and brushed the holes to pop the bubbles. Then I mixed up thickened epoxy, but much thinner than originally and finished the hole off.

With the amount of holes I drilled, this took a long time. I am especially concerned about the amine blush and getting a good bond between the epoxy layers, so I only did areas about 2 x 3 at a time and this would take about an hour and a half each, of working on your knees and slowly pouring epoxy in each hole... Keeping the epoxy warm makes it flow and pour a lot easier, and any bubbles rise up a lot faster, too.
 
Just peeled the plastic off. There is no glass over the balsa now, only a coating of epoxy.
Lots of grinding today because I have used all my epoxy, more should be arriving tomorrow.

20210403_094736.sized.jpg
 
I don't have time to post any pics right now, but I just glassed over the area in the picture above. Two layers of 1708.

I ground down the whole area to get a good bond with the next layer. I should have used a sander, but instead was using a grinder with sanding disc, and I gouged into the balsa in one area enough that I needed to fill with thickened epoxy first, and some other areas had the epoxy ground off.

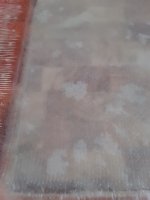
I decided to fill the low spots and the one gouged area and then lay the 1708 over it before it cured so I wouldn't have to grind it again. The balsa kept absorbing epoxy, and little air bubbles would form on it. I brushed over them many times with a chip brush to pop the bubbles, and eventually laid the wetted out 1708 over it. I used a plastic spreader and a fin roller and it all looked good, but a short while later, I could see small voids under the bottom layer of glass in a few spots, and I think it is where more bubbles escaped from the balsa and formed a void under the glass. I rolled the air out again with the fin roller, and again small voids formed within a short time later.

The voids aren't big, nothing larger than a dime, and mostly made up of a bunch of smaller bubbles, not one large one.

What, if anything, should I do about this?

Thanks for the advice,
 
I think that you are using too much epoxy. Lay the balsa in, the thickened epoxy after the brush over the bottom and sides of the cavity with un-thinned, Brush a layer of unthined on the bottom of the balsa sections. Then after that has gone off, brush on a thin coat of epoxy, wet out the 1708 and lay it down into a coat of epoxy with cabosil, put on with a notched trowel. Then you can work the finned roller/brush if necessary.

The 1000 holes::) I almost wonder if you might consider putting random glass fiber (milled fibers) with epoxy into the hole fills, along with the cabosil and filler. This is a thin line to get just the "right" consistency.

We all appreciate the documentation!!! Thanks!
 
After I left for work yesterday it appears the balsa continued to pull epoxy from the layup and there are lots more areas which are resin starved. I'm going to have to grind down into these and repair them. This is not going well...

Also, the two layers of 1708 has built it up quite a bit higher than the existing laminate. The inner skin on the hull is apparently pretty thin. The 1708 claims .044" per layer, and when I made a panel with two layers I got a panel that was .086" thick, so it is pretty accurate. I may try one layer of 1708 and one layer of 6 oz cloth in the cockpit to try and make for a more even match.

Dr Bob, to be clear here, you think I should be putting the wet out 1708 over thickened epoxy which has been troweled on to the top of the core? I was only using the thickened epoxy for bonding the balsa to the bottom skin. What is the reason for putting it under the 1708 also? Or did I interpret that wrong.

As always, thanks for the advice!
20210413_102554.sized.jpg
20210413_102638.sized.jpg
 
The notched trowel will put a very thin layer of thickened epoxy/filler. This is to help fill any irregularities in the surface of the balsa. As you roll out the layer of 1708 this should spread it evenly.

Your .086" would be a little under 3/32" (or a little over 2 mm.) My impression is that the inner layer of our hulls are at least that thick, but I don't have a core sample currently to verify that. You certainly could put in one layer 1708 and a layer of 6 oz cloth. You can also feather out the new glass into the existing bottom.

Have you been able to measure the skin of the inner hull?

Is it possible that the balsa is a bit higher than needed due to the thickened epoxy below?

We went with the 2 layers of 1708 in the cockpit of the 25 because it appeared to replicate the thickness of previous layer of glass on the top,
 
I suppose the inner skin probably is a little thicker than that. It's likely that the two layers of coring and thickened epoxy is thicker than the existing 1.5" balsa.

I will try the thickened epoxy under the 1708 next time. Maybe I will make a small test piece to see if it resolves the problem.
 
Back
Top