popped rivets soaking hull?

I have a 2003 16 ft CD cruiser that I usually keep garaged. When at sea or when washing it on its trailer however, spray water will pool inside the boat until I dry it out.

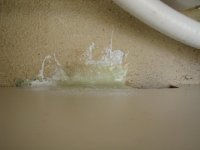
Some of the rivets attaching the seat platform and side wall to the floor have sheared off over the years. It occurred to me that this creates a hole for passage of water into the hull and balsa core… not good.

What is your suggested remedy?

1) Leave it and shoot silicon into the former rivet area;
2) Shoot silicon in the hole then screw-in a shallow stainless screw;
3) re-revet the holes;

How much “meat” is there to the bottom hull for #2 solution, screws? So you have a suggestion on screw size?

Is re-riveting possible? What kind of business might do that in Los Angeles, CA?

Thank you and be well.

Keith Dager
C-PUP16 in Los Angeles, CA
 
Here is my recommended remedy in photos.

http://www.c-brats.com/modules.php?set_ ... _album.php

In my experience, #1, 2 and 3 aren't remedies. At best, they are BandAids over an issue that won't heal itself. I can't think of any partial fix that I (as a an owner or potential subsequent buyer) would be happy with.

I suppose that it would be possible to drill test holes near each one of the missing rivet heads (see my photos) to see whether there has been substantial water penetration and rot. If neither, and you are satisfied with your testing, that's great. But then the question is how to make sure that the condition continues. I don't know an honest answer to that other than to go through the sidewall removal and epoxy plug project that I did. It was tedious as a DIY project and probably expensive as a hired out project.

Some of my missing rivet heads had rot underneath, others did not. Some that still had the heads on had rot surrounding the rivet. Some penetrations showed water discoloration but seemed to be a few years short of rot. Some of the screws into the rear cockpit sole (gas tank, fuel filter, etc.) showed water penetration, others did not.

I guess I might start with deck hardware. I didn't find a single deck fitting that didn't need to be properly re-fitted, even when there was no evidence of direct leaking (which was rare). And it's good practice for what you may find under the missing rivet heads.

Mark
 
I have to agree with Mark. I'd say "none-of-the-above" to your 3 choices. If you're lucky, you won't have the extent of damage Mark had and you can just drill out the holes, fill with thickened epoxy and use stainless screws to reattach the parts. Alternatively, you can use fiber glass tabbing to reattach the parts to the cockpit floor. That would be my preferred approach as those will last almost forever (especially relative to screws).
 
Mark's photos' and narrative show how to do the repairs. Agree with his comments 100%. He did a great job!

Because you keep the boat garaged, the chances are that your damage will not be as much as Mark's boat)-- (Mark how much of the time was your boat out in the weather, and was any time in the freeze thaw cycle times of the year?)

I would look very carefully at what he has done. Decide if you want to do the full repair--which I would strongly suggest. At the very least, pull the left over part of the pop rivet...and drill out the hole, fill with epoxy, and put the boat back together with fiberglass tabs, not new screws or rivets.

Silicone will only make things worse down the line. Putting pop rivets back in will only cause more issues.
 
Wow. Scales (must be fish scales) just fell off my eyes.

I am hoping that having used the boat infrequently in recent years and keeping it in my garage and being in above-freezing Southern California will have prevented any rotting of the core from water entering missing rivet holes. I'll find out. I also have to find out what's that fiberglass tab fix you mentioned. I can picture what you mean. Does West Marine sell that?

Thank you for sharing such critical insight and knowledge of the best fix. You guys sure prove the value of community on this web site!

Be well!
~ Keith
 
Tabbing is used to hold bulkheads in place in the construction of boats. Generally it will be several layers of mat or mat and cloth because is structural. There is some tabbing in all of the C Dorys (Not sure how much in the 16's since they are the only ones which use the pop rivets into the hull floor).

Here is an illustration, where I have filled the screw hole, drilled out, with epoxy, and put in a "tab" of fiberglass and epoxy. In this case I used some 1708 cloth. This is 17oz biaxial cloth, with 3/4 oz mat on the back, with epoxy to replace the "L" brackets holding the cabinets to the floor. You can just use epoxy compatible mat, two layers would be fine. Cut pieces 3" x 2"--Use this to hold the furniture in place. Marc may have some better ideas in his album. The above method works well for the 22's 25's and Tom Cats.

2007_05_25_004.sized.jpg

You have to make a decision--if to just repair that which is broken, or do the whole boat...The latter would be best.

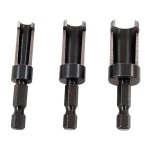
The fact that the boat has been garage stored and no freeze thaw--should tend me to speculate there is no significant rot. But the only way to know is to remove the remainder of the pop rivet, and over drill the core, to see if there is any rot. Another way to "drill out" the rivet would be to use a 1/4" or 5/16" "plug cutter" in a plunge router--that way, you have a circular cutter cut thru the surface layer of the hull bottom. l

photo of plug cutter:
167efc89-5802-459d-91ea-9b38a794eb8d_1000.jpg There are a variety of types--they are used to cut bung plugs for decking and furniture to fill screw holes..
 
I'm a lucky guy to have such kind-hearted experts advise me. I know now what to do! How much whisky do I drink first for courage before drilling through the surface of the inside hull to the core without punching through the bottom of the boat?

Now I am wondering about that brass strip that runs along the bottom of the boat... how was that attached ?
 
The brass strip is installed only into solid glass areas-no coring behind the brass strip.

Save the whisky for after you do surgery! Then congratulate your self. There are always many ways to do these things. The plug cutter or any drill would only just go thru the fiberglass shell on the upper surface of the hull--what you walk on. You can use these with a drill--the other way, is to drill multiple 1/8" holes all round where the rivet center way--and then bread between the holes,--or used a small Dremel tool bit to cut s circle around the metal, just thru the glass. I would get the pop rivet and mandrel out, because it can cause trouble down the line.

My guess is that your boat is going to be in good condition--and minimal if any water intrusion.
 
It would be more difficult to drill through the bottom than you might think. The top layer of glass is the thinner of the two, and it takes some time to get through. The drill bit then quickly sinks through the balsa and thunks on the bottom skin. Spooky the first couple of times. You would have to continue on and apply more pressure for 15 or 20 seconds to get through that layer.

I've always had trouble using plug cutters with a hand drill. Perfect for a drill press, but even on hardwood the plug cutters tend to skitter around. I could imagine that trying to use a plug cutter on fiberglass could be frustrating.

Maybe there is a simple way to check/fix all the cockpit liner fastenings. Here is what I would consider. You probably want to get the rivet mandrel out, as I found that these commonly had a small amount of compromised balsa around them. My core was damp enough that the steel mandrels had rusted even on rivets that didn't look like they had leaked. So use a 1/2" drill to plunge down the rivet hole after removing the top of the rivet. This is what I did, but after removing the liner. In your case, you might consider a 1/2" hole through both. Go in just deep enough to get at the mandrel with needle nose pliers. Pull that out and clean out the hole, checking to make sure that the wood is okay. On a few of mine, it wasn't quite okay, but I could easily scoop out the inch or two of surrounding balsa that looked bad.

If all goes well, you now have your cockpit liner sitting in place without any cockpit sole fasteners. You then clean off the lip of the liner in six or seven places and, when you fill all of the holes that you have drilled with epoxy putty, you also epoxy on a layer or two of fiberglass cloth. So instead of a fiberglass tab that bends 90 degrees from the cockpit sole to the cockpit liner (not really possible on the CD 16), you have some epoxy plugs with fiberglass caps holding the liner in place.

That assumes that you've checked every hole before you begin filling/attaching. Otherwise you might find that you have to remove the liner after doing some attachment work. Because of the stuff that I did behind my cockpit liner, I wanted the possibility of easily (hah!) removing the liner in the future. Others may not care.

Then all you would have to do is paint the flange around the bottom of the cockpit liner where you drilled and filled.

Even when I make it sound easy it doesn't sound all that easy.

Mark
 
Mark,
Now far down are the mandrels? Does the bit hit them?
I agree that with the flange of the 16 cabinetry, that the glass tab over the outside--after roughing it up would be better. There is another way: put a layer of epoxy compatible mat between the upper part of the hull, and the cabinetry. (sanding the deck and underside of the cabinet.) The mat need not be any wider than the flange, and thus you would still have the cosmetic look of the smooth flange--also not have to put the large hole in the top of the flange--just remove the mandrel/pop rivet, and then fill the hole with a dab of Marine Tex in white--might be cosmetically more acceptable.
 
Bob,

The bit will hit them. They are about 1/2" long, so in some instances I pushed them further into the balsa in order to drill through the top layer of fiber glass. Then I removed the mandrel and proceeded.

"(sanding the deck and underside of the cabinet.)"

That's the rub on the CD 16 Cruiser. In order to sand the deck and the underside of the cabinet/seat box/side wall to make a bond there, you have to completely remove the entire side panel (which is one piece including the seats and the throttle). Once that far along, I would go with my re-fastening method (and using the space behind the panel for lockable storage). I was trying to think up a method where, if all went well, that wouldn't be required.

Mark
 
Mark,
Thanks, I went back over your photos a couple more times. How is the side panel, seat, fastened at the upper part, under the gunnel?

I can see that you would have to remove all of the pop rivets in the bottom--but I guess, if I was doing the job, I would do that, Could you flex the box seat and panel parts which contact the floor, enough to get a fein saw blade under them? If so you could use an old blade, and contact cement some #50 to 80 grit and rough up the surfaces enough, that with some cleaning, you could slide pieces of mat saturated with epoxy under them--If you could get them up about half an inch. (Maybe leaving the top attached--along with the shifter and throttle/wiring.?) May be more work than necessary--but there was not a lot of strength in the pop rivets--especially after some corrosion...
 
Each panel is fastened with 4 rivets along the gunnel and, forward of that in the cabin, 4 screws that go into a wooden cleat that's glassed into the underside of the deck. The fasteners on the cockpit sole are the majority of the work, so once I had those out I just kept going and took the panels out.

There was a bead of caulking around the bottom of the panels that had failed as to holding the panel. The caulking had only stuck to the deck and it was much easier to remove that after the panels were out. I couldn't figure out the benefit of a bead of caulk, so I left that out in the install.

It would be possible to leave the throttle controls connected and work around that, although it would be a bit clumsy. I did some work on the throttle (new splash well boot on the control lines, routed the lines higher behind the new side hatch, etc.), so I could justify removing my throttle cables.

I had to pull out my Yamaha owner's manual to reconnect the throttle cables with all of it's fiddly little cams and springs. I wish I had just taken a series of phone photos as I took it apart. That would have saved me an hour.

Mark
 
Keith Your water leak is coming thru the screws that go into your handrail on top of the boat....mine has done it several times...somehow the screws seem to loosen up and then you get a drip....I loosen up the handrails then put 5200 where they attach to the roof and tighten the screws again...seems to do the trick for a few years...

I had a leak coming from my forward hatch...it turned out to be whatever they bedded the hatch in...I have to remove the hatch and put some 5200 between the hatch and the deck...should hold the water out...

Yer Pal
Joel
SEA3PO
 
C-PUP's transom had several drill/screw holes from a removed transducer. I just plugged those holes with silicon. Seems like the advice for the interior of the hull (drill, check for rot, soak with penetrating epoxy, plug holes with epoxy putty, cover with epoxy mat and surface that with penetrating epoxy) would be a fix for the outside transom hull. All those existing fittings in the transom for the trim tabs, drain plug, an underwater light, 2 transducers... I sure wish the installer had used penetrating epoxy after drilling and before attaching all that. Maybe I'll need a future DYI instruction on transom replacement.
 
Keith,
You are discovering something that several of us have been preaching on this site (and others) for years. The silicone is a no - no on the transom. Yes, people use it. It is quite possible that where your transducer screws in the transom were, was either solid glass or a void below the balsa core, and may be OK.

Since you don't keep the boat in the water, and keep it garaged, your risks are less.

Penetrating epoxy is not necessary, If dry and clean, I mix my epoyx, then use the unthickened to do the coating inside of the hole, Then mix in the cabosil and filler to a proper consistency before putting it in place. On the outside for a small hole, there is no necessity to put glass over it.

For putting transducers the proper way to do it is to put a piece of Starboard on the transom--properly applied. They screw the transducer screws into the block of starboard. Many times transducers have to be moved to get best performance. There is no harm in moving the transducer screws in the block of Starboard.
 
Back
Top