You are using an out of date browser. It may not display this or other websites correctly.
You should upgrade or use an alternative browser.
You should upgrade or use an alternative browser.
Photoshop Fun
- Thread starter MOOSE
- Start date
Pat Anderson
New member
- Joined
- Nov 2, 2003
- Messages
- 8,562
- Reaction score
- 0
- C Dory Year
- 2005
- C Dory Model
- 25 Cruiser
- Vessel Name
- Daydream
Jim, using Photoshop for so long and so well, it is probably difficult for you to imagine how daunting it is for newbies to just dive into Photoshop - at this point, I pretty much need a step-by-step "recipe." It was certainly not obvious how you would use Find Edges - if you just used it without a recipe, it would appear to have just loused up the color. It seems everything is a series of steps, some more complex and some less. And on that score, Moose and Brent and Dixie, can you run us through the "recipes" for your last couple of images?
Pat Anderson
New member
- Joined
- Nov 2, 2003
- Messages
- 8,562
- Reaction score
- 0
- C Dory Year
- 2005
- C Dory Model
- 25 Cruiser
- Vessel Name
- Daydream
And another question, one I have been grappling with since I switched to the Mac. On the PC I have a little program from Sierra Imaging called Image Expert that came with my first digital camera. The camera is long since out of service but I use the program a lot. It is truly no "expert" but it has the best approach to printing images I have ever seen. You hit the "Print Layout" button, and you can print 4x6, 5x7, 8x10, 1 per page, 2 per page, 4 per page, a page of wallets, portrait, landscape, whatever. So, it would be really easy to print say a 5x7 of the Priest Lake Lakescape automatically centered in a sheet of 8x10 photo paper. I have found no comparable facility to do this easily on the Mac. The work around is to start a new project in Photoshop and import the JPEG as a "Pict Resource" - a PITA to say the least. Is there some easier and more direct way to just print an existing image in various ways?
MOOSE
Member
- Joined
- Nov 7, 2003
- Messages
- 624
- Reaction score
- 1
- C Dory Year
- 2001
- C Dory Model
- 22 Cruiser
- Hull Identification Number
- CD022963D101
- Vessel Name
- MOOSE
One perhaps unfortunate aspect of Photoshop, at least the version I have, Pat, is that it will keep track of all of the changes you make to a photo up until the time you close that file, and then all of your history is lost.
Having said that, the Battle Island Light photo above is made up of three different photos taken at different times and places, the foreground rocks, Battle Island itself, and the brooding sky.
Two of the most important concepts to work on understanding are 1) how to make "selections" and 2) what a "layer" is. If there is something within a photo that you want to manage separately (lighting, hue, brightness, etc.) or something you want to import into another photo (in this case the foreground rocks and the sky) you need to first "select" it. Layers are like a photo made up of stacked sheets of mylar, each with its own part of the image which can be managed separately. So in this case, the foreground rocks are in the top layer, the island in the middle, and the sky at the bottom. The composite is what you see. Once you get the stack of layers as you'd like them, you can apply filters or effects (like converting to B&W and adding film grain and a frame) to the whole works.
Trying to figure all this out has been at times frustrating but the process of learning is overall fun. I have found in making these "creations" that it is helpful to have some idea of what you'd like to accomplish before you start, otherwise you can spend hours tweaking and retweaking and never really get anywhere. I hope this helps and I'm sure Jim will have a lot to add.
Al
Discovery
Active member
- Joined
- Dec 8, 2003
- Messages
- 1,245
- Reaction score
- 1
- C Dory Year
- 2006
- C Dory Model
- 255 Tomcat
- Hull Identification Number
- CDO25510J506
- Vessel Name
- Discovery
Pat
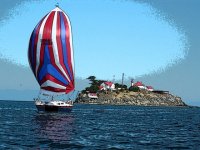
I hate to admit it, but that was my first attempt at using Photoshop CS. I have had the Photoshop Suite on the Mac for a couple of years, and this thread finally got me to try it out. The pix was made using a "poster" effect filter. I forget how I did the effect on the sky. Sorry not much help.
Brent
Doryman
New member
- Joined
- Oct 3, 2006
- Messages
- 3,807
- Reaction score
- 0
- C Dory Year
- 2006
- C Dory Model
- 255 Tomcat
- Vessel Name
- Lori Ann
Pat Anderson":2rp306za said:And another question, one I have been grappling with since I switched to the Mac. On the PC I have a little program from Sierra Imaging called Image Expert that came with my first digital camera.
Have you tried importing your photos to iPhoto? All you have to do is to drag them from the Finder to iPhoto. I was not able to do two-up but I was able to specify 8x10 paper and then give it a 1" margin all around.
You could also run your old program as a Windows task under Parallels or VMware Fusion. Aren't you already using Parallels?
Warren
sorry left off Picasa, It has 6 different Print Layout options and basic edit and effects.
try it
https://secure.picasa.com/support/register.php
try it
https://secure.picasa.com/support/register.php
Pat Anderson
New member
- Joined
- Nov 2, 2003
- Messages
- 8,562
- Reaction score
- 0
- C Dory Year
- 2005
- C Dory Model
- 25 Cruiser
- Vessel Name
- Daydream
Picasa is a Windoze only program...can run Image Expert under Parallels, but just wondering if there is a native Mac program to do decent print layout, so far I guess not...
ok thanks I thought you wanted a Windows program. My mistake
I would check the software that is included with printers and cameras. Canon supplies some useful programs but didn't check if MAC versions are included. You should start a new message under the Nerds section and hopefully the MAC gurus will answer it.
I would check the software that is included with printers and cameras. Canon supplies some useful programs but didn't check if MAC versions are included. You should start a new message under the Nerds section and hopefully the MAC gurus will answer it.
- Joined
- Oct 23, 2003
- Messages
- 2,870
- Reaction score
- 10
- Location
- Port Angeles
- C Dory Year
- 1995
- C Dory Model
- 25 Cruise Ship
More fun with The Gimp - here's a photo to charcoal sketch conversion.
Lot's of Gimp tutorials on the net - here's a batch, and here's the one I used to pick up pointers on converting Fred's photo below.
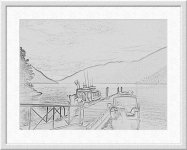
The original
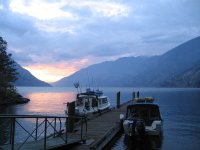
Lot's of Gimp tutorials on the net - here's a batch, and here's the one I used to pick up pointers on converting Fred's photo below.

The original

Knotty C
New member
- Joined
- Mar 23, 2005
- Messages
- 485
- Reaction score
- 0
- C Dory Year
- 2005
- C Dory Model
- 25 Cruiser
- Hull Identification Number
- CD025118D505
- Vessel Name
- Knotty C
Knotty C
New member
- Joined
- Mar 23, 2005
- Messages
- 485
- Reaction score
- 0
- C Dory Year
- 2005
- C Dory Model
- 25 Cruiser
- Hull Identification Number
- CD025118D505
- Vessel Name
- Knotty C
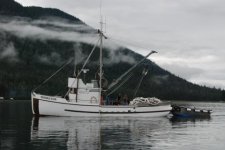
Thanks Moose. I use Photoshop 3.0 Editor, pull down filter, artistic, cutout, adjust number of levels at 6, edge simplicity at 7, and edge fidelity at 2. The settings are included in the url.
The next photo my wife Dee took on our Alaska trip is Green Lighthouse between Prince Rupert BC and Ketchican Alaska and is modified as a watercolor. It looks better full screen. (I'm using as my desktop on my laptop)
Don
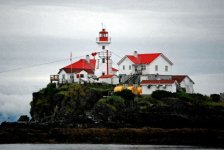
The next photo my wife Dee took on our Alaska trip is Green Lighthouse between Prince Rupert BC and Ketchican Alaska and is modified as a watercolor. It looks better full screen. (I'm using as my desktop on my laptop)
Don

Pat Anderson
New member
- Joined
- Nov 2, 2003
- Messages
- 8,562
- Reaction score
- 0
- C Dory Year
- 2005
- C Dory Model
- 25 Cruiser
- Vessel Name
- Daydream
Bill - the charcoal is great! Will have to fire up Gimp and give that one a try!
Don - what URL? Don't see one, but I too like the effect on the tug!
Don - what URL? Don't see one, but I too like the effect on the tug!
- Joined
- Oct 23, 2003
- Messages
- 2,870
- Reaction score
- 10
- Location
- Port Angeles
- C Dory Year
- 1995
- C Dory Model
- 25 Cruise Ship
Dene":3kzhmjco said:That looks like the Columbia River gorge but I don't recognize the dock. Where is this?
I stole the image out of Fred's Lake Chelan album, but I've never been there. According to the photo caption, it's Graham Harbor dock.
MOOSE
Member
- Joined
- Nov 7, 2003
- Messages
- 624
- Reaction score
- 1
- C Dory Year
- 2001
- C Dory Model
- 22 Cruiser
- Hull Identification Number
- CD022963D101
- Vessel Name
- MOOSE
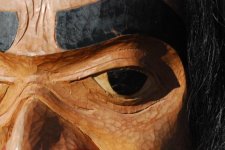
Here's a derelict Canadian Coast Guard boat at Battle Island, Lake Superior. It was first "Quick Fixed", then the "Find Edges/Color Sketch" technique applied, and then Knotty C's "Cutout Filter". Finally the washed out sky was selected and replaced with a pastel cyan fill.


