Leaking foredeck hatch deja vu

thataway

Active member
I was feeling so good that Frequent Sea didn't seem to have any window or hatch leaks--but today we had a heavy Florida rain. It was susposed to be a "rest" day for me, but I went aboard to check up on some items--and there was over a quart of water on the foreward bunk platform and floor(no cushions present). It was all leaking from a screw holding the inside trim ring JUST LIKE on the Tom Cat 255, Thataway! Pulling the trim ring showed some dirt and water, and drops from a second screw hole. It took me over an hour to get the hatch rim off. The bedding compund was probably 4200 or 5200. I have all sorts of thin slicks and knifes so I cut all of the sealant. When I pulled it free (photos in Thataway Album 148 to 151), there was almost no caulking on the foreward part of the aft rim of the lip of the opening or the hatch frame! The plywood core was wet, and there was water in some of the screw holes. To compound matters, when the deck cutout was done, for some reason the saber saw was angled so that the top of the lip was cut back about 10 to 15 degrees more than the bottom (thinner top than it should be--almost exactly like Thataway's leaking hatch!

I spent 3 hours with heat guns, compressed air at 110 psi (putting the nozzel at one drilled out screw hole forced water thu the plywood, and air thru a void about 20" away from the screw hole. There seemed to be a void where the trim ring screwd into the glass, with water in this void. The water was blown out, and evaoprated. The plywood dryed out. Epoxy coated the raw aft edges of the plywood opening at the lip, and a 10oz layer of glass was laid to cover this raw plywood. In the morning, the screw holes will be filled with epoyx and filler, the rim built back to where it belongs (adding another 1/4" of microfibers, cabosil and filler, plus fairing the lip). The aluminum hatch lip was cleaned with chizzels, several different grades of wire brushes and acetone (what ever sealant was used is still disolved by acetone). Sometime tomarrow, the hatch will go back on (if it is not raining) with proper amounts of 4200 and the assurance that there is a complete seal.

This is not a design flaw--The defect that 2003 CD 25 has it is the same type of problem I encountered in the Tom Cat 255 which was built in May 2006. This is a quality control problem, which should have never happened in either boat. I am not going to point fingers at factories or people. The C Dory administration is getting a copy of this post. Yes, both of these items are past history, but this type of carelessness on someone's part is what hurts all of us. It is not a big deal for me to fix this sort of thing, and I do it gladly--but what about the owner who does not realize that there is a problem, which will get worse with time?
 
It's raining out and I just returned from my boat. My 2007 CD-25 has the same leakage problem around the hatch that Bob found on the Frequent Sea and on his Tomcat. The leakage is substantial.

Earlier, on examining the inspection port over the fuel sender gauge I found no sign of epoxy (or anything else) around the edges of the hole cut out for the inspection port. The wood core was becoming soft in several spots.

I'm contacting the factory this coming week to try and get an answer as to whether my aluminum fuel tank is resting on the hull or is elevated on plastic strips. At the same time I'll discuss remediation of the preceding items and a few others that need further investigation. Unless I'm restricted from doing so, I'll post the results. Assuming I get an answer regarding the fuel tank I'll post it.

From Bob's post and my experience it appears that the same hatch quality control defect is present over a course of five model years (2003 through 2007). I'm unable to understand how a problem of this type could exist for such a long time. I grant there's a possibility that there are only three affected boats but I find that unlikely. I'd be curious as to how many others have encountered this same hatch leakage problem.

I have gotten the sense that some c-brats have a preference that topics such as this not be discussed, but had there not been a post on the hatch leakage topic, I wouldn't have gone down in the rain today to check it out. I had earlier tested for leakage with a hose and and it did not show up. It appears there was a quart or more of leaked rain water there this afternoon (judging by the weight of a quilt which had soaked most of it up).

Bill
Edgewater, MD
 
I have the same problem on my 2004. I patched it when the boat was new and am about to remove the hatch and reinstall it properly. I will have McMichaels yacht yard look at it as soon as the spring rush is over.

Some of you are recent owners. Before the old C-Dogs website was taken down you could read about the same type of fixes and leakage problems on C-Dory boats. These issues have existed for a long time on these boats. While the design and the boats' capabilities are great, the initial build quality is sketchy when it comes down to hardware and hardware installation. Any new owner should expect to fix the shortcomings by themselves with varying dealer support depending on where you buy your boat.

The good news is that C-Dory Marine Group will pay for their mistakes under warranty. What is not compensated is the disappointment a new owner feels as these issues emerge. I would guess that if warranty issues had a major impact on their bottom line or their marketing that the repetative QC defects would evaporate.

GET YOUR ACT TOGETHER C-DORY!!!!

I spoke with Brett about the remaining problems on my boat and he appoligised for the problems. I would rather use my boat instead of taking precious time to fix it.
 
The top flange of the hatch tends to "shield" the edge of the hatch. If the bow is down, and no water pools aft of the hatch, it will not leak. The Tom Cat is oriented bow up, because it is on a lift and I want any water in the bilge to drain aft. The C D 25 also has the bow up, about 6" above where the foot jack on the foreward end of the trailer would have it--this is to get water to drain aft out of the bilge. It is interesting that the leaks have been the aft part of the hatch--this is because this is where water can trap.--if the bow is down, water drains foreward off the hatch.

Next up--the transom drains in the earlier C D 25's--I'll post after the photos are up.
 
Bill.Secure":ie3x2fqa said:
Earlier, on examining the inspection port over the fuel sender gauge I found no sign of epoxy (or anything else) around the edges of the hole cut out for the inspection port.

At least your inspection hatch is over the fuel sender...John at Buccaneer Marina, who replaced my fuel filter, pulled the inspection cover - and there is nothing below it but aluminum tank. Those careful workers at C-Dory had installed the cockpit deck backwards. I need to contact them to fix it. It isn't as simple as just pulling it and turning it around because it is cut out where the side steps are.


Bill.Secure":ie3x2fqa said:
I'm contacting the factory this coming week to try and get an answer as to whether my aluminum fuel tank is resting on the hull or is elevated on plastic strips. At the same time I'll discuss remediation of the preceding items and a few others that need further investigation. Unless I'm restricted from doing so, I'll post the results. Assuming I get an answer regarding the fuel tank I'll post it.

I'd appreciate your posting the response no matter what. We should not accept restrictions, a warranty is a warranty. I have no idea about my own fuel tank - and I saw it in the factory before the cockpit decking went on, but was not tuned in to what I should be looking for.


Bill.Secure":ie3x2fqa said:
From Bob's post and my experience it appears that the same hatch quality control defect is present over a course of five model years (2003 through 2007). I'm unable to understand how a problem of this type could exist for such a long time. I grant there's a possibility that there are only three affected boats but I find that unlikely. I'd be curious as to how many others have encountered this same hatch leakage problem.

The hatch over our vee-berth does not leak - we have been in some pretty good downpours here. On the other hand, I have no idea whether it is properly installed or if some problem is developing...

Bill.Secure":ie3x2fqa said:
I have gotten the sense that some c-brats have a preference that topics such as this not be discussed, but had there not been a post on the hatch leakage topic, I wouldn't have gone down in the rain today to check it out. I had earlier tested for leakage with a hose and and it did not show up. It appears there was a quart or more of leaked rain water there this afternoon (judging by the weight of a quilt which had soaked most of it up).
This topic HAS to be discussed, individually we might have a very hard time getting anything taken care of, collectively we will probably be quite persuasive...
 
It just occured to me part of that the reason the leaking is visiable, is that there are several holes (see the photos)--and several of those are drilled straight thru from the deck and the inner liner. Only the 4 screws for the inner liner of the hatch should be drilled thru the inner gel coat and layers of glass. Water can trap between the outer layer of glass, the core--void around the hatch, and inner layer. If the hatch is properly caulked this will not happen.

I would think if the hatch does not leak, that there is not reason to pull it. There is a problem doing a moisture meter test, since there is an aluminum frame and that will register a false positive on the moisture meter. The inner frame is easy to pull and check for moisture, and that is worth while doing. A fair amount of moisture can be held in the "trough" of the rim, so it is a good idea to pull it and see if there is any small leak.
 
I have 2 battery access hatches. One was screwed in and caulked - nice job. The other is secured with 5200 or something equally bulletproof. This would not be a problem except that it is difficult to get a battery in or out and almost impossible to work inside these spaces without taking the hatch off.

Also, the chain pipe was installed with no caulk at all - so water leaked there. Also the boat came from the factory with no drain hole in the chain locker, so the dealer drilled on for me - right through the forward edge of the storage space under the bunk, so that much of the water that leaked into the chain locker did not drain out, but instead drained into the boat.

None of these are critical items, but taken together they are most disturbing.
 
You can expect what you inspect !!
Unfortunately for me, I have no clue about boats. Posts of these problems need to be made so rookies like me can seek help and have these areas looked after before serious damage occurs. I appreciate these posts and as a result of them feel like I am part of an honest and caring group of people. Thanks to all of you who have shared your wealth of knowledge on this site about every topic imaginable :!:
 
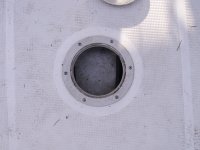
So here is my fuel gauge sender inspection hatch.

Gas_Sender_Gauge_Inspection_Hole.jpg

I felt around below the inspection hatch, there is raw plywood there that is sprayed with something but not sealed with epoxy. It did not feel soft or anything, so maybe it isn't a problem - yet.

The deal is, the hatch hole is not centered, it is 15"+ on one side and 17"+ on the other - the cockpit deck was obviously (now that I understand what I am supposed to be seeing there) installed backwards.
 
Speaking of those inspection hatches -- I wrecked my hand on Lake Powell opening a stubborn hatch just using my fingers. :amgry Are there any tools or techniques for opening those suckers?

Warren
 
Warren,

I began using Spa Lube on these circular port hole covers, on the gasket and plastic threads. Helps alot in keeping them 'unfrozen', also, don't tighten them down too much. I suppose the next fix would be to make a simple tool, maybe 12" long" with a couple of nibs to place over the cover and turn with leverage -- wood, plastic or starboard should work.
 
Lori Ann":362qsh96 said:
Speaking of those inspection hatches -- I wrecked my hand on Lake Powell opening a stubborn hatch just using my fingers. :amgry Are there any tools or techniques for opening those suckers?

Warren

An axe works pretty well.
Once.
 
I made a "wrench" for opening 4" bronze or SS deck inspection plates, but drilling holes in a 18" long piece of SS 3/16 thick x 1/2" wide and threaded this hole, and put in two #10 bolts, to match the holes in the plates--I had used the U wire type of handle and it didn't have the grip necessary. A "tool" for these plates could be made of a hard wood. I like teflon or silicon grease--which is probably the same thing as "spa Lube".
 
Back
Top