Help Please, No Power is Reaching Electrical Panel at Helm!

Pat Anderson

New member
We were last out in August 2015, and everything was working fine. Daydream has been in our garage since then with the shore power plugged in. Fast forward to today, I pulled the boat out into the driveway, no horn, no lights, no accessories, no water pump, no nothing controlled from the panel at the helm. But the charger is working, batteries are fully charged and not from solar because boat has been in the garage. There is a big breaker that sits right by the starting battery, and it is popped (I think it is popped, the little lever is out) and it won't reset (which I think I would do by pressing the little lever back in, but it won't stay in). Is this breaker indeed the culprit, and if so, how do I deal with it? What could have caused it to pop in the first place, there has been no load on the 12 volt system at all.
 
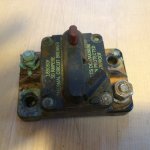
OK, mystery solved I think. I just pulled the breaker, and here is a pic:

Breaker.sized.jpg

The terminal connector on the cable that was connected to the really corroded post was broken. Broken terminal connector equals broken circuit, no juice!

The breaker MIGHT still actually work, but given its corroded appearance, I am going to replace it. It has been down there for eleven years now, time to retire it!

The bigger problem for me is how to put a terminal connector on the cable. I think the cable is probably AGW 4, at least it looks bigger than the AWG 6 I have on the solar controller to batteries on the fifth wheel. Off to LFS tomorrow I guess!
 
You also have a poor location for that breaker, based on the corrosion. It should be up out of the bilge area. Or, maybe this boat spent some time underwater?
 
AstoriaDave":34gumib1 said:
You also have a poor location for that breaker, based on the corrosion. It should be up out of the bilge area. Or, maybe this boat spent some time underwater?


This boat has spent NO time underwater! The breaker locations is right where C-Dory decided it should be in 2005! I wonder how many other CD25s of similar vintage have the breaker in this location? It is actually not "in the bilge," it is on the raised fiberglass tray the starting battery sits on. Still, this is an area where moisture is to be expected!
 
Yep, Pat you are right to replace the brakes. There is a lot of condensation, from bilge water in the 25, and unfortunately this is probably the best place to put the breaker--should be within 7" of the battery. I would do several things. Replace the same breaker but with a 60 amp breaker. I would either get one of the "hit the spot" with a hammer swagers, (but use Vise Grips or a vise to do the crimp. Or buy a hydraulic hand crimper from Harbor Freight.

When you assemble the circuit coat the terminals and fittings with conductive non corrosive grease. Spray the complete switch with "corrosion block". Every year, check the fittings, and re apply the grease and corrosion block.

L-639-701010-2T.jpg


image_11366.png

The Harbor Freight is cheaper, and better, but be sure you use the right die.

image_11428.png
 
Hi Pat, Sorry about the electrical issue. Better in the driveway than in the anchorage off Stuart Island. Looking at the picture, your fuse was in about the same shape as mine last Spring when it was replaced at Roger's Marine in Portland. They said replace it or it would go bad. Guess they were right.

Mine is in the stbd lazzarette, high and dry, but still looked "crusty" and ??? So I took Their advise.

Hope it is all better now.

Harvey
SleepyC :moon

:embarrased :oops:
 
Tomherrick
I used one (Harbor Freight hydraulic crimper that Dr Bob showed). Rewired my boat and used it for all the larger crimps. It worked very well -- no problems at all. Nice solid crimps. I was impressed, it seems like good quality tool. I wouldn't hesitate to get another except that this one is still good! My figuring about HF tools is that if they last to get the job done and it's not a tool I need all the time, why spend more. If it's a tool I use all the time I'll go for a real commercial tool.
 
Hi Pat, I'm pretty sure LFS has a hyd terminal crimper for customer use. I've used their hyd crimper for wire rope (cable) many times and believe it is also used for copper terminals. They also have wire remnants at attractive prices. Text me if you need a hand. Larry
 
I have borrowed a friends for a couple of swages-don't own one, but thinking about buying one. . My friend, who does a lot of electrical work on boats has one, and it has worked well for him--as I recollect a couple of the dies were not perfect, and he had to do some minor modification. I tend to agree that HF are not the best tools, but this type is better than many. I have used the "hit the hammer"--in the vise or with large Vise Grips type many times. Not the best, but works--and I often sweat some solder down into the crimp after for the large cables. (Yes I know about the controversy about solder in boats. National standards makes a low temp solder system, and it works well.f)

Many stores have hand crimpers which can be used by customers. However, I suspect that the #6 or larger wire that Pat has, runs all of the way up to his helm--and that he would not want to take it out and then re-run. I would leave the cable and crimp in place--perhaps a new wire from the battery would be in order.

This is also a good illustration why if you are putting a large wire from the battery to the console, that you should leave a few inches to a foot of slack, so it can be re-swaged. a small supported loop would be ideal.
 
There is a mechanical reason for not soldering the terminals after crimping. A good terminal and a good crimper will create a junction that minimizes cold working of the wire material.

This lesson was learned the hard way in aviation because of vibration. Solder can create a situation that creates a sharp edge that the encapsulated wires work against. Picture bending a copper wire over the edge of a 90 degree sharp angle time and again and it will soon crack. Bend the same wire over a radiused edge, and it will take many more straightening and bending cycles before damage resulte.

Boats are vibration machines like airplanes and though the potential risk to life and limb on a boat due to a broken or high resistance wire junction.

I've owned 5 larger boats and all five developed faults from bad wiring or connections at some time during my ownership. Many were factory sloppy work, most were aftermarket installer work or prior owner work.

As my granddaddy said, the right tool for the job and any job worth doing is worth doing right. My boat Poopsy is a poster child for poor wiring connections, factory and prior owner, bBut I'm putting them right, one by one.
 
It's a bit more of an investment (but then tools are a good investment, right?), but I have an FTZ Heavy Duty Crimp tool, their part number 94284. It will crimp FTZ (and perhaps other brands) power lugs, starter lugs, and butt splices from AWG 8to 4/0. It's not cheap (I think it was around $180 when I bought it a few years ago - I got it from Fisheries Supply), and so I really debated before buying it. First, "Well, I could just get these few crimps done at XX store," then "Well I'll use it then sell it on eBay," then.... I bought it.

As it turns out, I have made hundreds of crimps with it. On the C-Dory, on my RV, on other people's RV's and boats. SO glad I bought it. It is so much easier to be able to make my own crimps as/when I need them. I can do one end, then get the lug facing *just* the right way on the other end (which can be a big deal with larger wire in small spaces). It just makes doing (and changing) things so much easier, and I have complete confidence in the crimps. I don't add any solder as they are super tight and completely resistant to heat (which hopefully I won't have, but still).

I purposely got the non-ratcheting version as in tight spaces the ratchet can be a liabliity (tool has long arms), and there is no trouble at all knowing when the crimps are complete.

I first heard of this from one of Maine Sail (Compass Marine, RC) and very glad I did. Incidentally, he reviewed the Harbor Freight crimper and gave it a big pan. Thing is, even though he is a tool snob and a pro, he does try to find usable, economical tools to recommend to DIY-ers (and I have bought of few of those that he did like); but he couldn't make peace with the HF crimper. I see someone on here likes it - that may be a sign of variable quality control, so maybe some are good. Or maybe you have a lot of AWG 7 to crimp :wink

Anyway, I know not everyone will want to spring for this tool, but just wanted to mention it.

PS: When using the FTZ lugs (which are tinned copper with no built in covering), I use the FTZ Dual Wall adhesive heat shrink. I like that best of the various ones I've tried. It's tough, but also flexible.

Now, if I could JUST find a *good* non-electric heat gun I'd be in business. So far all I've tried just haven't been up to the task, so it's one of the few tools I still need to use an inverter or AC power for (electric heat gun for shrinking).
 
potter water":3rhcrcr5 said:
There is a mechanical reason for not soldering the terminals after crimping. A good terminal and a good crimper will create a junction that minimizes cold working of the wire material.......

I was not going into that solder with arguments pro and con, but there are times it is allowed and can be effective. That is if the wire is supported.

From ABYC:
11.14.5.7 Solder shall not be the sole means of mechanical connection in any circuit. If soldered, the connection shall be so located or supported as to minimize flexing of the conductor where the solder changes the flexible conductor into a solid conductor.

EXCEPTION: Battery lugs with a solder contact length of not less than 1.5 times the diameter of the conductor.

NOTE: When a stranded conductor is soldered, the soldered portion of the conductor becomes a solid strand conductor, and flexing can cause the conductor to break at the end of the solder joint unless adequate additional support is provided.
 
Pat, I just made some similar cables and did not want to invest in a $200 crimping tool with multiple dyes. I bought this one on Amazon and it worked fine. I only needed to make 4 connections. I am more than willing to let you use it, but Bellingham to Lake Stevens...time=money and for $17.


http://www.amazon.com/TEMCo-Hammer-...id=1460563820&sr=8-8&keywords=crimper+8+gauge

Our breaker is also located in the starboard battery compartment, screwed to the upper front splash well. So discourage corrosion I use either dielectric grease or spray; you can get it at any auto parts store, or even on Amazon. :lol:
 
Thanks, "Local Boy"--I had forgotten about that crimper. It is definitely cheaper (The Harbor Freight hydraulic is about $60). What blew me away was the price of the first one I showed in the illustration. ($80). I paid about $16 for mine many years ago.

The TEMCo can be used in a vise--as well as sledge hammer for the larger sizes--and this will often get a better swage.
 
Corrosion can travel inside wire jacket !

On the wires leading to the breaker... before crimping on new ring terminals, you want to strip back the wire jacket until no more corrosion.
 
Corrosion can travel inside wire jacket !
I had considered opening another thread, or addressing the issue here, and Chromer's post made my decision easy.... Absolutely you have to get back to good wire, but in cleaning up the wire strands you tend to loose the tinning, if the wire had the creeping corrosion.

I have run into this issue of corrosion along the wire, to the extent that I have completely re-wired boats which were 20 years old. Lots of wire in a Cal 46!

1. Wire should be tinned, marine grade, and AWG (not SAE (automotive). American Wire gauge is 6 to 10% larger than SAE gauge! All tables for wire runs on boats are AWG.

2. All wires should be properly crimped with marine quality fittings (meaning tinned, and coated with plastic covers--best with adhesive heat shrink tubing, to form a waterproof seal at each swaged joint.

3. If the swage (crimp) fittings are not adhesive shrink tube equipt, they should be covered with either Adhesive heat shrink tubing, or they should be covered with regular heat shrink tubing, and then the ends coated with liquid tape.

4. I feel that all crimps in the #10 to #20 AGW, should be made with a high quality ratchet crimper--there are some cheaper ones, which do not have the proper dies for AWG fittings.

5. For the large fittings, where it is not possible to seal the ends, with covering, is where I have used solder--this achieves two goals--if I have a question about the
"hit the hammer" type of swagger's effectiveness, than it makes an excellent electrical and mechanical connection. Potter Water's points are well taken, but ABYC does address this issue, as I cited earlier. There is support of these wires, and there is over 1.5 x diameter amount of solder. This is sweated in with a torch, not a soldering iron on the large lugs. This seals both ends. Then the fitting is also covered with heat shrink tubing and supported properly.

6. Definitely dielectric grease, and Corrosion block are used on fittings to prevent corrosion with ring or spade terminals.

7. For small fittings, (#20 to #24) which will usually be NMEA connections between radio and GPS for AIS etc. There are 3 choices:

A. Scotchlok Connectors--Although made for solid wires, they also work with solid wires, and no stripping of insulation is necessary. There is a dielectric silicone (I believe) fluid in the connector. Easy crimp. And then I put liquid tape over the entrance to give extra support, and wrap with tape.

B. Use a terminal block, with screws--and spray this with corrosion block--have to strip the wire.

C. Solder the wires, and cover with good length of adhesive shrink wrap to give support--and then use some supporting sheath material, like spiral wrap.

Sunbeam mentions the large jaw type of crimper. These are good for fast production large crimps. I have Similar type of compound jaw crimpers for Nicropress fittings on my sailboats (along with both bolt and cable cutters). The problem with these are that the specific model Sunbeam mentions is 25" long and weight close to 6#--difficult to get into corners where you may have to make swages. This is why I prefer the hydraulic Swaggers for the larger fittings. A good crimp basically fuses the wire and fitting, with many lbs of pressure.
 
Back
Top