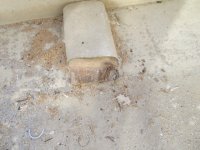
Gas Tank leak on my 25

Coastline Equipt seems to be a food processing mfg. Are they going to build your new tank? The question is: who would one contact to build a new tank, one that understands the problem and has the new dimensions? Not: who is to blame. Too late for that.

Random question: could one go in and install a pad to prevent the rubbing, etc, if the tank isn't leaking yet? Could be a good winter project.

Boris
 
Dora~Jean":1obhhg35 said:
I have a CD25 2003, plastic tank, so far no problems or leaks.

Steve-

Is it shaped and mounted the same as the aluminum one, or……….???

Do you have the same floor panel?

Other differences/similarities?

Thanks!

Joe. :teeth :thup
 
I have no semi-removable floor in the cockpit, fiberglassed in all around. I believe the tank is sitting on fiberglass molded runners, but not sure. I'll take an inspection mirror one of these days and see what I can see (and photograph).
 
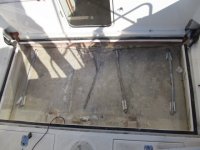
Okay, I took a few pictures of the culprit.
IMG_0158.sized.jpg
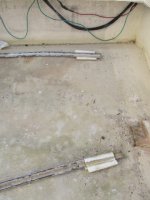
This is the starboard spacer which appears to be metal coated with maybe the spray on coating I think they use on the interior. The leak is at the top of the spacer. Limber hole on the right.

Close up of the starboard spacer.
IMG_0159.sized.jpg
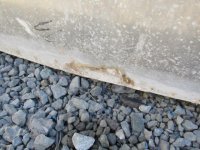
The corrosion can be seen at the top against the tank.

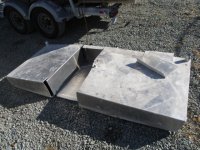
View of the tank from the top.

IMG_0157.sized.jpg


I also found some pictures in my album titled Construction of the New Anna Leigh HERE
 
Also, why not just repair the tank? easy access and it can be welded in place. Rinse the tank and then fill with a a non flamable gas. should be easy.
 
From the pictures in your album when the boat was constructed, it appears the tank was set in place after the hull and deck were joined. Could it be possible to remove the tank intact?
 
tess, if you look in the corners where the fuel fills are you will see that the tank is wider then the opening by about 6 inchs or more. i think it was installed before the hull and deck where joined. I cant see from these pics how you could get it out with out cutting it up.
 
Tess-C II":g03opm91 said:
From the pictures in your album when the boat was constructed, it appears the tank was set in place after the hull and deck were joined.

Pic:
http://www.c-brats.com/modules.php?...ame=gallery&file=index&include=view_photo.php

I was wondering about the same.

From looking at the first pic you posted it appears the tank sits on the inner hull. Am I right, David? It does no appear to be raised off the deck at all, which to me means that would be an additional issue. No air; no drying. Is the original tank flat bottomed or does it follow the contour of the hull?

Also the blocks installed would also stop any water from flowing to the center line/low spot and thereby out the limber hole. I see that as an issue too. IMO...stupid design and I'm no expert.
 
Tom, there is so much corrosion just around the spacers that I think it would be tough to repair the tank. And all that can be seen is the top and back of the tank. Can't see the bottom, either side or the front. The tank is not resting flat on the floor of the boat. It is off the floor by maybe 3/4". And yes, the new tank will be just wide enough to drop in and also be larger forward to aft. should come out with about the same capacity. The spacers do not run up under the tank so they do not act as a dam for water to get to the limber hole.
 
It looks like the tank went in after the deck, hence the need for the notched cuts of the deck at the step (I had wondered before why they were there). I don't think they would put the deck on the hull, and within 24 hours pull it apart and then back together based on your construction photos. Besides, the hull and deck are glassed together, so the tank had to go in post-joining.

It looks like after removing the spacers, the tank can be manuevered to slide aft and over to allow one side to come up and then pull the tank out the hole to the side. And any replacement tank would need to be wide enough to allow the fills to be under the steps.

Hey, if this stuff were easy, anyone would do it.... :lol:
 
Okay, the tank has been removed exposing the bottom of the boat under the tank.
IMG_0189_1.sized.jpg

IMG_0191_1.sized.jpg

IMG_0192_1.sized.jpg

IMG_0193_1.sized.jpg

The problem I had with just trying to have the two bad areas patched is that the rest of the tank was hidden.

The two pieces that where holding the tank in place, as it turns out where wood with fiberglass overlay. But they held moisture against the tank and I am sure the 7 years of pressing between the tank and the support is what caused the problem.
 
Dave Pascoe is a well regarded Florida Marine Surveyor http://www.yachtsurvey.com/ All boat owners should take the time to read his numerous articles on the internet. There is a lot of great information there--and perhaps some which is not as good....but still needs to be read and analyzed.

David suggests that the tank should never be foamed in. That it should be supported on plastic or fiberglass strips and glued in place with 5200. You should not use any strap which contains carbon (which many rubbers do). There should be a platform under the tank--3/4" plywood saturated with epoxy is a good choice, with plastic strips above the platform. Probably a layer of glass cloth on top is also a great idea. I also feel that aluminum tanks need to be acid washed, primed with epoxy and then painted on the outside. The tank needs to be able to "breath"--and never sit in salt water. Unfortunately, I suspect that if you use your boat in salt water, that the tank bottom is often immersed in salt water--as per Boris's comments. We had the plastic tank in our 25, but there was always water in the bilge around the tank.
 
Back
Top