colbysmith
Active member
I've had a small leak in the cabin bulkhead, under the head, where the bulkhead attaches to the bilge hull floor. I've tried caulking the area, but have had no luck with the limited access under the head floor. I decided I would pull the cockpit floor up, remove the fuel tank, and access the leak from that side of the bulkhead.
After pulling the fuel tank, I learned that wet core rot is not the only problem we face with C-Dory's, but that my aluminum fuel tank was pitted on the bottom. I did some internet research and it looks like this is a common problem. One repair mentioned involved painting the tank with Glovit Epoxy Paint. I'm open to suggestions. C-Traveler is a 2009 model. I have to wonder how many other, particularly older CD-25's, also have pitted fuel tanks, and when does the pitting start leaking fuel?
I have stopped the leaking between the bilge and cabin by applying fiberglass matting and resin along the base of the cabin bulkhead on the bilge side. I am also planning to install a bilge sucker system I built, from a link to plans that C-Otter Tom posted about a few years ago. But the problem with the fuel tank will continue to exist with water that remains in the bilge while the boat is in the water. On the trailer I pull the bilge drain plug and park the boat bow high.
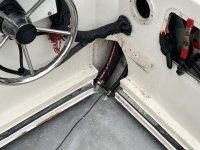
This photo is of the cockpit with the steps removed. To remove them I went in through the small access plate to remove the screws holding a metal bracket between the steps and sidewall. I also removed the side boxes to have better access.
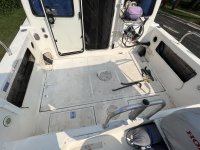
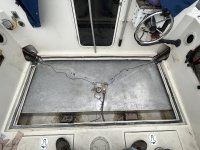
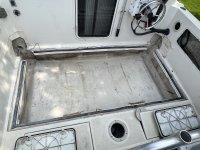
To remove the cockpit floor, I used a utility knife to cut through the sealant (I used 4000 UV last time I had the floor up). Then used pry bars to help leverage breaking the cockpit floor free. If you look directly behind the fuel tank, there are two blocks that are fiberglassed to the hull to keep the tank from sliding backwards. The tank is pushed up against the cabin bulkhead. These blocks must be removed so you can slide the tank back, and then slide the tank to one side or the other, so it will clear the side of the floor opening. I was able to chisel the bottom of the blocks free from the hull. The real pain was getting the fuel fill and vent hoses off. I removed those first. I am replacing with new hoses. The vent hose is 5/8" and pretty easy to find. The fill hose is 2", and not so easy to find. Great Lakes Skipper has both, and my total bill for all four hoses is just over $100 with shipping. The 2" hose was 27" long on each side, and the 5/8" was 24". This photo is with the cockpit floor removed.
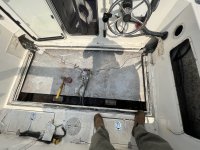
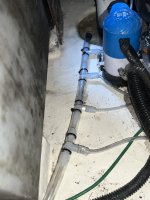
Once I removed the fuel tank, you can see the mold/mildew along the bottom of the bilge. The white strips are where the fuel tank has spacers taped to the bottom of it.
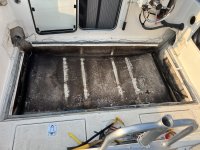
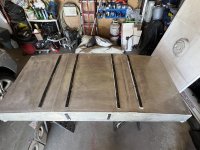
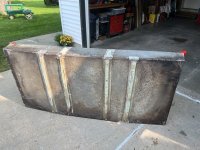
The fuel tank is now out, and sitting up on edge. I pressure washed the top of it a few years ago when I pulled the cockpit floor. But still some new grime.
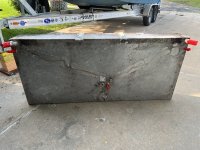
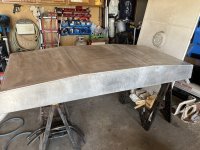
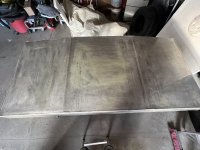
The bottom of the tank (before pressure washing) has spacers taped to it so it does not sit directly on the hull/bilge floor. There are also some spacers along the front edge so it doesn't sit flush against the cabin bulkhead. You can also see the pitting along the tanks bottom in this photo.
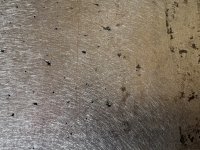
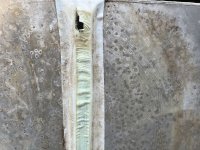
Here's a close up of the tank bottom. Better view of the pitting.
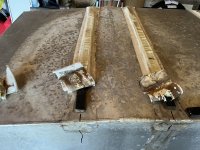
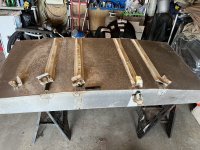
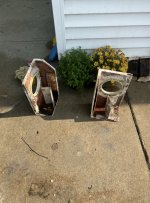
Here are the steps. You can see that there is core rot along the edge. I repaired these half ass last time I had them off, with the use of spray foam and some fiberglass. This time I'll take time to grind them out better, place some new wood in place, and then a better job of fiberglassing.
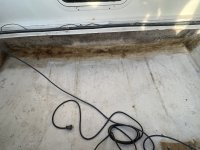
Bilge pressure washed, all nice and clean.
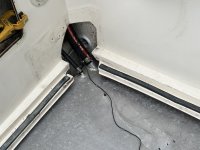
Some closeups of the area that appeared to be leaking into the cabin.
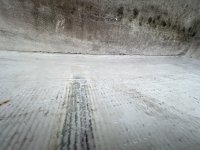
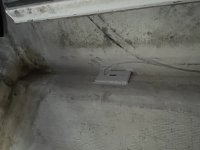
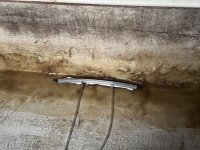
Hard to see in this one unless you can zoom in, but there is a small hairline crack along the base of the bulkhead.
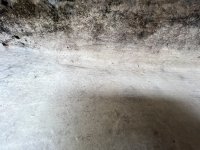
Fiberglass matting and resin used along bulkhead to hull area to repair leak. I filled the bilge with about 3" of water. All good now, no leak!
After pulling the fuel tank, I learned that wet core rot is not the only problem we face with C-Dory's, but that my aluminum fuel tank was pitted on the bottom. I did some internet research and it looks like this is a common problem. One repair mentioned involved painting the tank with Glovit Epoxy Paint. I'm open to suggestions. C-Traveler is a 2009 model. I have to wonder how many other, particularly older CD-25's, also have pitted fuel tanks, and when does the pitting start leaking fuel?
I have stopped the leaking between the bilge and cabin by applying fiberglass matting and resin along the base of the cabin bulkhead on the bilge side. I am also planning to install a bilge sucker system I built, from a link to plans that C-Otter Tom posted about a few years ago. But the problem with the fuel tank will continue to exist with water that remains in the bilge while the boat is in the water. On the trailer I pull the bilge drain plug and park the boat bow high.
This photo is of the cockpit with the steps removed. To remove them I went in through the small access plate to remove the screws holding a metal bracket between the steps and sidewall. I also removed the side boxes to have better access.

To remove the cockpit floor, I used a utility knife to cut through the sealant (I used 4000 UV last time I had the floor up). Then used pry bars to help leverage breaking the cockpit floor free. If you look directly behind the fuel tank, there are two blocks that are fiberglassed to the hull to keep the tank from sliding backwards. The tank is pushed up against the cabin bulkhead. These blocks must be removed so you can slide the tank back, and then slide the tank to one side or the other, so it will clear the side of the floor opening. I was able to chisel the bottom of the blocks free from the hull. The real pain was getting the fuel fill and vent hoses off. I removed those first. I am replacing with new hoses. The vent hose is 5/8" and pretty easy to find. The fill hose is 2", and not so easy to find. Great Lakes Skipper has both, and my total bill for all four hoses is just over $100 with shipping. The 2" hose was 27" long on each side, and the 5/8" was 24". This photo is with the cockpit floor removed.

Once I removed the fuel tank, you can see the mold/mildew along the bottom of the bilge. The white strips are where the fuel tank has spacers taped to the bottom of it.

The fuel tank is now out, and sitting up on edge. I pressure washed the top of it a few years ago when I pulled the cockpit floor. But still some new grime.

The bottom of the tank (before pressure washing) has spacers taped to it so it does not sit directly on the hull/bilge floor. There are also some spacers along the front edge so it doesn't sit flush against the cabin bulkhead. You can also see the pitting along the tanks bottom in this photo.

Here's a close up of the tank bottom. Better view of the pitting.

Here are the steps. You can see that there is core rot along the edge. I repaired these half ass last time I had them off, with the use of spray foam and some fiberglass. This time I'll take time to grind them out better, place some new wood in place, and then a better job of fiberglassing.

Bilge pressure washed, all nice and clean.

Some closeups of the area that appeared to be leaking into the cabin.

Hard to see in this one unless you can zoom in, but there is a small hairline crack along the base of the bulkhead.

Fiberglass matting and resin used along bulkhead to hull area to repair leak. I filled the bilge with about 3" of water. All good now, no leak!


