There are four or five "nationally known" good brands of epoxy. Probably the most likely to be found at the corner marine store is WEST System. Others are System Three, Raka, and MAS (plus some other lesser-known brands).
I've used all of the above except Raka and found them all to be fine. WEST has excellent customer support and it's easy to find at West Marine and other locations.
I tend to use System Three as it's what I started with, and the 1:2 mixture is easy to measure by volume (that said, I just got a digital scale and plan to start measuring by weight). System Three is sold by Fisheries Supply (probably along with others). But I have also used WEST quite a bit.
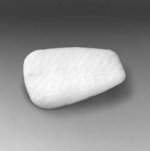
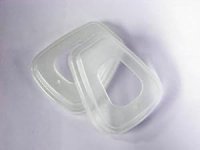
They do all work similarly. Basically, you mix resin and hardener (in careful proportions), then either use it "neat" or add fillers to give it the consistency and physical properties you want. For filling holes, I would most likely use neat epoxy to wet them out, and then add colloidal silica to thicken it. You could also use other thickeners, but this is one that works well. You'll want to wear a respirator while you are mixing in the CS, as it is very "flyaway" and not good to breathe.
So, a short list:
--Resin (WEST 105 or System Three General Purpose, for example)
--Hardener of the same brand (medium or fast in your neck of the woods now)
--Filler (e.g. colloidal silica/Cab-O-Sil (same thing)
--Mixing cups (you can make your own) OR
--mixing pumps that fit onto the epoxy containers, OR
--digital scale
--Mixing sticks (I use tongue depressors, cut one end off straight for cup scraping)
--Squeegee (I make them out of cut up water jugs for small jobs)
--Nitrile disposable gloves (put two or three on each hand, peel off as necessary; good to keep epoxy off your skin).
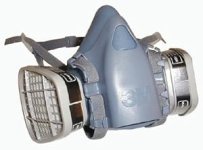
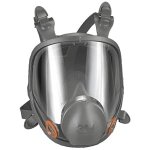
--Respirator (for mixing silica; may not be necessary if you use another filler)
--Blue tape or similar for masking off
--Clear packing tape can be useful
--Pipe cleaners or similar for wetting out holes
--Syringe(s) for filling blind holes (non-adhesive shrink tubing makes a handy extension).
There are a couple of other options on the epoxy:
1) If you are only ever doing a few small repairs, WEST make small "repair kits." I don't buy the kits, because they have silly things in them like one pipe cleaner, and two gloves (ha ha), but what I do buy are the "ketchup packet" refills that go in the kits. Basically, you open two packets, combine and mix them, and Voila, you have a small amount of neat epoxy. It is a small amount though, so for me they are something I carry traveling or on the boat, not something I stock for my base arsenal.
2) WEST also make a product called "610," that is basically epoxy mixed with silica in a caulking tube, with some fancy properties. It's expensive ($20 for a tube that is only half full), but.... after years of having an "I don't need these silly pre-made things; I know how to mix my own!" attitude I did try some just the other day. I have to say it's pretty slick, and a tube will probably join the "ketchup packets" in my kit. Somehow it is capable of wetting things out (they claim, but then they aren't given to wild claims), and also of being a thickened epoxy. I've just started using it, and I'm initially pleased but that's all I know so far. It's very easy to be tidy with it, and you can squeeze out just as much as you need, quite simply.
Hmmm, this may be more than you ever wanted to know, but a couple of other thoughts on filling holes, especially those beneath the waterline. I like to first overdrill them slightly, then reach in (with Dremel/115 bit/tiny sanding drum, or dental pick) and remove more core (back-cutting), so the hole behind the fiberglass is a bit larger than the hole in the fiberglass.
Then I put a piece of blue tape right over the hole, then cut the hole back out with an exacto knife. That saves either putting a dozen teeny pieces of tape around the hole and/or cleaning epoxy off later. Then paint the inside of the hole with neat epoxy and after that fill with thickened (you can thicken the same batch and fill right away)
Getting the epoxy to fully fill a blind hole (i.e. there is no other hole for air to escape from) can be a trick. If there are two or more holes close together (I just filled an adjacent group of four from a transducer, for example), I will sometimes try to connect them "behind the scenes." Then you can fill from the bottom with a syringe or Zip-Loc with the corner cut off (like filling an outboard lower unit), let the air come out the top hole and then when epoxy starts coming out, slap a piece of tape over that top hole and slowly withdraw the syringe from the lower hole.
If you are stuck with a blind hole though (especially if it's not very large in diameter), the best way is to use a syringe and try to get it in far enough that you are filling from the bottom of the hole outward - so that the air can escape. On the holes in my transom that I made for the trim tab plane fasteners, not only were they blind, but they were horizontal, and they had "caves" up above the entrance hole (where I had back cut). Talk about air wanting to be trapped! What I did was first of all put an ~1" long piece of tubing on the end of the syringe, so that it would reach the back of the hole. One problem solved. But I was still getting air trapped in the "upper cave." So what I did that worked was take another piece of tubing and put it in the hole alongside the syringe, with the inside end up at the top of the "cave." Then I started pushing epoxy into the hole with the syringe. Air came out the other tube for awhile and then finally just epoxy. It worked! When I re-drilled the holes for the fasteners (into the epoxy), there were no air pockets.
Sometimes if you get something filled just right, you can slap a piece of clear packing tape over it, then peel it off later and all is perfect. But more often the plug will be standing slightly proud or a bit sunken. Both of these are easy to deal with if you catch it in the "green" stage. This is when it is not sticky or "easily moldable" anymore, but when it is still slightly rubbery and you can dent it with a fingernail. At this stage if your fill is proud of the surface, you can slice it off neatly with a sharp chisel and you're done. If it's sunken, you can add more epoxy without having to prep and it will chemically bond (later you would have to wash off blush, sand for tooth, remove sanding dust, then add for a mechanical bond), then slice that off in the green stage and be done.
You can clean "wet" epoxy droozles off the boat with denatured alcohol or acetone, but once it hardens it's a bear to remove.
Okay, I'll stop now. At least I put the direct epoxy-shopping info right at the top

Sunbeam

