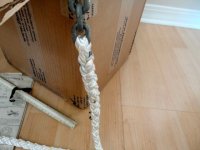
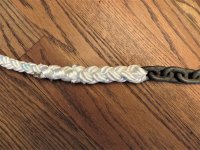
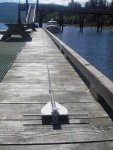
Why use 8 strand Plait? The advantages over 3 strand are: it stows in much less space, it remains soft and supple, it does not hockle, it runs very well thru the combination chain rope gypsy in the windlass.
Why the back splice over a chain weave? The chain weave is likely to pick up mud and debris. I do not feel it is as a secure splice.
I present the techniques outlined in the Yale cordage web site:
http://www.yalecordage.com/pdf/brait_to ... splice.pdf
This is a very clear and concise set of instructions.
There are also a set of briefer instructions which show the 3 strand and the chain weave splices at:
http://www.johndanicic.com/sailing%20pa ... licing.pdf
I will illustrate with photos some of the steps following the Yale Cordage site as a supplement--I recommend that you copy the Yale site to have in front of you as you work.
There are four strands which lay to the right, and four which lay to the left.
Yale says measure off 10 "Pic", which is the distance of two strands of the lay. I prefer to have a little extra, and I taper my end of the splice more. This way, I have no problem putting weaving the spice and have plenty of rope to work with.
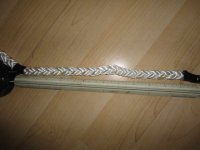
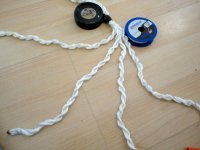
After the rope is measured--12" in this case, I seize the throat where the spice will lay tight against the chain link with Dacron seizing twine (The vinyl tape is only temporary) and unlay the 4 separate pairs of strands. The ends of each set of strands is heated and fused together for the splicing:
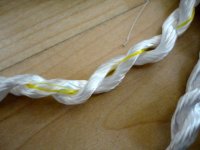
Only one of the strands has a yellow marker thread:
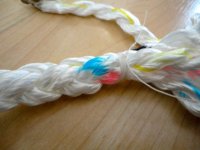
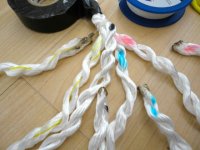
We then mark each strand, both at the throat, before the throat, and the end of the strand, so we are able to position the tucks properly.
The next part is tricky and I didn't photograph it--that is you take one right laid pair and one left laid pair thru the chain from right to left, and then the other right laid pair, and left laid pair from left to right. there are four strands going right to left, and left to right.
Then tuck the right-laid pair under the nearest opposing left- laid strand pair so that it is running parallel with the right-laid strands. Conversely, tuck the left- laid pair under the nearest right-laid strand pair. Flip the splice over and tuck the pairs on the opposite side in the same way.
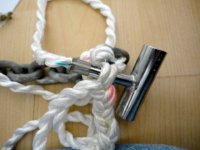
This next photo is after this is done and the strands have not been snugged up tight yet:
After these four are tucked under you start a conventional splice weave, following parallel with the respective right-laid or left-laid strand:
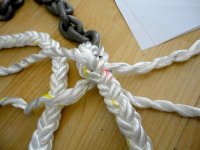
This is after 3 tucks, and we are finishing the 4th set of tucks. The splice is tightened up as you go, and will tighter in the finished product. I am using two types of hollow fids, both of which have an obturator, and a handle. These are both "Fid O" awls. The obturator is pushed under the set of stands, and then removed, so the end of the strands can be passed back thru the standing strands to compete that tuck of the splice. I don't believe that these tools are made today--but a swedish fid can be used:

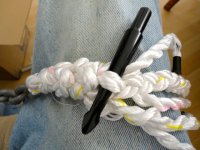
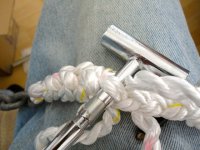
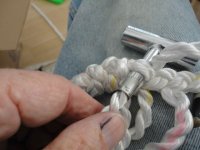
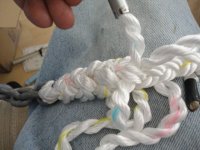
After 4 tucks I went to cutting 1/2 of the strands in half, then 1/2 of those remaining. Each cut the remaining tag is fused and burned smoothly next to the rode. Finally the splice looked like this, after tightening and rolling under foot:
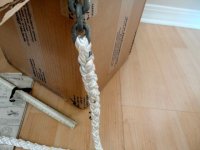
It is very important that the strands lie smooth in the chain, are tight, and equal in tension during the splice.
Next we seized the end of the rope with Dacron thread, and dipped it 4 times in liquid plastic:
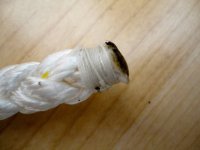

The final step in making the anchor rode was to mark it every 50 feet of rope. We used colored electrical ties. At 50 feet we have a single green tie, at 100 feet a single blue tie, at 150 get we have a double green tie, and 200 feet a double blue tie. At 250 feet we have a single orange tie, and at 290 feet we have two red ties. We did not include the 30 feet of chain in the marking--since we tend to be conservative, and that allows more rode then may be necessary. We have a laminated card with the "Code" next to the windlass switch, and also available for the person on the deck. We made two extra of the laminated cards.
Why the back splice over a chain weave? The chain weave is likely to pick up mud and debris. I do not feel it is as a secure splice.
I present the techniques outlined in the Yale cordage web site:
http://www.yalecordage.com/pdf/brait_to ... splice.pdf
This is a very clear and concise set of instructions.
There are also a set of briefer instructions which show the 3 strand and the chain weave splices at:
http://www.johndanicic.com/sailing%20pa ... licing.pdf
I will illustrate with photos some of the steps following the Yale Cordage site as a supplement--I recommend that you copy the Yale site to have in front of you as you work.
There are four strands which lay to the right, and four which lay to the left.
Yale says measure off 10 "Pic", which is the distance of two strands of the lay. I prefer to have a little extra, and I taper my end of the splice more. This way, I have no problem putting weaving the spice and have plenty of rope to work with.

After the rope is measured--12" in this case, I seize the throat where the spice will lay tight against the chain link with Dacron seizing twine (The vinyl tape is only temporary) and unlay the 4 separate pairs of strands. The ends of each set of strands is heated and fused together for the splicing:

Only one of the strands has a yellow marker thread:

We then mark each strand, both at the throat, before the throat, and the end of the strand, so we are able to position the tucks properly.


The next part is tricky and I didn't photograph it--that is you take one right laid pair and one left laid pair thru the chain from right to left, and then the other right laid pair, and left laid pair from left to right. there are four strands going right to left, and left to right.
Then tuck the right-laid pair under the nearest opposing left- laid strand pair so that it is running parallel with the right-laid strands. Conversely, tuck the left- laid pair under the nearest right-laid strand pair. Flip the splice over and tuck the pairs on the opposite side in the same way.
This next photo is after this is done and the strands have not been snugged up tight yet:

After these four are tucked under you start a conventional splice weave, following parallel with the respective right-laid or left-laid strand:

This is after 3 tucks, and we are finishing the 4th set of tucks. The splice is tightened up as you go, and will tighter in the finished product. I am using two types of hollow fids, both of which have an obturator, and a handle. These are both "Fid O" awls. The obturator is pushed under the set of stands, and then removed, so the end of the strands can be passed back thru the standing strands to compete that tuck of the splice. I don't believe that these tools are made today--but a swedish fid can be used:


After 4 tucks I went to cutting 1/2 of the strands in half, then 1/2 of those remaining. Each cut the remaining tag is fused and burned smoothly next to the rode. Finally the splice looked like this, after tightening and rolling under foot:

It is very important that the strands lie smooth in the chain, are tight, and equal in tension during the splice.
Next we seized the end of the rope with Dacron thread, and dipped it 4 times in liquid plastic:


The final step in making the anchor rode was to mark it every 50 feet of rope. We used colored electrical ties. At 50 feet we have a single green tie, at 100 feet a single blue tie, at 150 get we have a double green tie, and 200 feet a double blue tie. At 250 feet we have a single orange tie, and at 290 feet we have two red ties. We did not include the 30 feet of chain in the marking--since we tend to be conservative, and that allows more rode then may be necessary. We have a laminated card with the "Code" next to the windlass switch, and also available for the person on the deck. We made two extra of the laminated cards.

