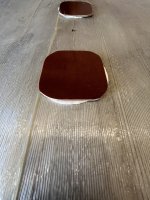
Getting Fuel Tank Tested

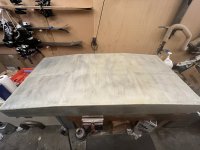
I 3D modeled the tank to think about how to do my spacers for the bottom of the tank.

I think my solution will be to reinforced epoxy in a series of hdpe rails to the bottom of the hull. I’ll rip 1/2 inch thick 1 inch wide strips with a 1/8 inch groove cut into the the periphery of the 1/2 inch to act as a keyed feature to mechanically secure the hdpe to the hull.

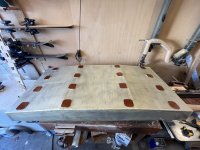
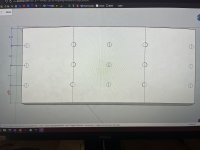
Then on the tank itself I’ll bond a matrix of micarta washers to act as a wear surface to protect the gflex coating on the tank proper.

Here’s the layout for the micarta.

The limited area of the micarta will limit the any induced stress between the aluminum tank and micarta due to their different thermal expansion rates. I think previously expressed concerns about bonding rails to the tank were around this idea. The micarta won’t be directly contacting the aluminum, just sitting on the gflex.
IMG_1669.jpeg
 
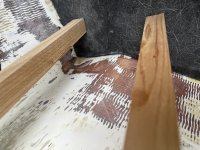
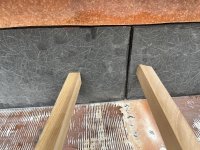
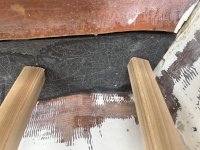
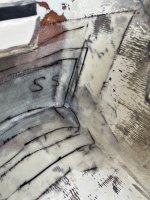
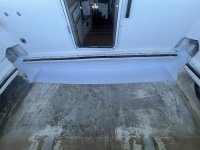
Coosa just epoxied in. The sticks are wedged in from the aft battery compartment divider to provide clamp up.

IMG_1686.jpeg
 

Attachments

  • IMG_1683.jpeg
    IMG_1683.jpeg
    4.1 MB · Views: 3
  • IMG_1685.jpeg
    IMG_1685.jpeg
    2.7 MB · Views: 3
  • IMG_1684.jpeg
    IMG_1684.jpeg
    2.8 MB · Views: 1
This looks as if you are laying the 23 oz triaxiel directonly on the bottom? I would use the same layering on the bulkhead to the bottom. Just one of mat, and 6 oz cloth over the stern facing layer of Coosa.
 
This looks as if you are laying the 23 oz triaxiel directonly on the bottom? I would use the same layering on the bulkhead to the bottom. Just one of mat, and 6 oz cloth over the stern facing layer of Coosa.
No - I think you’re reading the ply map backward?

First layer, directly against the Coosa, is mat. Cut to the same profile as the Coosa.

Then:
6 oz bi
23 tri
6 bi
23 tri

Are you saying that you'd start with your largest piece being the mat?
I could see that making sense if you think that having a base of mat is critical.
 
No I am not reading the ply "map" backwars. Yes, put the mat down first on the bottom. Have you tried bending the 23 oz triaxial over the filett? We used to use 24 oz woven roving, before the bi and tri axials. The heavier rovings do not bend well on a short radius. The strength of the Roving is not really necessary when you have adequate build up of cloth and mat. Theoreticaly you should have the same tabbinf on both side of the bulkhead. Also theoretically the coosa should be floated about 1/4 " off the hull,
we used foam spacers back in the day. thickened epoxy will work. You don't want a "hard spot"--and the load distributed out over several inches on each side. Here the load is more in compression. Think about the mechanics involved.
 
I tried to edit above, but "time ran out"

I should have caught that you were not spacing the Coosa off the bottom and sides to avoid a "hard place". it does not make as much a difference in a cored hull. 'but I aways spaced the bulkhead off the outer skin layers, using a foam spacer.

The below is better to do one side and fill with a polyurethane, and then the other.

Here is a quote from a post in Crusing World by Allied 39:
Depends whether you are looking for "looks good" or is structurally sound.

Largest first gives the largest adhesion area. Anybody who does fiberglassrepairs knows this. Small to largest demonstrates somebody does not know what they are doing.

I do not use foam, foam degrades with movement, obviously. Tab one side with a gap, 3/16 to 1/4. Fill the gap between bulkhead and hull with a polyurethane sealant. If you are in the US (lucky you) the Loctite marinesealant sold at home dopey is about the best priced polyurethane sealant available. Think 3M 5200 without the silly price.

You want polyurethane over polysulphide, preferably.

Then tab the other side after the sealant has cured. Good job done properly which will last.
 
Fillet in. 5:1 traditional with fumed silica to a stiff consistency like cold peanut butter.
1’’ radius.
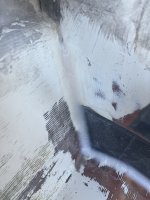
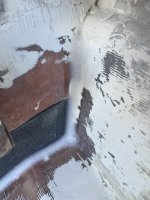
IMG_1698.jpegIMG_1699.jpegIMG_1700.jpeg
 
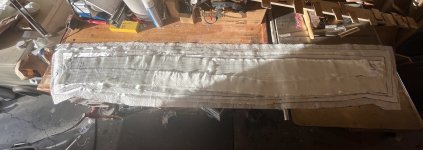
Here are my plies cut and stacked.

IMG_1732.jpeg
 
Very detailed work. This should give you many years of trouble free service.
What are you doing to protect the outdoor the fuel tank from corrosion?
 
Excellent. Much better than when the boat was new.
 
Very detailed work. This should give you many years of trouble free service.
What are you doing to protect the outdoor the fuel tank from corrosion?
Thanks Pat!

To protect the exterior of the tank from corrosion I'll be applying GFlex 655 to the bottom and sides of the tank per manufacturer specs. I'm not going to go with a dry bilge system like others have done.

I'm an aerospace engineer by profession -- we coat our aluminum aircraft fuel tanks in the equivalent of the aircraft bilge (high corrosion prone area) with a very similar flexible, toughened epoxy for both corrosion protection and to act as a secondary fuel barrier. If it's good enough to fly like that for a 30 year service life, its probably good enough to float for 20 more.
 
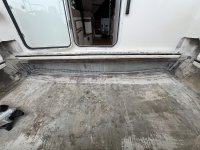
Wetted out!

Laying down the plies with a precise/even amount of step over was really hard, especially the mat.

Probably something like 2 liters of epoxy total. The mat and triax were super thirsty.

Getting everything to lay in the outboard lower corners was challenging but I got it in the end.

I think I’ll put a coat of Gelcoat over the whole thing just to keep it looking tidy-ish.

Next up: hdpe spacers epoxied to the hull.

IMG_1744.jpegIMG_1745.jpegIMG_1746.jpeg
 
Gelcoat to tidy it up. I figure it’s good practice to do so also if in the future we suspect a crack anywhere along this area that the gelcoat may make it easier to visually detect. That might be BS, idk. 🤷
 

Attachments

  • IMG_1749.jpeg
    IMG_1749.jpeg
    2.8 MB · Views: 12
Gflex on!

Gflex 655, on the bottom and sides.
Using the thickened version was okay. I wouldn’t necessarily recommend it over 650.

Prep was 60 grit and some wire brushing for the nooks and crannies followed by an acetone wash then etch wash.

IMG_1765.jpeg
 
Boy, it sure would have been nice if the manufacturer of these aluminum tanks coated them so they would last like yours will.
How much would it cost for this step? How long does it take to coat a tank? Do tank manufacturers offer the option to coat the outside?

My boat is a 2004, the tank was replaced in 2011. The cockpit deck was also replaced with a foam core. I cannot inspect my tank since the removable deck hatch was not a feature until 2005. Therefore, the cockpit deck is solid. I guess I shouldn't worry about it. I just hope my tank is in good shape since the boat was in dry storage in WA and on a trailer in the Santa Rosa, CA area before I purchased. To inspect I would have to get a Bore Scope. The only thing I could do is cut the deck off and put a new one on that is removable.
The fabricator actually recommends against doing any kind of coating.

Not sure of their exact logic -- the guy on the phone from the fabricator I asked said something about trapped water accelerating corrosion which I would have to agree with...if it were to happen.

Where I don't agree is this product is made specifically for this application (bonding to aluminum). G-flex is marketed as a permanent patch solution for aluminum hulled boats. I think, as in all things coating-related, the prep is key. I guess we'll see if I pass muster in that regard.

Also, as I've mentioned before, this is pretty much the same exact treatment we give to our aluminum aircraft fuel tanks in some of our highest corrosion areas in order to mitigate both corrosion and any sort of fuel/vapor leak.

If it's good enough to operate for a 30 year aircraft service life at 35,000 feet I think it's probably okay for 20 years at sea level.:geek:
What we definitely do not do for high corrosion areas and critical structure is just leave bare aluminum.


It's a tough call to replace fuel tanks. Expensive and time-consuming. And if other's who have taken this on experiences are a pattern, you will likely find more to do once you're in there. (Boating!:love:)

Internal bore-scoping is basically impossible because the tank is internally baffled so you can only really inspect the middle third of the interior of the tank. Also corrosion works from the outside in so by the time you see corrosion from the interior it's safe to say you already have a leak.

You could, as I did, inspect the exterior aft vertical wall of the tank through the transom access. If you find severe pitting on that wall you can bet that you have worse on the underside of the tank. These tanks, at least my old one and the new one, are made of 0.125" sheet stock.
I found pitting on my aft vertical tank wall of ~0.050.

That was the sole deciding factor to replace.

As you can see by my previous posts, this was a good idea since the bottom was in really rough shape.

Another feature to inspect is the welds -- I found when I was looking closely at my old tank that all the welds were in significantly worse shape corrosion-wise than the majority of the sheet material. Probably something to do with losing temper or something during the weld process?
 
Another factor I have seen, is with ethanol laced gasoline leaking out of the bottom of the tank over a peroid of time, it will eventualy disolve the polyester resin. I am aware of several boats where this has occured.

Concurr with the difficulty of scoping the tank. Even with the later tanks with the fills and steps in the cockpit--some of which have inspection ports--the bottom of the tank is not accessable.

A lot of the 25's are going to be subject to these ills. It is always better to be ahead of the curve, and replace the tabbing, and the fuel tank before it fails.

The question of replacement is also going to affect the Tom Cat 255's. Their tanks are even harder to get out. When I have replaced fuel tanks, I have always coated them with a specialized epoxy and then painted them. Also NO CARBON containing materia should touch with the tank! All too often straps, or under supports are materials with carbon, and then more rapid failure of that new tank.

Both my Cal 46 and Symbol 41' MY had their tanks replaced during my ownership--and we put in new tanks on the 38' cruising cutter we built. All of the new tanks had epxoy coating, then paint. The Cal 46 was easy, since they under the pilot house floor. The Symbol, we had to remove both Cat 3208 engines before we could pull the fuel tank (that or cut out the side of the hull). Almost 40 years later we know that the Cal tanks are still good.
 
Back
Top