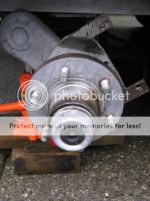
Trailer maintenance; grease your hubs!!!

localboy

New member
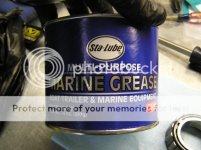
I was doing a little pm on the trailer & boat. I went to put new grease into the hubs. Three of the four were fine; clean grease in & out. The last hub, the left front, was full of milky, white, viscous "grease", obviously mixed w/ water. This hub has always run hotter. Now I know why. the last time I did this last season it was pretty clean, but that's obviously no longer the case. >1 cup came out when I filled the hub w/ new grease. Looks like it's time for new seals and repacks of all four hubs. I think this time I go w/ marine grease in all four.

Pics:
http://www.c-brats.com/modules.php?...ame=gallery&file=index&include=view_photo.php

http://www.c-brats.com/modules.php?...ame=gallery&file=index&include=view_photo.php

http://www.c-brats.com/modules.php?...ame=gallery&file=index&include=view_photo.php
.
 
If you need to replace the seals, bearings or race the part number is on the part. Just take the part to your local NAPA store And they will provide you with a replacement. For repacking use gloves that can be purchased at the NAPA store to bypass the mess. Your local auto store has the tools to remove and install the seals/races. I always use a good wheel bearing grease to repack. I have had very good performance from West Marine wheel bearing grease (red color).
 
I'm on my way back to Wisconsin from Long Island, New York, having bought there a used Norseboat 17.5. It's on an EZ-Loader trailer with oil bath hubs, which I'd never seen before, and had no knowledge of. About 200 miles into the trip home, I noticed the oil level, which you can see through a transparent window on the wheel hub, had gone down to about a quarter full. I stopped at a truck service center, and the mechanic showed me how to add oil. It's done through a tiny hole on the side of the hub, about a quarter inch in diameter, with a set screw removed with an allen wrench. The mechanic recommended a heavy oil specifically for oil bath hubs, and said it was top quality, and might plug up the leaking seal that was causing the oil level to go down. Sure enough, 600 miles later, the oil level in that hub hasn't dropped at all, and the hub feels just a little wamer than my skin temperature. I'll replace the seals on both wheels when I get home. I thought you all might be interested in the experiences of a total novice with oil bath wheel bearings. Any advice on what else I need to do would also be appreciated.
 
For those of us with leaking inner seals, please check the hub where the seal sits/rubs when you install a new seal.

On the E-Z Loader the hubs were worn and allowed oil to drain out of the hub. Not only does this drain oil out, but it also lubes up the brake pads. Since the hub and axle are one piece, I used Speedi Sleeves. These are thin stainless sleeves that slide over the hub, don't leak and give the seal a smooth surface on which to seal.

I use (per E-Z Loader recommendations) SAE 80W-90 Gear Oil. This is probably better than the 50W engine oil that Reliable recommends, since it's designed to lubricate bearings and gears. If your bearings are grease lubricated, remember to pack them before installing them. The hubs on the E-Z loader are made by Reliable, though they don't sell any parts to usn.

Boris
 
80-90 was originally desiged for lubricating hypoid gear sets.....It can be used for bearings too, but it will create extra drag and will require more enery to pull. The difference though in actual practice is probably almost none.
 
Smittypaddler
Be real carful about adding oil to your hubs as it is very easy to over fill them. They may, and I'll stress the word may not have been low. You have to let them sit for a bit to get a true reading on them Have to give that heavy oil time to run down. Even when I change the oil I add very slowly alittle at a time. Learned this the hard way. To much oil is as bad as to little. I also use a good brand 90 wt.
 
Chuck,

I learned my lesson about overfilling a few years ago when I had the oil changed on my twin Honda 40s in Florida. The mechanic put oil in and told me it had to settle for awhile, and went to lunch. I was impatient to get going, and when I checked the dipstick, not realizing how clear the new oil was, thought it needed more, and put some more in. By the time the mechanic returned I'd overfilled both engines. We had to pull the boat out of the water on a lift (I didn't have my trailer with me) to drain the excess oil out. That lesson cost me for the extra lift, but might've been worth it, as I'm more careful now.
 
Mark is quite adept mechanically I'm sure. I posted a list of the part numbers somewhere on here, I'll look and see if I can find it again. I have been through the hub thing, in spades.

As to grease, I swear by Gary Estes's advice, and Gary swears by Lucas Red 'N' Tacky No. 2.
 
Grease seal SL225-1
Bearing race 25520
Bearing 25580
Bearing cone 15123
Bearing cup 15245

Thanks Pat. I searched yesterday, but had no luck. :| I found them today by using your screen name as author. :thup

Taking the hub apart today. I will confirm the numbers, inspect the current bearings/races & go from there. Seems Matt has the parts available, I just need to confirm the numbers. Now to find that grease that Estes recommends. :?

I called Performance Marine as they are the closest King dealer to me. They had no info and told me to remove the parts, bring them in and they'd see if they could find them. I already knew that... :roll:
 
Don't know what make of trailer you have, but here are the bearing sizes for a EZ Loader 7500# trailer. By the way, I switched to Timken bearings, as the Chinese ones didn't last very long. Timken are made in either the USA or Europe.

Outer bearing:
Inner Roller Assy P/N 67048 Outer Race P/N 67010
Note: Timken prefix is LM (Light-Medium duty,) set P/N is SET 6
ID 1.2500 in OD 2.3280 in thickness 0.625

Inner Bearing
Inner Roller Assy P/N 25580 Outer Race P/N 25520
ID 1.7500 in OD 3.2650 in thickness 0.9375

Inner seal: Rubber coated is the only way over straight metal.
P/N TCM 21334TC, only from the EZS Loader factory as far as I know.


Since a seal leaked, I needed 1 new brake pad. They come in axle sets of 4. The calipers are Kodiak.
P/N Kodiak 225.

I think Pat has a King trailer.

Boris
 
Since I had to do this I figured I'd take some pics and write a tutorial for those who've never done anything like it before. I'd say anyone w/ basic tools and a medium mechanical ability can do this themselves. Part numbers are as follows:
Grease seal SL225-1
Bearing race 25520
Inner bearing 25580
Outer bearing cone 15123
Bearing cup 15245

As I noted our trailer is a 2007 King KBT7000B2, w/ disc brakes and "Superlube" spindles. Please use proper safety precautions like jack stands, blocking the opposing tires etc when working around/under the trailer. The procedure for repacking the bearings follows:

Jack up the trailer and remove the tire/rim. Pull the dust cover/rubber cap off w/ a pair of channel locks. This exposes the outer "axle", castle nut, zirk fitting etc.
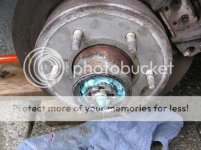
Wheelbearingservice021.jpg

Start by removing the disc brack caliper assembly. This is bolted to the rear of the hub assembly via two 7/16" stud bolts at the back of the caliper. The stud bolts look like this:

Wheelbearingservice001.jpg

Once you've removed both bolts, the entire disc brake caliper will come off. Be careful it doesn't drop on the ground. Don't let it hang via the rubber brake line; I hang mine w/ a piece of wire/hanger like this:
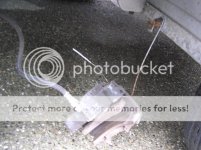
Wheelbearingservice002.jpg

Inspect the pads if they're good move on. Once completed the brake rotor will slide off the studs. Inspect it for gouges/wear etc. Put it aside. You will now have the spindle/hub assembly ready for dissasembly. Holding the castle nut on the axle is a retaining washer w/ two tabs attached. One of the tabs will be bent into one of the notches on the castle nut so it does not loosen. Using a small screwdriver or similiar bend the tab back against the axle so the castle nut can be removed. The order of parts from exterior in is castle nut, retainer wahser, flat washer. Once removed you have this:
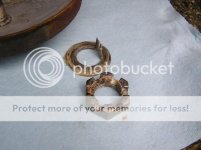
Wheelbearingservice005.jpg

Now the entire hub w/ bearings etc just slides off the spindle. The outer bearing will simply fall/be pulled out.
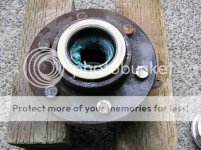
Hub w/ outer bearing removed:
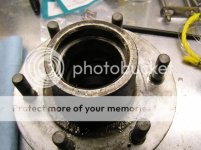
Wheelbearingservice009.jpg
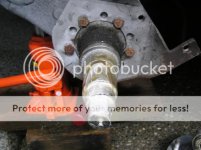
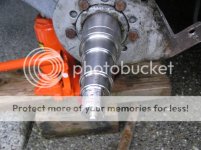
Spindle:
Wheelbearingservice004.jpg
Hub rear w/ grease seal still installed:
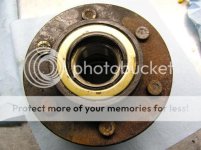
Wheelbearingservice006.jpg

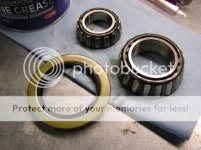
Now to get the seal/inner bearing removed. To do this you'll want to tap it back/out of the hub from the outer side in. I placed it inner-side down on two 4X4's (this creates a space for the seal/bearing to fall) and used a race driver & small hammer. You could use a punch & hammer being careful to tap around the inner bearing evenly & slowly; DON'T JAM THE BEARING IN THE HUB!!! Even, slow tapping/pressure will get it out. Once the seal gives the inner bearing will fall out w/ it. Here's the parts you're now looking at:
New seal and clean bearings; Wheelbearingservice016.jpg
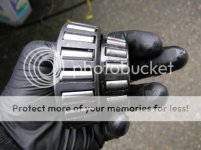
The larger inner bearing/smaller outer bearing after cleaning: Wheelbearingservice012.jpg
Now the messy part. Clean up all the old grease from all parts. THIS IS ESPECIALLY IMPORTANT IF YOU ARE USING A DIFFERENT COMPOUND OF GREASE! DON'T MIX DIFFERENT BASE GREASES TOGETHER. I switched to an grade 2, aluminum based, Marine grease not a lithium based grease. To clean everything I used solvent, a parts brush and lots of paper towels in a pan. Once clean, I inspected both the races and the bearings for wear, pitting etc. My bearings/races were fine so I re-used them. You may need to replace one or both bearings.

Races were smooth & shiny:
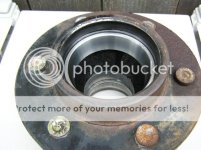
Wheelbearingservice014.jpg
Same w/ the spindle; smooth & shiny:
Wheelbearingservice013.jpg

Now repack the bearings. I do the old hand/palm method and I wish I could've taken pics but I was alone. Some of you old time mechanics know this is the best way to repack bearings completely. Basically, put a blob of grease in your weak hand. Grab the bearing w/ the larger side facing down w/ your strong hand. Push, slap the bearing onto your palm like you're knocking on a door, forcing grease up, into & through the bearing. You wanna see it "goosh" out the smaller side.
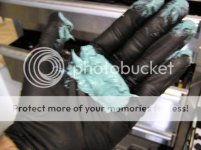
Wheelbearingservice011.jpg
Wheelbearingservice010.jpg

I did the inner bearing first, placed in in the hub
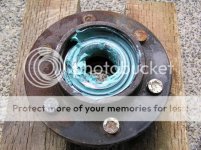
Wheelbearingservice017.jpg

...and placed a new seal over it.
Wheelbearingservice018.jpg

Now tap the new seal into place. I used a bearing driver
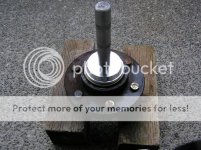
Wheelbearingservice019.jpg
...but it could be done w/ a piece of wood like a 2X4 & a hammer. USE EVEN PRESSURE! You want the seal to go in EVENLY & STRAIGHT and not jam in the hub. Take your time. When the seal is flush w/ the hub it's installed.
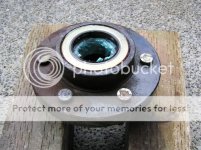
Wheelbearingservice020.jpg

Repack the outer bearing, put it in the hub and place the hub onto the spindle. Place hub on spindle in reverse order as listed above. Rotate the hub while tightening the spindle nut to approximately 50 ft lbs. This translates into full handpressure with a 12” long set of pliers or 12” long wrench. Loosen the spindle nut to remove the torque, do not rotate hub.
Finger tighten the spindle nut until snug, backing out only to line up the locking tang washer. Bend the locking tang tab in place. Replace grease/hub cap. Replace the rotor and caliper. I used red Loctite on teh threads of the two stud bolts that hold the caliper on. Test hub with wheel mounted for excessive play or tightness, re-adjust if required.
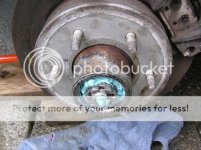
Wheelbearingservice021.jpg

Done!
Wheelbearingservice003.jpg
 
Nice tutorial, Mark.

As an addition- I beleive that after the dust cap is back on, enough grease should be added via the zerk fitting to bring the grease level over the nut, or just flush with the end of the spindle.
 
Thanks, Matt. Yes, once this is done I filled the hub w/ all new grease via the zerk fitting until it started filling the dust cap. Thanks for adding that step that I didn't include. :oops: I was amazed at how large the inner hub space was; it's over 1 cup of grease total.

It will be interesting to see what the temp of this hub will be vs the others. I am going to re-pack the other three but only had time to do this one today. Now that I have the parts and experience, the last 3 should be quick. The biggest PIA is cleaning up all the old grease from the parts; very messy.
 
Back
Top