Safety Concern!!!

amy and karl

New member
Old topic new experience.

The screws that hold the brass stem guard in place are subject to pulling out of their holes. We found this out yesterday at Roche Harbor.

We had spent a night at Patos island and then two nights at Stuart island before going to Roche Harbor Friday morning. (By the way Prevost Harbor on Stuart is a great place to wait out S.E. - S.W. winds.) With no signs for concern to this point, we walked the girls up to the sculpture garden and then to the Mausoleum. Upon returning our runner on the cabin floor was soaked and Amy found water bubbling up through a stress crack near the porta potti. I immediately started opening the hatches we installed in the berth. We found alot of water under the berth. We were able to bail the water, maybe 15 gallons, with a Gatorade bottle. We assessed the situation and realized water was not gushing in. So we checked the weather one more time and made a b-line for Bellingham and got the boat on the trailer. Where we found the source of the water.

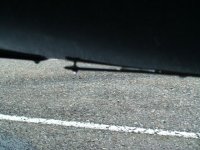
The lowest screw on the brass stem guard had pulled out completely. The screw hole is totally stripped. Here are a couple pictures.
DSC00089.sized.jpg
DSC00084.sized.jpg

We feel lucky that this happened when it did. We were relatively close to the trailer and we had not been away from the boat for very long. And this is an easy fix in my mind.

My question to those who know is what is the best way to fix this problem? I intend on correcting this problem on all the screwholes for the stem guard.

Thank you for your suggestions,

Karl and Crew on C-Daisy
 
I noticed mine were loose too about a month ago and have tightened them. There was no water intrusion like your case, but I wasn't thrilled to see the loose screws and the stem guard pulling away from the hull. I sealed it up with marine sealant. Mine weren't stripped.
 
we had this problem early on but not to the extent you did. More of a slow weep. the factory fixed it for up. At the time they offered two fixes. One was to redo the brass strip as is and the other was to seal the strip and then cover the whole thing with a keel guard. i had then re do the brass becasue I like the look but if I was doing it my self I would go with the keel guard for easy of installation.
 
As many others have done, after I'd owned my boat for a month I systematically pulled every exterior screw below the waterline and epoxy potted it. The brass stem guard had short screws and sealant so were probably fine but I like epoxy holding things together. Trim tab planes and rams also epoxied. Garboard drain tube also pulled and epoxied.

When and if I ever need to pull these screws one holds a soldering iron of the old style on the head till it heats up to about 140 degrees and voila the epoxy lets go.
In the meantime she's stuck good, dry bilge, dry v berth
Happy lad.
George
 
:shock: Damn, Karl...glad it worked out safety-wise, and you and the family made it back to port. I was just contemplating this today when I saw DaveS (Sea Shift) had a white keel guard on his 22' and NOT the stock, factory brass one. One more thing to look at.
 
localboy":1gz2abhu said:
I saw DaveS (Sea Shift) had a white keel guard on his 22' and NOT the stock, factory brass one. One more thing to look at.

We had the brass strip on our '99 16' Cruiser and had no problem with it. However, when we ordered the 22' new from EQ Marine I asked that the factory not install the brass keel guard and Les at EQ Marine installed the rubber keel guard instead. It offers more protection and is glued on, not screwed on.
 
I have the Keelguard (installed by Les at EQ) on Notayot, which covers all of the aforementioned screws on the stem. I have used Keelguard on the last two boats I've owned, more for impact and scuff resistance than for leak prevention, but I'll take that too. Some say it doesn't have the "salty look" but I like the security of impact resistance for the flotsam and jetsam that comes by.
 
Here is a photo of a Les Lampman installed Keelguard. It is layered over the standard brass item. Notwithstanding the aesthetic, or lack thereof, it does provide an extra measure of protection against both internal screw failure and external impact and abrasion.
Keel_guard.jpg
 
If it was my boat I would pull that stem guard out and repoxy it and be done with it Get rid of any source of leaks Im glad the cape cruiser doesnt have one just my humble opinion
 
Sorry to hear about this and other like stories. Do you have to worry about a wet core (wood) when this happens? Or is the water riding up on top of fiberglass? Will the internal water eventually dry up?
 
chromer":2guug4ps said:
Sorry to hear about this and other like stories. Do you have to worry about a wet core (wood) when this happens? Or is the water riding up on top of fiberglass? Will the internal water eventually dry up?

Chromer-

The balsa core is not on the very centerline of the boat, only on the sides, from a couple of inches or so off center and on up. The centerline of the boat is solid fiberglass, and the water would ride on top of it. Some minor water intrusion along glass fibers would take place, but this will dry olut if left open for a while before the epoxy is installed. No wet core problem.

Yes, it will eventually dry out if their inspection hatch is left open. I'd flush the salt out, however, then let it dry.

Joe. :teeth :thup
 
After the trouble I had with my first C-Dory (Fishtales), I told the factory not to install the brass stem guard. I will be installing the KeelGuard instead.
 
Well, I think I'll remove it this winter, epoxy the holes and put on a KeelGuard; so far no water intrusion in the boat and I don't want to start now.
 
localboy":fc3dn5pz said:
Well, I think I'll remove it this winter, epoxy the holes and put on a KeelGuard; so far no water intrusion in the boat and I don't want to start now.

Yes!

The KISS Princiiple wins again!

kiss.png
(Not directed at anybody, just the idea!)
Joe. :teeth :thup
 
The entire foreward area is not balsa cored (solid glass), so no worry there.

I would pull the entire stem guard, dry out the area; including washing well with fresh water. A shop vac hooked up to this area, can help get more water out. Heat will also help. After it is dry, drill out the holes, and counter sink the outer skin, then put in epoxy, with mill fibers, or short pieces of cloth into the old holes. Work the epoxy and fibers/Cabosil into the old holes with toothpicks. Then refair the seat for the brass strip, redrill pilot holes, and re-install the brass strip with 5200.
 
I posted this on a thread discussing keelquard in March of this year.

Quote
"I replaced the brass strip with keelquard following our 2007 Alaska cruise. Hit either ice or rock not very hard because it was underwater line and didn't know until pulling from water. Bent the brass over enough to break one of the holding screws. When I removed the brass and rest of screws small amount of water came out of a couple of the screw holes. I debated on installing the keelquard over the brass or leaving it off. Thinking the brass provided very little actual protection and maybe even a hard hit with brass under keelquard could possibly break another holding screw and allowing more water intrusion decided to just totally seal all screw holes and install the keelquard. Not near as concerned about going to shore with bow of boat now. For me at the time it seemed the right thing to do, but who knows the combination of brass and keelquard may actually be better."

Am even more convinced removing brass and just replacing with keelquard is the right thing to do now. To me the amount of brass used is more for looks than protection and the keelquard actually does protect.

These are links to threads discussing keelquard and similar problems here in the past.

http://www.c-brats.com/viewtopic.php?t= ... =keelquard

Jay
 
When I had the trouble with the stem guard leaking on Fishtales, here's what I did-

1- Remove the brass and let the water drain
2- Open the access under the the porta-potty storage area and remove the water using a wet-vac, until no more water was showing
3- Set a small, commercial dehumidifier close the the access port and let run for three days to dry out the interier (ran the drain hose out the door and through the stern drain)
4- Inject epoxy into the factory drilled holes
5- Flip the brass 180 degrees and mark out new drill holes (flipping the brass will offset the holes at least 1/2")
6- Drill new holes just short of the length of the screws
7- Dip the screws in 5200 and reinstall

I did not have any more trouble with the stem guard after that.
 
Well,

I removed the brass strip on our boat today and I am hoping that the brass strips were that guys only job! There were a couple pieces of masking tape attached to the hull side of the strip directly under a couple screw holes. Whatever was used as a sealant was fully uncured and very gooey.

Still in the process of drying the area out. I won't be able to reinstall until this weekend. We are still grateful this happened where it did. Could have been a lot worse. Also glad there aren't too many things left to worry about below the waterline. Maybe next will be the drain plug.

Karl
 
Back
Top