Hey everyone,
I'm in spring project mode, can you tell?
I installed a Jabsco 6gpm washdown pump, using lots of the tips I gleaned from others on the site. Here is a writeup of what I did and a number of photos at the end. In short, I wanted to do a non-permanent installation as a starting point, and live with it for a year. Then decide what changes to make, if any, and whether I want to do through-hull, etc.
The basic installation uses a direct connection to the house battery, and the pump is mounted in the same hatch as the house battery. To mount the pump there would have required some serious aerobics and two guys to through-bolt, and so I decided to mount the pump on a small board and then use industrial velcro to hold it in place. Added bonus there is that I can easily remove the pump if/when I need to pull the house battery, and/or if I need to replace the pump, etc.
My intake and outlet hose is 3/4" reinforced vinyl--I chose this because it can handle the 70psi generated by the pump. Normal vinyl is only rated to 35psi. Also, the clear tubing will make it easy to find any clogs and deal with them. I could only find a bronze check valve locally, so I mounted that on the end of the intake hose so the pump doesn't have to keep priming every time it's turned off. I also put a basic washing machine strainer on the check valve to help with eel grass, etc. The outlet side uses 3/4" tubing just for a couple of inches and then there is a barb-to-garden hose fitting, and the sprayer hose is attached to that.
I did put a 20A fuse inline (pump rated at 16 or 18, I forget) and a 20A on/off marine switch. This was wrapped in electrical tape and then strapped to the motor for easy access.
The whole thing stows in the battery compartment when not in use; to use it, I throw the intake over the side, and deploy the sprayer hose. The compartment lid just sits slightly ajar. The pump turns on and off as it loses or gains pressure, or can be shut off altogether with the inline switch.
And before you ask/comment, I do in fact realize that electrical tape doesn't help keep a water line watertight. It is there to hold down the loose end of the hose clamps--which I cut myself on about once per minute when they are exposed. I am certain this is a job title at the hose clamp maker: "Chief Hose Clamp End Sharpener".
Happy washing, looking forward to hosing some blood and guts overboard the easy way this year!
Best,
Ben
Underside of pump with white plate and velcro. Tip: when placing velcro on the boat, attach it to the part it will hold first, remove the adhesive cover, and then place the boat side of the velcro with the part being placed. Alignment will be perfect this way.

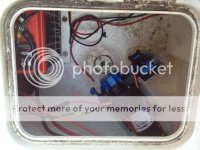
Pump velcroed in place, with easy access to hose disconnects. Switch is on top front; hard to see in the picture.

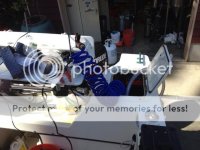
Intake and sprayer hoses deployed.

Stowed.

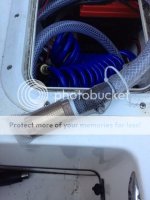
Lint screen installed on intake check valve (these are for the drain hose of a washing machine, about $3 for two of them at Home Depot).

The good stuff.

My sweet new Miller Marine rigging table. Just because.

I'm in spring project mode, can you tell?
I installed a Jabsco 6gpm washdown pump, using lots of the tips I gleaned from others on the site. Here is a writeup of what I did and a number of photos at the end. In short, I wanted to do a non-permanent installation as a starting point, and live with it for a year. Then decide what changes to make, if any, and whether I want to do through-hull, etc.
The basic installation uses a direct connection to the house battery, and the pump is mounted in the same hatch as the house battery. To mount the pump there would have required some serious aerobics and two guys to through-bolt, and so I decided to mount the pump on a small board and then use industrial velcro to hold it in place. Added bonus there is that I can easily remove the pump if/when I need to pull the house battery, and/or if I need to replace the pump, etc.
My intake and outlet hose is 3/4" reinforced vinyl--I chose this because it can handle the 70psi generated by the pump. Normal vinyl is only rated to 35psi. Also, the clear tubing will make it easy to find any clogs and deal with them. I could only find a bronze check valve locally, so I mounted that on the end of the intake hose so the pump doesn't have to keep priming every time it's turned off. I also put a basic washing machine strainer on the check valve to help with eel grass, etc. The outlet side uses 3/4" tubing just for a couple of inches and then there is a barb-to-garden hose fitting, and the sprayer hose is attached to that.
I did put a 20A fuse inline (pump rated at 16 or 18, I forget) and a 20A on/off marine switch. This was wrapped in electrical tape and then strapped to the motor for easy access.
The whole thing stows in the battery compartment when not in use; to use it, I throw the intake over the side, and deploy the sprayer hose. The compartment lid just sits slightly ajar. The pump turns on and off as it loses or gains pressure, or can be shut off altogether with the inline switch.
And before you ask/comment, I do in fact realize that electrical tape doesn't help keep a water line watertight. It is there to hold down the loose end of the hose clamps--which I cut myself on about once per minute when they are exposed. I am certain this is a job title at the hose clamp maker: "Chief Hose Clamp End Sharpener".
Happy washing, looking forward to hosing some blood and guts overboard the easy way this year!
Best,
Ben
Underside of pump with white plate and velcro. Tip: when placing velcro on the boat, attach it to the part it will hold first, remove the adhesive cover, and then place the boat side of the velcro with the part being placed. Alignment will be perfect this way.

Pump velcroed in place, with easy access to hose disconnects. Switch is on top front; hard to see in the picture.

Intake and sprayer hoses deployed.

Stowed.

Lint screen installed on intake check valve (these are for the drain hose of a washing machine, about $3 for two of them at Home Depot).

The good stuff.

My sweet new Miller Marine rigging table. Just because.

