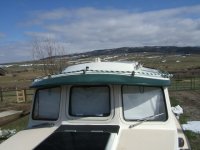
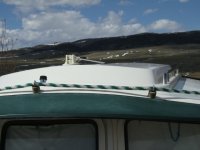
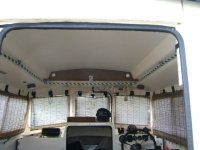
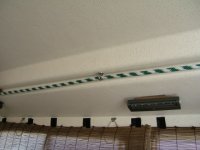
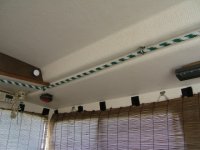
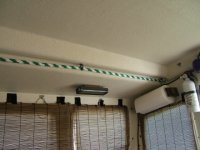
For those folks considering creating a rope handle in the U configuration shown in an above picture, I can add some comments. When c-brats began to add inside SS railings, I considered doing that but after seeing an actual installation, I decided not to. Reason. My cabin roof is the standard height, and since I am over 6'3' the inside railings would just be another thing to hit with my head, plus I dislike the cold, slippery feeling of SS railings, inside or out. They are stout beyond question.
By replacing the existing bolts from the bottom with eye bolts, the same security can be achieved to the upper railings and a greater range of grabbing is created on the sides and the front. Grabbing the front shelf to brace oneself has always given me trouble. Besides, I enclosed that area with a special "door."
With the rope handle, there is the additional bonus or two. One can reach up while at the helm to get into or out of the seat. Or if sleeping on the port side, reach up and help hoist yourself out of bed. Or move up and down the aisle with complete security.
If you want to install this system, I have several recommendations.
1. loosen only one bolt at a time using a phillips head driver that fits snugly. A good size vise grip on the shank of the driver will give you good leverage to turn the bolt. A nut is welded in the upper railing, so you should have little trouble threading the eye bolt. You may have to shim with an additional SS washer or two to achieve the correct orientation of the eye bolt. Of courses slather plenty of clear silicone on the hole above and on the threads of the eye bolt. Finish your installation before going on to the next bolt removal. If you use lock-tite, use the least gumming type.
Note: the ends of the railings have limited space for the shank of the eye bolt, so probe for length before you install. If your eye bolt shank is too long, simply place in vice and hack saw off the excess, touching up the end thread with a file before threading. Of course using the extracted bolts will give you the threaded length which will work.
2. A variety of soft lay rope is available at most hardware stores. A simple way to install the rope is this. A knot at the end should secure one end of your rope handle. When you reached your last eye bolt in the cabin top, run your rope through another eye bolt with at least a three inch shank, do a couple of half hitches, push that bolt through the roof eye bolt, and then push a large SS washer with a quarter inch hole over the eye bolt shank, followed by a SS wing nut. Hence, you can tension the rope with one hand and turn the wing nut with the other taking up the slack and preventing a limp rope.
I estimate that your material costs may reach $25 for this retrofit. You have not compromised your top railings and have added more inner cabin security.
John

