Well, I've had a small adventure working on what I thought was such a simple place to start.
First off, thanks to
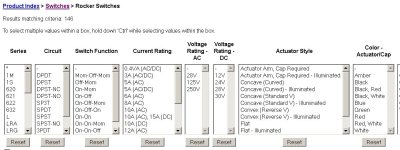
DuckDogTitus.......since he/she lead me to the Digi-Key site. This was the best place I've found to explore the many hundreds (probably thousands ) of Carling Switch models. It turns out that this basic switch product is sort of like an "Erector Set" in that there are just a few simple parts, but they can be put together in hundreds of combinations -- each combination being its own unique item with a unique model number. (If you know how to read the model number coding, one can figure out the features of a switch from that model number.) The Digi-Key site that DuckDogTitus provided organizes this process very nicely via the following interface:

Using this Digi-Key interface, I've narrowed down the replacement switch I need to the following:
http://www.digikey.com/product-detail/e ... ND/3025051
This model is "incomplete" in the sense that it does not include an actuator (the rocker cover one pushes to actuate the switch). At some point I realized that to replace the switches with burned out lights, I don't need an actuator since it can be easily removed from the existing switch and transferred to the new switch body (indeed, I could not find a matching actuator in the current Carling Switch product line).
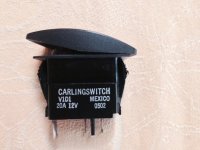
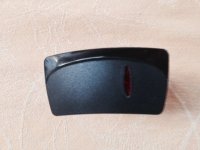
Someone asked about photos of the switch I removed, here they are (note no model number is stamped on the switch. I can understand this from Carling's point of view given the thousands of possible combinations):


More research turned up some other useful resources relating to Carling Switches. The best of these was this discussion on TheHullTruth forum:
http://www.thehulltruth.com/new-wire-ma ... ained.html
Another key resource is this step by step (with photos) article on the same website describing how to replace a burned out bulb with an LED:
http://www.thehulltruth.com/marine-elec ... witch.html
I removed a switch from the Anna Leigh and took it apart using these instructions. I fast learned why Carling says one can't replace a burned out light, but instead must buy a new switch. As the article points out, one must be
very careful when taking the switch apart. It is almost impossible not to have the springs and other parts jump out at you once you pry the body apart. Thankfully, the photos provided in the article were enough of a guide for me to reassemble the switch.
The bottom line is that I've decided to move the 3 switches with burned out lamps to circuits where I don't care if a functioning lamp exists or not; and then just live with it. Indeed, the entire reason I started down this road in the first place was that one of the burned out switches was to the house water pressure pump. Without the pilot lamp on the switch, more than once I didn't realize that the switch was left on when I put the boat away on shore power. One time that water tank was just at the point where the pump turned on and never stopped because it could never reach the cut off pressure. That pump ran continuously for 3 days before I noticed it!!
At some point I may attempt to replace the lamps with LEDs as described in the article above. I would hope I can find a 12v LED so as to avoid having to solder in the resistor into the tiny cramped space inside the switch. Either that or simply buy the model above and transfer the existing actuator to it since the rocker covers will snap onto any Carling switch providing that you don't break the little tabs on each side attempting to remove it (note they sell a $5 tool that allows the actuator removal without risking the breaking of these vital tabs).
Hopefully all this info with help someone else


