| View previous topic :: View next topic |
| Author |
Message |
Scott Fletcher
Joined: 31 Mar 2016
Posts: 26
City/Region: Key Largo
State or Province: FL
C-Dory Year: 2003
C-Dory Model: 16 Cruiser
Vessel Name: C-Buoy
Photos: C-Buoy
|
 Posted: Wed May 04, 2016 1:09 pm Post subject: Hull and deck crack at stern corner Posted: Wed May 04, 2016 1:09 pm Post subject: Hull and deck crack at stern corner |
 |
|
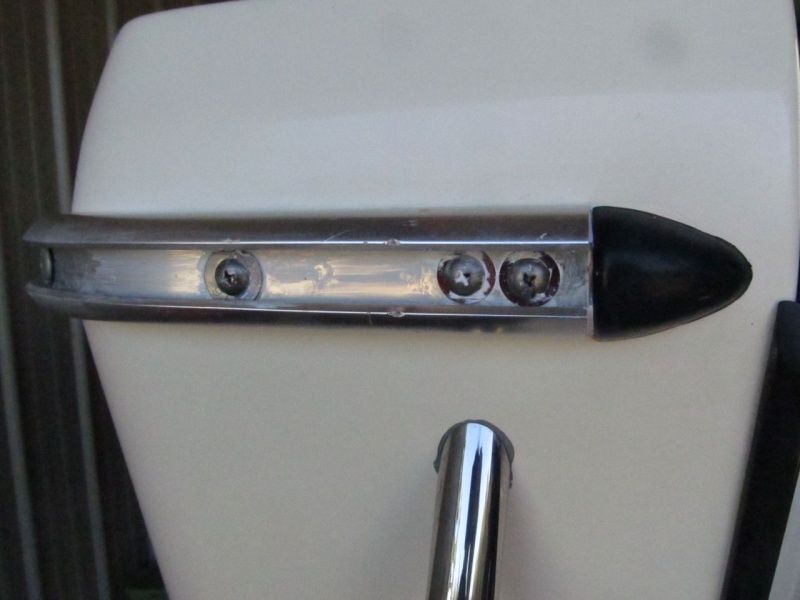
My CD 16 is really a labor of love. I'm rebuilding the rub rail according to Sunbeam. To make everything right I have to fix this crack. I think it's superficial. Does anyone have any advice for me. I've researched the site and can't quite find what I'm looking for. Thank you in advance, Scott
https://drive.google.com/file/d/0B9mqpikgrZBJYkYzSEdDc29RcEk/view?usp=sharing
_________________
Scott Fletcher |
|
| Back to top |
|
 |
thataway
Joined: 02 Nov 2003
Posts: 21507
City/Region: Pensacola
State or Province: FL
C-Dory Year: 2007
C-Dory Model: 25 Cruiser
Vessel Name: thataway
Photos: Thataway
|
| Posted: Wed May 04, 2016 2:42 pm Post subject: |
|
|
The "Crack" is the hull to deck point. Are you concerned with that part in the front or mostly in the back of the picture (boat). Generally the factory should put at least a layer of mat on top of the area where the hull to deck join, and are not covered with the rub rail. The hull to deck wont should be glassed over on the inside the boat. Check this, to be sure that there is good coverage and adherence there. If this is the case, then route out all of those little crazes, with a "V" bit in a Dremel tool, and fill with gel coat paste, tinted to match you r boat. If you need to fill a larger food, I would make a mix of polyester resin, milled fibers and cabosil, to a consistence of thick peanut butter. Fill, sand flush, and then cover with Gel Coat. If this comes back, then it may be time to be more aggressive. This would be to put a layer of cloth and then matt, after a shallow grind out, to remove any old fairing material. Fair this with polyester and a medium density filler, then gel coat.
I normally like epoxy for repairs, but in this case, it will have to be gel coated over fairly large area. Gelcoat is a bit more difficult to get to adhere to epoxy than to polyester. But if you clean the epoxy well, to remove any amine blush, sand lightly,
here is the paper on bonding
_________________
Bob Austin
Thataway
Thataway (Ex Seaweed) 2007 25 C Dory May 2018 to Oct. 2021
Thisaway 2006 22' CDory November 2011 to May 2018
Caracal 18 140 Suzuki 2007 to present
Thataway TomCat 255 150 Suzukis June 2006 thru August 2011
C Pelican; 1992, 22 Cruiser, 2002 thru 2006
Frequent Sea; 2003 C D 25, 2007 thru 2009
KA6PKB
Home port: Pensacola FL |
|
| Back to top |
|
|
Sunbeam
Joined: 23 Feb 2012
Posts: 3990
City/Region: Out 'n' About
State or Province: Other
C-Dory Year: 2002
C-Dory Model: 22 Cruiser
Photos: Sunbeam
|
| Posted: Wed May 04, 2016 3:33 pm Post subject: |
|
|
That's interesting (to me). On the 22 the rub rail turns the corner and thus covers up the entire hull/deck joint. It looks like on the 16, the rub rail ends before the corner and the joint after that was simply cosmetically filled/faired. At least that's my idea just from the one photo. Obviously you'd want to know that the joint is well secured on the inside, but if it is, then you are probably looking at a cosmetic type crack that wasn't quite secured enough from flexure, so it has "cracked" where the joint is. Can you see what's on the inside at that location?
BTW, there is some new info from WEST on gelcoat-to-epoxy application. I found it interesting. This is in the Feb. 2016 Epoxyworks (the original WEST info was from around ten years ago).
http://epoxyworks.com/index.php/applying-polyester-gelcoat-over-epoxy/ |
|
| Back to top |
|
|
Scott Fletcher
Joined: 31 Mar 2016
Posts: 26
City/Region: Key Largo
State or Province: FL
C-Dory Year: 2003
C-Dory Model: 16 Cruiser
Vessel Name: C-Buoy
Photos: C-Buoy
|
| Posted: Wed May 04, 2016 3:51 pm Post subject: hull to deck- hairline crack |
|
|
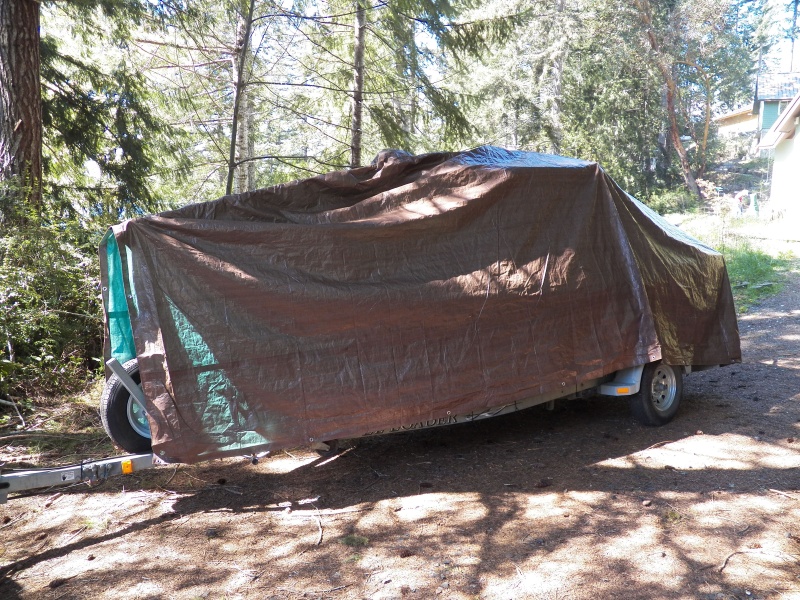
Bob thank you for the help. Im mostly concerned about the hairline crack. The inside of the boat looks good, no cracks in the gel coat all the way around. So I will route out the little crazes and gel coat. First time experimenting with gel coat so read up on the tint. Big rain squall coming over now glad I have my new Angola Canvas $755 cover.
Sunbeam, very interesting about your 22. Everything on the quarter wrapping around to the transom looks perfect from inside.Thanks for this study material.
Scott |
|
| Back to top |
|
|
Sunbeam
Joined: 23 Feb 2012
Posts: 3990
City/Region: Out 'n' About
State or Province: Other
C-Dory Year: 2002
C-Dory Model: 22 Cruiser
Photos: Sunbeam
|
| Posted: Wed May 04, 2016 4:10 pm Post subject: |
|
|
It is always interesting to see the variations between various C-Dory models/years, etc. Here is a photo from when I was re-installing my rubrail that shows how it wraps a bit further around
Matching gelcoat color is a bit of an art. You can experiment with the color before you add the catalyst. This way no time pressure, plus you can smear a bit right onto the existing gelcoat for a good color check (it will wipe back off).
That said, I took the easy way, and purchased gelcoat that was already tinted to my boat's two colors ("white" and blue). The white was an absolutely perfect match. (I've only used a bit of the blue, so can't comment as much on it.) I bought mine from Gelcoat Products (based in Seattle but I had mine shipped), using these codes (I used codes #6 and #2 for my boat).
1) Forest Green: Cook Composites # 953-GJ-081
2) Tailgate Blue: Cook Composites # 953-LJ-110
3) Cabarnet: Cook Composites # 953-MA-206 [sic - Cabernet]
4) Roberts Gray: CCP # 963-AK-212
5) Black: CCP # 944-B-096
6) Cdory White Gelcoat: CCP # DX 963-WK-506
7) Cdory White Enamel: CCP # DX 948-WA-441 [not sure what this refers to]
 Red = Cook red 953RA076 Red = Cook red 953RA076
Another possibility is some sort of rubber molding wrapping around, perhaps affixed with VHB or etc. (Autos use these quite a bit now). You'd have to evaluate the practical application (how likely are you to need bump protection there) vs. the non-standard look. |
|
| Back to top |
|
|
Marco Flamingo
Joined: 09 Jul 2015
Posts: 1167
City/Region: Seattle
State or Province: WA
C-Dory Year: 2004
C-Dory Model: 16 Cruiser
Vessel Name: Limpet
Photos: Limpet
|
| Posted: Wed May 04, 2016 6:33 pm Post subject: |
|
|
That's the same rub rail construction that I have. If it is just a seam joint where the un-reinforced gel coat has cracked but when checking from the inside the structural integrity hasn't been compromised, I would be tempted to do nothing. I have a couple of places where my gel coat has rubbed through and that is way down on my list because I know that when it comes to cosmetics I can make it look worse. I cut out openings in some of the fiberglass panels, so I have some scraps to practice gel coat matching and finishing, but it's still low on my list.
These types of little fix it projects bring up something that I've been thinking about. I bought chopped fiberglass strands, cabosil, and even some 1.5" balsa core. I've used less than half of these materials. They are cheap to ship. If you need anything, ask and you shall receive. No point every C Brat having a bag of chopped strand sitting in their garage.
Post a picture of your cover when you get a chance. I've posted a picture of mine.
Mark
 |
|
| Back to top |
|
|
Scott Fletcher
Joined: 31 Mar 2016
Posts: 26
City/Region: Key Largo
State or Province: FL
C-Dory Year: 2003
C-Dory Model: 16 Cruiser
Vessel Name: C-Buoy
Photos: C-Buoy
|
| Posted: Wed May 04, 2016 7:21 pm Post subject: VHB |
|
|
| Interesting. I wonder if I could use VHB to secure my furniture back to the deck? A 1 ounce CD gelcoat kit from Gelcoat Products was the same price as a gelcoat kit you have to mix the color, Thanks |
|
| Back to top |
|
|
thataway
Joined: 02 Nov 2003
Posts: 21507
City/Region: Pensacola
State or Province: FL
C-Dory Year: 2007
C-Dory Model: 25 Cruiser
Vessel Name: thataway
Photos: Thataway
|
| Posted: Wed May 04, 2016 7:41 pm Post subject: |
|
|
Scott,
I would use the
Spectrum Color C Dory patch gel coat
Which is plenty of gel coat and a great match.
It is very possible that some time in the past there has been a "hard docking" maneuver, which put some stress on this corner of the boat, and even if it were against the rub rail, could have accentuated the cracking process.
As for putting the furniture back in--I suggest some fiberglass tabs. In this case I just used some scraps of cloth I had around: After removing the screws and filling the holes in the core:
 |
|
| Back to top |
|
|
Sunbeam
Joined: 23 Feb 2012
Posts: 3990
City/Region: Out 'n' About
State or Province: Other
C-Dory Year: 2002
C-Dory Model: 22 Cruiser
Photos: Sunbeam
|
| Posted: Wed May 04, 2016 8:27 pm Post subject: Re: VHB |
|
|
| Scott Fletcher wrote: | | A 1 ounce CD gelcoat kit from Gelcoat Products was the same price as a gelcoat kit you have to mix the color, Thanks |
Glad to hear it's still easily available.
It's not that easy to get the right angle, but here is a hunk of the Gelcoat Products C-Dory white sitting on my lazarette deck (it's the puck from the bottom of my mixing cup). But any brand mixed from the correct formula should be the same.
 |
|
| Back to top |
|
|
Scott Fletcher
Joined: 31 Mar 2016
Posts: 26
City/Region: Key Largo
State or Province: FL
C-Dory Year: 2003
C-Dory Model: 16 Cruiser
Vessel Name: C-Buoy
Photos: C-Buoy
|
| Posted: Thu May 05, 2016 7:17 am Post subject: New Boatman |
|
|
Thanks everyone,
Mark, very good point I dont want to make matters worse. Canvas pictures forthcoming. When you screwed your furniture back down how did you ensure you screws into the middle of your epoxy plug?
Thatway, all the patch kits at Spectrum were discontinued so I am surprised Iboats still carried them. Your patch idea its like a good plan. I was thinking of using a 3M product as an adhesive to glue the furniture back deck. Id like to screw the deck back down but Im afraid Ill mess up my epoxy plugs. I had a problem with a little bubbling when I filled epoxy back into a couple of my undercut plugs. But after I sanded them down they looked pretty good. Still , I would like to completely seal them with some bilge paint and just 5200 the furniture back on.
Sunbeam, you are so generous. Im setting up to make the epoxy leveling seat for my washers on the through bolt. I read your article. So I just put a washer in a plastic bag, some epoxy thickened epoxy on the outside of the bag, push the epoxy in position, remove the bag and the washer, chipped around the new epoxy leveling seat?
Anyway thats what Im up to today.Please feel free to chime in on the issue.
Scott |
|
| Back to top |
|
|
Scott Fletcher
Joined: 31 Mar 2016
Posts: 26
City/Region: Key Largo
State or Province: FL
C-Dory Year: 2003
C-Dory Model: 16 Cruiser
Vessel Name: C-Buoy
Photos: C-Buoy
|
|
| Back to top |
|
|
Scott Fletcher
Joined: 31 Mar 2016
Posts: 26
City/Region: Key Largo
State or Province: FL
C-Dory Year: 2003
C-Dory Model: 16 Cruiser
Vessel Name: C-Buoy
Photos: C-Buoy
|
|
| Back to top |
|
|
Marco Flamingo
Joined: 09 Jul 2015
Posts: 1167
City/Region: Seattle
State or Province: WA
C-Dory Year: 2004
C-Dory Model: 16 Cruiser
Vessel Name: Limpet
Photos: Limpet
|
| Posted: Thu May 05, 2016 11:02 am Post subject: Re: New Boatman |
|
|
| Scott Fletcher wrote: | | When you screwed your furniture back down how did you ensure you screws into the middle of your epoxy plug? |
Each of my screw holes were drilled out with a 1/2 inch drill. Then the holes were undercut, so the amount of balsa removed was about a 1 inch circle. I then put in penetrating epoxy to seal the exposed balsa. Smith brand penetrating epoxy doesn't cure with an amine blush, so my epoxy putty would bond to it.
My epoxy "putty" was the consistency of honey. I drizzled it into the holes and then returned with more putty a few times as bubbles came to the surface. I had a few areas where the volume was bigger than a 1 inch circle, and I did those in several "lifts," meaning that I would put in a 1/3 of an inch, let the putty cure and throw off some heat, and then add another layer. Reason being that if you cure too much epoxy at one time the heat generated can cause the putty to foam up.
Even though the holes were filled to the point of making a little dome of putty above the hole, the epoxy shrinks as it cures and would end up leaving a little divot or dimple. I didn't worry about that because the panel would eventually cover the holes. Plus, having some of the holes with dimples in the center made it easy to see exactly the center of the putty repair (even when painted, which I did before the reinstall) and I knew exactly where to drill my screw holes.
I had several paper cups with left over epoxy putty in them, so I drilled them for screw holding tests. I used micro-balloons instead of cabosil. MB traps more heat when curing, but my experience is that it is more forgiving when driving screws and still has sufficient screw holding ability. It is more like driving a screw into wood, where the wood can crush rather than split if the hole isn't perfect. Even still, I put a drop of penetrating epoxy on the screw just in case something went wrong (split the epoxy plug or the screw hole went outside the epoxy plug). That last part was kind of tedious, but after all that work I didn't want any possibility of exposed balsa. I secured the panel in place using the several pre-drilled screw holes for each panel. Once I was satisfied that the panel was sitting exactly in the same spot as when removed, I drilled the rest of the holes using the panel as a template. I watched and made sure that none of the swarf had any balsa in it.
I didn't use any panel-to-deck caulking for the re-install because I wanted the water that gets behind the panels to drain out. Whatever the original caulking was, it had failed (which may have allowed the rivets to work open and allow more water into the core). I just couldn't see that recaulking would do anything. It certainly hadn't done anything for the original construction technique.
Your boat is going to be subjected to the famous C Dory pounding when in choppy seas and I'm not sure that I would have confidence with just caulking, even 3M 5200. One reason would be that the deck is painted. Assuming you can clean off the bottom of the panel and get a good bonding surface for 5200, on the deck the 5200 would be attached to the old paint. That means that ultimately your panel (holding a 200# passenger in a pounding sea) is held in place by a layer of paint. I would want some mechanical fasteners.
A couple of my upper screws that hold the front of the panel to the side deck had failed, as yours apparently did in the past. There wasn't enough material for the screws to bite into. I used some disposable eye droppers, made some honey putty, and injected that into the holes, placing a piece of tape over the holes so that it couldn't drool out when curing. I had to put several droppers full in a couple of holes, so I don't really know what is inside there, if anything. Anyway, I ended up with an epoxy plug that I drilled and refit the original screws. The boat has been through several rigorous poundings (the honeymoon is over) and all is well.
One of the reasons that I didn't use any caulking is because it is possible that I will need access because of my heater install on the passenger side. The thought of removal is daunting enough without having the panel also glued in place.
Mark |
|
| Back to top |
|
|
Scott Fletcher
Joined: 31 Mar 2016
Posts: 26
City/Region: Key Largo
State or Province: FL
C-Dory Year: 2003
C-Dory Model: 16 Cruiser
Vessel Name: C-Buoy
Photos: C-Buoy
|
| Posted: Thu May 05, 2016 12:23 pm Post subject: Reinstalling the furniture |
|
|
Excellent Mark,
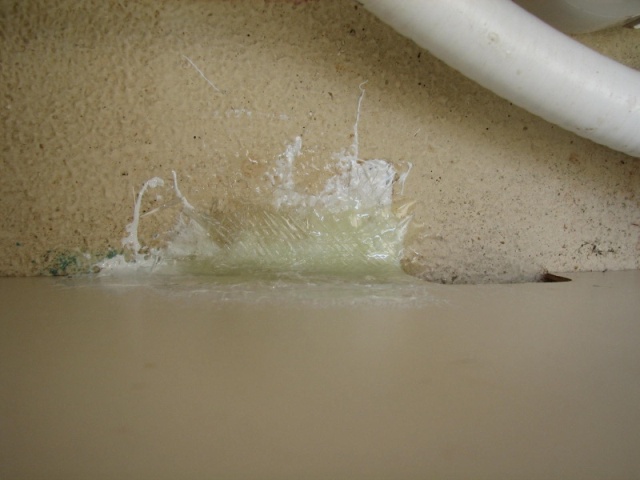
That's just how I'll reinstall the furniture. While I have the furniture I have been working on the rub rail. Now that I know how to handle the crack in the gel coat and I know how to install the new stainless steel fasteners , I went ahead and complete removed both the port and starboard rub rail. There were a few ants running around in joint between deck and hull. The tiny Florida kind not the carpenter kind. Going to have to seal the joint. Maybe wet it out first and then use some 3M 4000 or 3M 5200.
Again thanks for the writeup, I needed it. It rained an inch and a half last night. |
|
| Back to top |
|
|
Marco Flamingo
Joined: 09 Jul 2015
Posts: 1167
City/Region: Seattle
State or Province: WA
C-Dory Year: 2004
C-Dory Model: 16 Cruiser
Vessel Name: Limpet
Photos: Limpet
|
| Posted: Thu May 05, 2016 5:29 pm Post subject: Re: Reinstalling the furniture |
|
|
| Scott Fletcher wrote: | | It rained an inch and a half last night. |
In Seattle, we call that a heavy mist. Good luck.
Mark |
|
| Back to top |
|
|
|
 Search
 Private Messages
 Profile
 Log in
 Register
 Help
Help
