| View previous topic :: View next topic |
| Author |
Message |
clayhubler
Joined: 03 Aug 2019
Posts: 280
City/Region: La Center
State or Province: WA
C-Dory Year: 2003
C-Dory Model: 22 Cruiser
Vessel Name: Hammerhead
Photos: Hammerhead
|
 Posted: Mon May 03, 2021 10:57 pm Post subject: Posted: Mon May 03, 2021 10:57 pm Post subject: |
 |
|
| thataway wrote: | | You will have the strongest and best Buil C Dory. Probably last over 100 years! |
I hope so!
_________________
Clay on Hammerhead
 |
|
| Back to top |
|
 |
clayhubler
Joined: 03 Aug 2019
Posts: 280
City/Region: La Center
State or Province: WA
C-Dory Year: 2003
C-Dory Model: 22 Cruiser
Vessel Name: Hammerhead
Photos: Hammerhead
|
|
| Back to top |
|
|
clayhubler
Joined: 03 Aug 2019
Posts: 280
City/Region: La Center
State or Province: WA
C-Dory Year: 2003
C-Dory Model: 22 Cruiser
Vessel Name: Hammerhead
Photos: Hammerhead
|
|
| Back to top |
|
|
clayhubler
Joined: 03 Aug 2019
Posts: 280
City/Region: La Center
State or Province: WA
C-Dory Year: 2003
C-Dory Model: 22 Cruiser
Vessel Name: Hammerhead
Photos: Hammerhead
|
| Posted: Sat May 08, 2021 11:05 pm Post subject: |
|
|
| Yay! Finished laying the balsa into the hull today! Soon I will be done with the repairs and on to the upgrades! |
|
| Back to top |
|
|
thataway
Joined: 02 Nov 2003
Posts: 20803
City/Region: Pensacola
State or Province: FL
C-Dory Year: 2007
C-Dory Model: 25 Cruiser
Vessel Name: thataway
Photos: Thataway
|
| Posted: Sat May 08, 2021 11:08 pm Post subject: |
|
|
Congratulations--you built a boat!
Can you see any "seams" between the block areas you filled in the hull?
_________________
Bob Austin
Thataway
Thataway (Ex Seaweed) 2007 25 C Dory May 2018 to Oct. 2021
Thisaway 2006 22' CDory November 2011 to May 2018
Caracal 18 140 Suzuki 2007 to present
Thataway TomCat 255 150 Suzukis June 2006 thru August 2011
C Pelican; 1992, 22 Cruiser, 2002 thru 2006
Frequent Sea; 2003 C D 25, 2007 thru 2009
KA6PKB
Home port: Pensacola FL |
|
| Back to top |
|
|
clayhubler
Joined: 03 Aug 2019
Posts: 280
City/Region: La Center
State or Province: WA
C-Dory Year: 2003
C-Dory Model: 22 Cruiser
Vessel Name: Hammerhead
Photos: Hammerhead
|
| Posted: Sat May 29, 2021 6:31 pm Post subject: |
|
|
I have gotten behind on my updates because I have been working on the boat the whole time! Just a recap, the floor is all done and I have moved on to sanding, fairing, and refinishing of the boat. I really need to get the cabinets/ furniture built and installed. I am up against a deadline and I need to get this thing back in the water asap! There are pictures with captions in the photo album if interested.
Thanks to all who have given advice throughout this project. I'm trying to document everything I'm doing. Hoping it may help somebody else in the future if they ever have to go through this. |
|
| Back to top |
|
|
clayhubler
Joined: 03 Aug 2019
Posts: 280
City/Region: La Center
State or Province: WA
C-Dory Year: 2003
C-Dory Model: 22 Cruiser
Vessel Name: Hammerhead
Photos: Hammerhead
|
| Posted: Wed Jun 16, 2021 3:14 am Post subject: |
|
|
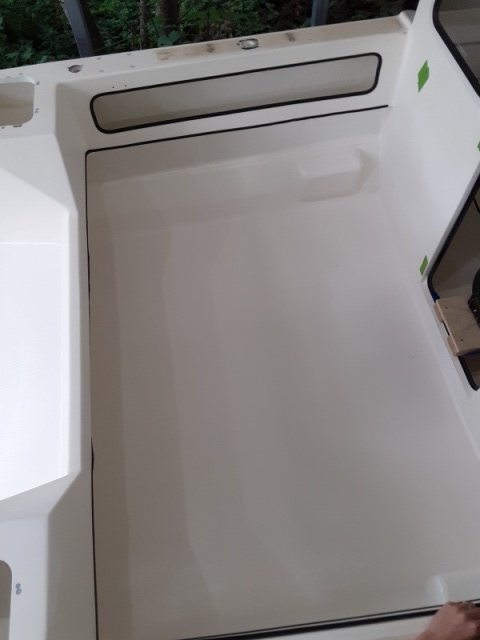
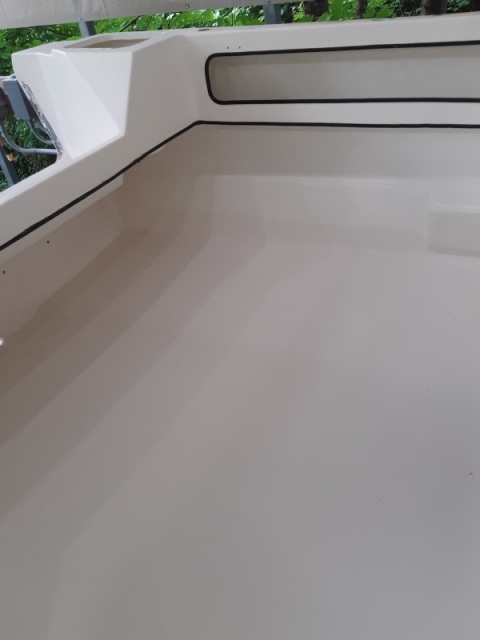
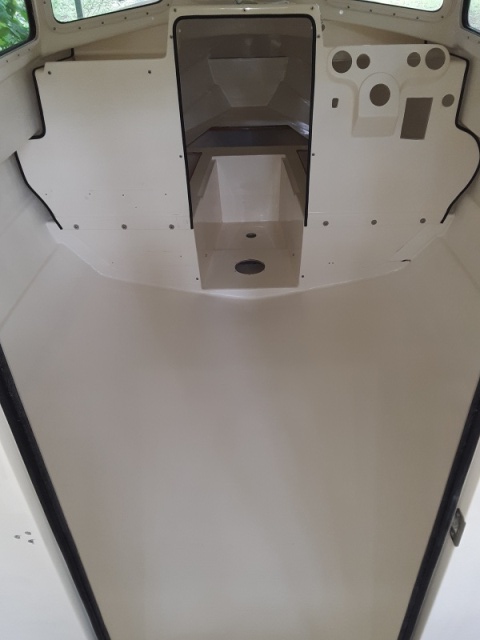
Okay, still behind on photos in the album, but here are some from today. The hull repairs are completely done. I just need to bottom paint and then its going back on the trailer. Of course then I will still need to put ALL THE PARTS BACK IN! We leave for florida in 3 WEEKS!
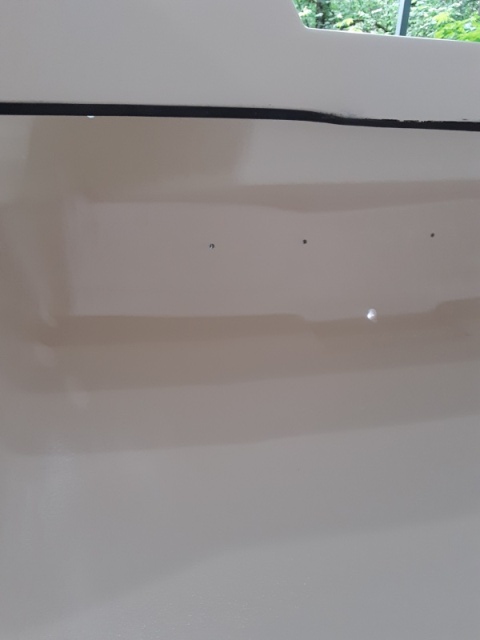
So I painted the walls in the cabin and the cockpit, and in the v-berth storage. The floor is all gelcoat, and I am really happy with how it turned out. I cannot see any of the repairs.
I will update the album with captions when I get time. It may not be until after we get back from vacay. |
|
| Back to top |
|
|
iyaman
Joined: 06 Jul 2020
Posts: 43
City/Region: Seattle
State or Province: WA
C-Dory Year: 2007
C-Dory Model: 16 Cruiser
Vessel Name: Eye C Fish
Photos: Eye C Fish
|
| Posted: Wed Jun 16, 2021 9:45 am Post subject: |
|
|
wow! can't wait to see the finish product. It will probably be better than a new boat.
_________________
consistently inconsistent |
|
| Back to top |
|
|
clayhubler
Joined: 03 Aug 2019
Posts: 280
City/Region: La Center
State or Province: WA
C-Dory Year: 2003
C-Dory Model: 22 Cruiser
Vessel Name: Hammerhead
Photos: Hammerhead
|
| Posted: Fri Jun 18, 2021 12:53 am Post subject: |
|
|
| I'm putting the rubrail back on tomorrow. Was planning to use butyl tape to seal it. Think this is okay? I'm going to use ss machine screws with lock washers and nuts. |
|
| Back to top |
|
|
hardee
Joined: 30 Oct 2006
Posts: 12632
City/Region: Sequim
State or Province: WA
C-Dory Year: 2005
C-Dory Model: 22 Cruiser
Vessel Name: Sleepy-C
Photos: SleepyC
|
| Posted: Fri Jun 18, 2021 5:55 am Post subject: |
|
|
Really nice looking work. What a talent.
Harvey
SleepyC 

_________________
Though in our sleep we are not conscious of our activity or surroundings, we should not, in our wakefulness, be unconscious of our sleep. |
|
| Back to top |
|
|
ssobol
Joined: 27 Oct 2012
Posts: 3370
City/Region: SW Michigan
State or Province: MI
C-Dory Year: 2008
C-Dory Model: 22 Cruiser
Vessel Name: SoBELLE
Photos: SoBelle
|
| Posted: Fri Jun 18, 2021 11:00 am Post subject: |
|
|
| clayhubler wrote: | | I'm putting the rubrail back on tomorrow. Was planning to use butyl tape to seal it. Think this is okay? I'm going to use ss machine screws with lock washers and nuts. |
Personally, I would use flat washers and fibernuts and forget the lock washers. I'd also run a bead of sealant along the top and bottom edge where the rail meets the hull.
 |
|
| Back to top |
|
|
journey on
Joined: 03 Mar 2005
Posts: 3595
City/Region: Valley Centre
State or Province: CA
C-Dory Year: 2005
C-Dory Model: 25 Cruiser
Vessel Name: journey on
Photos: Journey On
|
| Posted: Fri Jun 18, 2021 12:57 pm Post subject: |
|
|
When I redid the rubrail on Journey On, the original pop-rivets were corroded away, stainless mixed with aluminum.
Anyway, where I could reach the inside, I used 1/4 panhead machine bolts with a plastic washer on the outside and a locknut on the inside, with plenty of 5200 as sealer. This requires 2 people. Where I couldn't reach behind, I used sheet metal screws.
Also, opposed to sealing water from entering the rubrail, I drilled drain holes to let the water out. This seems reasonable since the rubrail wasn't corroded. Also, the joint is sealed with epoxy filler and doesn't leak unless the hull is breached. And that's really serious.
Boris |
|
| Back to top |
|
|
clayhubler
Joined: 03 Aug 2019
Posts: 280
City/Region: La Center
State or Province: WA
C-Dory Year: 2003
C-Dory Model: 22 Cruiser
Vessel Name: Hammerhead
Photos: Hammerhead
|
| Posted: Fri Jun 18, 2021 3:29 pm Post subject: |
|
|
I normally use locknuts on everything, but in this case I wanted to be able to spin the nut on freely by hand when drilling all the holes. I agree with journeyon that the rail should not be caulked. It was originally, and water was always trapped in there. Whenever I jacked the tounge of the trailer up water would run out the back of the rubrail, even when the baot hadn't been wet in a long time.
The admiral just helped me drill all the holes. I started near the back just ahead of the bend at the aft corner. Drilled a hole and then put in a screw and had her on the inside putting on the nuts. Worked our way around a few holes at a time to make sure we didn't get any buckles in the rail. Drilled all the holes but didn't put fasteners in all of them. Then pulled the rail back off and will now put butly tape tape over the holes and reinstall for real this time. I got a washer that has a rubber washer bonded to it to keep the ss machine screw off the aluminum. I think this will be a permanent solution.
Really, this is the one thing that has proven to be much easier than I thought. It is really easy with no cabinets or wiring in the boat! |
|
| Back to top |
|
|
clayhubler
Joined: 03 Aug 2019
Posts: 280
City/Region: La Center
State or Province: WA
C-Dory Year: 2003
C-Dory Model: 22 Cruiser
Vessel Name: Hammerhead
Photos: Hammerhead
|
| Posted: Wed Aug 18, 2021 12:53 am Post subject: |
|
|
Okay, I have gotten way behind on this thread, but if anybody is interested, I have now gotten my photo album on this repair up to date with captions.
http://www.c-brats.com/modules.php?set_albumName=Core-rot-repair&op=modload&name=gallery&file=index&include=view_album.php
This repair took about 7 months. Perhaps it could have been done much quicker. Much of the time I spent drying core. Also, I feel that I went a little overboard, as I like things to be just right. I rebuilt all the cabinets, rewired the entire boat, ran new gas lines, new plumbing lines and components, relocated batteries, installed the propane locker, patched all holes in the hull and roof, wetsanded the entire boat and buffed and waxed, and sanded off the bottompaint and reapplied. I never would have gotten this done in time without help from the cbrats. Thanks to everybody who gave advice during this project. I'm hoping that these photos will help somebody in the future if they find themselves in the same situation. Always happy to answer any questions.
Thanks everybody,
Clay
 |
|
| Back to top |
|
|
|
 Search
 Private Messages
 Profile
 Log in
 Register
 Help
Help


