| View previous topic :: View next topic |
| Author |
Message |
bmcminn
Joined: 20 Jul 2019
Posts: 65
City/Region: Bellingham
State or Province: WA
C-Dory Year: 1992
C-Dory Model: 19 Angler
Vessel Name: Polū
Photos: bmcminn
|
 Posted: Tue Oct 08, 2019 3:04 am Post subject: what is this & how do I fix this Posted: Tue Oct 08, 2019 3:04 am Post subject: what is this & how do I fix this |
 |
|
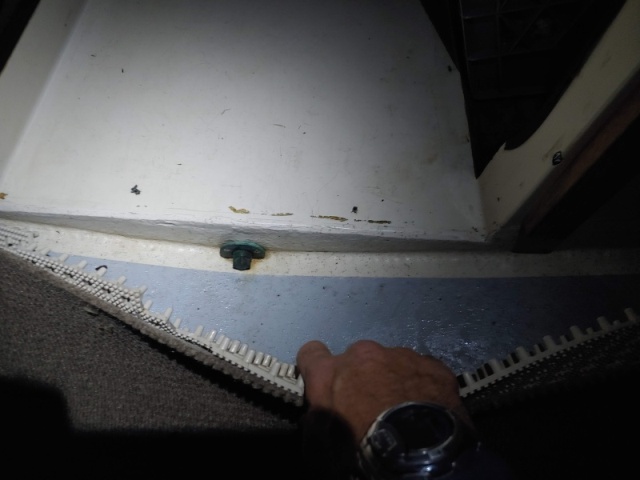
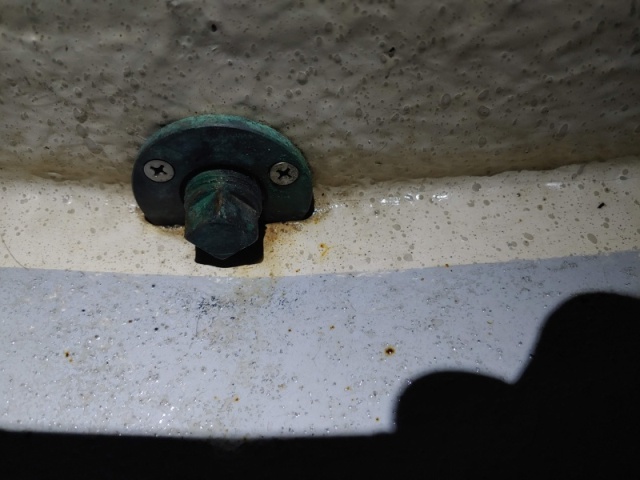
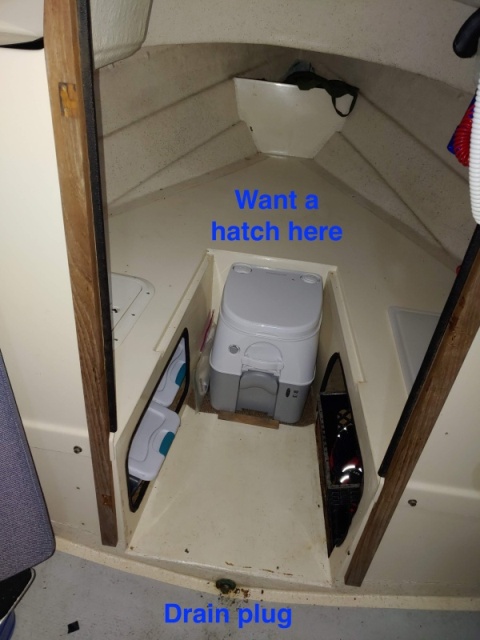
What is this plug bolt thing? Looks dangerous, serious, or superfluous.
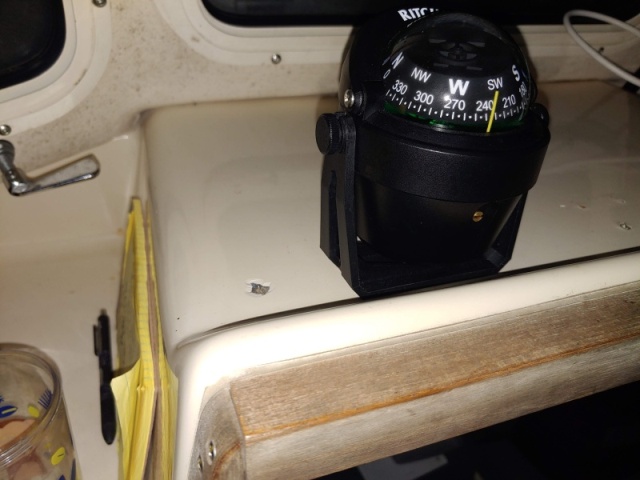
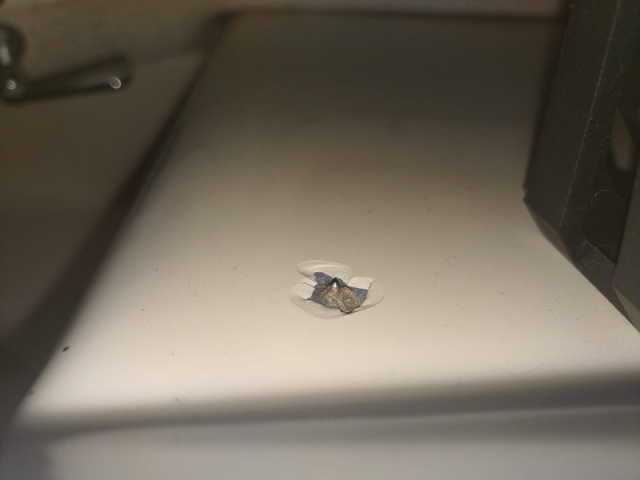
And how do I fix where these screws went through? Regardless of if I grind off the sharp parts, what is the way to cover or patch a small fiberglass wound?
As always thanks for all the great thinking and info!
 |
|
| Back to top |
|
 |
PaulNBriannaLynn
Joined: 26 Oct 2012
Posts: 757
City/Region: Fort White
State or Province: FL
C-Dory Year: 2007
C-Dory Model: 22 Cruiser
Vessel Name: TBD
Photos: Lorelei
|
| Posted: Tue Oct 08, 2019 9:55 am Post subject: |
|
|
That's a drain plug or inspection port, I've never seen one placed there by the factory, but its not a bad idea IMO. Probably a previous owners improvement. Water can accumulate under there, through the anchor locker, or brass keel strip or the rub rail rivets. I'd probably leave it, but pull the brass plug out once in a while to check for water and/or drain. I don't believe there's any balsa core in that area, just empty space for water to accumulate.
_________________
2007 22 cruiser sold 10/2021
2009 Parker 23 sold 10/2017
2003 22 cruiser sold 3/2016 |
|
| Back to top |
|
|
Micahbigsur@msn.com
Joined: 27 May 2019
Posts: 484
City/Region: Big Sur
State or Province: CA
C-Dory Year: 2003
C-Dory Model: 25 Cruiser
Vessel Name: Sierra
Photos: Sierra
|
| Posted: Tue Oct 08, 2019 10:29 am Post subject: |
|
|
By your compass.... looks like you need to remove the over long screw that has penatrated from below and chipped the gellcoat. Then buy a gellcoat chip repair kit from West Marine and carefully follow directions, only the tiniest toothpick tip of brown colorant will be added to match the CD color.
Good luck with the repair.
(or you can put something like a happy face sticker over it and call it a day. One of my co-workers did that once with a sticker on a ding hours before a boatshow!!!)😎
_________________
Micah Curtis and Dana, RN
2003 C-dory 25 Sierra, 200, 9.9 and 2.5 Suzukis
2012 R25 SC Sequoia (2015-2018)
1978 Folkes 38 SV Audacious (2006-2015)
Micah, KJ6GUF, Dana, KJ6GXG |
|
| Back to top |
|
|
tsturm
Joined: 01 Nov 2003
Posts: 1134
City/Region: Soldotna
State or Province: AK
C-Dory Year: 2003
C-Dory Model: 25 Cruiser
Vessel Name: JMR TOO
Photos: JMR-TOO
|
| Posted: Tue Oct 08, 2019 10:30 am Post subject: |
|
|
And for the missing white stuff covering the fiberglass, Google Gell Coat repair kit, mix up a close color, & follow directions.
 
& use shorter screws  |
|
| Back to top |
|
|
thataway
Joined: 02 Nov 2003
Posts: 20803
City/Region: Pensacola
State or Province: FL
C-Dory Year: 2007
C-Dory Model: 25 Cruiser
Vessel Name: thataway
Photos: Thataway
|
| Posted: Tue Oct 08, 2019 12:34 pm Post subject: |
|
|
There were some boats where this "garboard drain plug" (with one side cut off) was put between he cabin aft bulkhead and cockpit. Most folks who had water under the platform under the V berth (which I assume this area is...good to identify exactly where a photograph is taken.). I agree, open the plug and see if any water. It is not dangerous, serious or superfluous--it was put there for a reason. If you have water in there, then either the brass strip has to be redone, or the anchor locker floor has a leak in it. Both of these are common.
The chip by the compass is cosmetic and caused by an over length screw. The only issue is matching the gel coat: a very small amount of yellow and brown pigment is what it usually takes. You will need to feather in the edges with sandpaper. After the gelcoat sets up (put a small piece of mylar or wax paper to be sure and occlude air over the repair), then sand with progressively finer grit to 2000 or 5000 and then use a compound to bring it the original luster.
_________________
Bob Austin
Thataway
Thataway (Ex Seaweed) 2007 25 C Dory May 2018 to Oct. 2021
Thisaway 2006 22' CDory November 2011 to May 2018
Caracal 18 140 Suzuki 2007 to present
Thataway TomCat 255 150 Suzukis June 2006 thru August 2011
C Pelican; 1992, 22 Cruiser, 2002 thru 2006
Frequent Sea; 2003 C D 25, 2007 thru 2009
KA6PKB
Home port: Pensacola FL |
|
| Back to top |
|
|
nordicstallion
Joined: 16 Dec 2007
Posts: 380
City/Region: Crescent City
State or Province: CA
C-Dory Year: 2004
C-Dory Model: 19 Angler
Vessel Name: Rylee Rose
Photos: Rylee Rose
|
| Posted: Tue Oct 08, 2019 2:18 pm Post subject: |
|
|
| I have a small weep hole in that location. I cleaned up the hole & enlarged a tiny bet & just forgot about it. Good to have a drain hole there as moisture does sometimes tend to collect under there from a number of potential sources. |
|
| Back to top |
|
|
bmcminn
Joined: 20 Jul 2019
Posts: 65
City/Region: Bellingham
State or Province: WA
C-Dory Year: 1992
C-Dory Model: 19 Angler
Vessel Name: Polū
Photos: bmcminn
|
| Posted: Sun Oct 13, 2019 3:48 am Post subject: |
|
|
I did not apply those particular screws, although it's the type of mistake I make.
Yes, the drain is on the short step up between the cabin and the v-berth/shelf the head sits on. So if understand correctly, it connects through to the space behind the forward wall of the porta-potty place or under the v of the v-berth?
My boat does not have any foam in that area, it's all open storage. I'd like to put a hatch to access the part that is under the forward-most part of the berth, it is a hard reach. I guess that is the same place this drain connects through to? At any rate, the ring it is set in is loose and not at all water tight so maybe the best thing is to re-do it.
So, what is under my feet? Like between the floor of the cabin/cockpit and the hull? Is it a few inches of space filled with foam? I had been curious if this drain connected to that area any.
Thanks! |
|
| Back to top |
|
|
thataway
Joined: 02 Nov 2003
Posts: 20803
City/Region: Pensacola
State or Province: FL
C-Dory Year: 2007
C-Dory Model: 25 Cruiser
Vessel Name: thataway
Photos: Thataway
|
| Posted: Sun Oct 13, 2019 1:08 pm Post subject: |
|
|
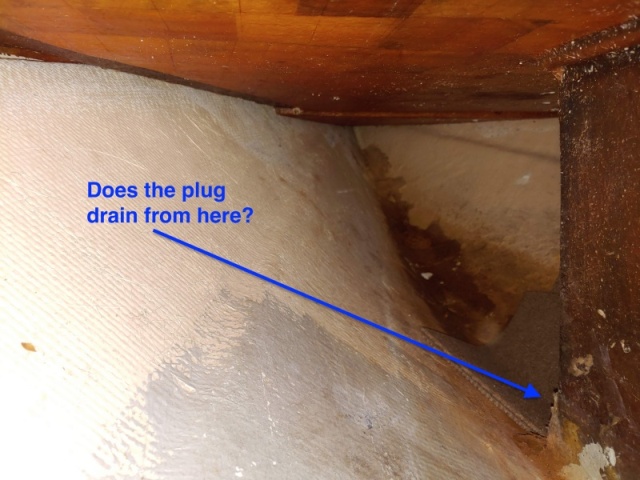
The last photo, is taken from the hatch in the V Berth on the port side? The arrow is just forward of the portipotty recess. Yes, the garboard plug does drain from there.
Just get a hatch, and make a cut out. Many use plywood, or even the fiberglass they cut out. My current boat has aluminum 1/8" thick x 1 1/2" wide bolted to the surrounding glass, and then wooden hatches. I have re-used the cut out glass, and put in 1 x 2 wood cleats to hold the hatch in place.
Your hatches are similar to what was on the lazarett of many of the 22's. I have two of those when I replaced them with water tight hatches on the 22.
Drive on down to Hontoon gathering in next March, and I will put the two hatch covers up for auction (proceeds go to the state park for improvements). |
|
| Back to top |
|
|
|
 Search
 Private Messages
 Profile
 Log in
 Register
 Help
Help
