| View previous topic :: View next topic |
| Author |
Message |
hardee
Joined: 30 Oct 2006
Posts: 12632
City/Region: Sequim
State or Province: WA
C-Dory Year: 2005
C-Dory Model: 22 Cruiser
Vessel Name: Sleepy-C
Photos: SleepyC
|
 Posted: Fri Mar 17, 2017 3:57 am Post subject: Raw Water Washdown Pump and Intake Grill Posted: Fri Mar 17, 2017 3:57 am Post subject: Raw Water Washdown Pump and Intake Grill |
 |
|
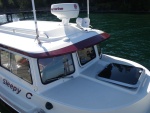
I have a raw water washdown pump on my 22 Cruiser. The intake is through a grill, brass, just starboard of center and inches forward of the transom. There is a brass valve just above the sole.
I am considering taking out the grill and more importantly, the through hull in the bottom of my boat. I will probably keep the pump on board, and use a flexible hose that could be put overboard if I need to use the pump, Which I have not used more that half a dozen times in 10 years.
I have a concern with removing the through hull and valve. There is a wire attached to the valve. It appears to be a ground wire. Would this be a likely place for a common ground for the entire boat system? If so, what would be the next best place for that?
I do have trim Lenco tabs, stainless, and electric. Would that be a usable connection or would the outboard be a better choice?
Harvey
SleepyC 
_________________
Though in our sleep we are not conscious of our activity or surroundings, we should not, in our wakefulness, be unconscious of our sleep. |
|
| Back to top |
|
 |
AstoriaDave
Joined: 31 Oct 2005
Posts: 994
City/Region: Astoria
State or Province: OR
|
| Posted: Fri Mar 17, 2017 6:05 am Post subject: |
|
|
The grill and the thruhull and the valve should be bronze, not brass. Brass will lose zinc and become worthless.
Why do you want to remove this system? If intact, and not corroded, it should last forever.
As to the "ground wire," where does it go? A proper setup should tie it to other metal fittings. You need these electrically grounded to protect them.
Do you know the history of the washdown pump system, or who installed it? If not, you might want someone competent to inspect the system before proceeding with bottom paint. Bottom paint should not be applied to the grill.
_________________
Dave Kruger
Astoria, OR |
|
| Back to top |
|
|
jkidd
Joined: 23 Oct 2006
Posts: 1615
City/Region: Northern, Utah
State or Province: UT
C-Dory Year: 2007
C-Dory Model: 22 Cruiser
Vessel Name: Voyager
Photos: Voyager (JK)
|
| Posted: Fri Mar 17, 2017 8:58 am Post subject: |
|
|
I have 2 hose connections in my splash well. 1 for the wash down hose and the second for the intake hose it's about 3 feet long with a screen on the end. The nice thing about it is the intake can be put in a 5 gallon bucket with fresh water for rinsing off the salt. I couldn't talk myself into drilling the through hull.
_________________
Jody Kidd
KE7WNG
Northern, Utah
 |
|
| Back to top |
|
|
rogerbum
Joined: 21 Nov 2004
Posts: 5922
City/Region: Kenmore
State or Province: WA
C-Dory Year: 2008
C-Dory Model: 255 Tomcat
Vessel Name: Meant to be
Photos: SeaDNA
|
| Posted: Fri Mar 17, 2017 9:31 am Post subject: |
|
|
A raw water wash down is great thing for fishermen (especially if one ever fishes tuna). So for some people it adds value (something to consider for future resale). As mentioned above, it should be (and probably is) bronze. If you want to replace it, you might consider doing what I had done on my tomcat - my raw water wash down pickup is a piece of plastic pipe about 3/4". It has several holes drilled in the side of it (small diameter) and it's attached to the outside of the hull with a through hull well above the water line. The small diameter holes filter out larger bits of vegetation and the raw water pump itself has a screen at it's input. The common ground for the boat is probably attached to the engine housing/lower end. Attaching the bronze through hull to the rest of the system, allows the zincs of the system to protect the through hull.
_________________
Roger on Meant to be |
|
| Back to top |
|
|
hardee
Joined: 30 Oct 2006
Posts: 12632
City/Region: Sequim
State or Province: WA
C-Dory Year: 2005
C-Dory Model: 22 Cruiser
Vessel Name: Sleepy-C
Photos: SleepyC
|
| Posted: Fri Mar 17, 2017 12:48 pm Post subject: |
|
|
You all are right, I'm sure, it is most likely Bronze. The valve on the inside has a bit of a gray-greenish patina (I think it is called.) I will be tracing that wire today.
Harvey
SleepyC
 |
|
| Back to top |
|
|
tsturm
Joined: 01 Nov 2003
Posts: 1134
City/Region: Soldotna
State or Province: AK
C-Dory Year: 2003
C-Dory Model: 25 Cruiser
Vessel Name: JMR TOO
Photos: JMR-TOO
|
| Posted: Sat Mar 18, 2017 11:07 am Post subject: |
|
|
| hardee wrote: | You all are right, I'm sure, it is most likely Bronze. The valve on the inside has a bit of a gray-greenish patina (I think it is called.) I will be tracing that wire today.
Harvey
SleepyC
|
That is a "Bonding Wire terminal" on the through hull.
There is more than one theory on Bonding. On my 25 that through hull is under the cabin step mid boat, with no other metal around it for 8' or so. I chose to remove the bonding wire & the green crap has disappeared  My boat spends 10 months a year in the salt water My boat spends 10 months a year in the salt water  |
|
| Back to top |
|
|
journey on
Joined: 03 Mar 2005
Posts: 3595
City/Region: Valley Centre
State or Province: CA
C-Dory Year: 2005
C-Dory Model: 25 Cruiser
Vessel Name: journey on
Photos: Journey On
|
| Posted: Sat Mar 18, 2017 5:58 pm Post subject: |
|
|
i just got through pulling Journey On's strainer plumbing apart, to flush the strainer out. It had a lot of crud/seaweed in there.
So the first question I have is: why wouldn't one paint the strainer with bottom paint? It's bronze, but it still gets covered with growth, unpainted inside where I can't paint. I also paint over the brass (let's hope it's bronze, but I don't think so) strip on the bow of the boat. No one seems to object to that. Been doing it for a decade and can see no deleterious effect, except plant growth when I haven't painted the bottom for awhile.
Next is the use of bronze versus brass. I'm not going to advocate the use of brass but several of the fittings in the plumbing are brass and they've held up well in the last decade. As a matter of fact the factory installed shutoff valve has a bronze body but brass internals and it looks great. That's what i read on the tag attached to the valve. The whole assembly is in salt water when the boat is in the water since the valve is open to allow the head to be pumped.
Boris |
|
| Back to top |
|
|
AstoriaDave
Joined: 31 Oct 2005
Posts: 994
City/Region: Astoria
State or Province: OR
|
| Posted: Sat Mar 18, 2017 8:24 pm Post subject: |
|
|
Boris,
My naive assumption on keeping antifouling paint off the bronze screen/thruhull innards is based on two principles:
Marine growth should not occur on bronze because the copper in it should prevent barnacles and similar from attaching there. Sediment, sand, etc., will catch there whether you paint it or not.
If the assembly is part of the electrical ground bonding system, I think you would not want any coating because it could interfere with current flow in/out of the boat's electrical ground, to/from surrounding seawater.
On that second one, I would have to check Gerr to verify it, but Gerr is buried in a box somewhere. |
|
| Back to top |
|
|
thataway
Joined: 02 Nov 2003
Posts: 20808
City/Region: Pensacola
State or Province: FL
C-Dory Year: 2007
C-Dory Model: 25 Cruiser
Vessel Name: thataway
Photos: Thataway
|
| Posted: Sat Mar 18, 2017 10:21 pm Post subject: |
|
|
I have always painted the thru hulls, including the strainers--they will have growth--believe me--the copper in the bronze does not prevent this.
There is "naval" Brass. ( 60 percent copper, .75 percent tin and 39.2 percent zinc.) This may be salt water resistant. But one issue is keeping the boat in the water all of the time, vs the occasional trip--with brass.
The bonding is another issue--and there are two sides to that. There is enough surface which is not painted so that conductivity is not an issue. I tend to not bond the thru hulls.
After you remove the fittings, how are you gong to "plug" the hole? This will include some glass work inside and outside of the boat. The new glass should be tapered in on at least 6:1 bevel both inside and outside. You will have to provide a core for the center--could be wood, could be glass/fiber. Consider the strength of secondary bonds of various materials.
_________________
Bob Austin
Thataway
Thataway (Ex Seaweed) 2007 25 C Dory May 2018 to Oct. 2021
Thisaway 2006 22' CDory November 2011 to May 2018
Caracal 18 140 Suzuki 2007 to present
Thataway TomCat 255 150 Suzukis June 2006 thru August 2011
C Pelican; 1992, 22 Cruiser, 2002 thru 2006
Frequent Sea; 2003 C D 25, 2007 thru 2009
KA6PKB
Home port: Pensacola FL |
|
| Back to top |
|
|
Ron on Meander
Joined: 17 Jun 2004
Posts: 561
City/Region: Powell River
State or Province: BC
C-Dory Year: 2005
C-Dory Model: 25 Cruiser
Vessel Name: Meander
Photos: Meander
|
| Posted: Sat Mar 18, 2017 11:07 pm Post subject: |
|
|
Harvey you do tend to post questions just when I need the answers most! Thanks for that.
I have just removed the same type of through hull as yours. Thankfully the core, even though it only had 5200 or something similar as a sealant, was bone dry. My through hull was for a long removed marine head and is located in the area below the entry door step. I've ground the outside glass back around the 1 inch hole at my best guess of about a 12 to one, I'll do the inside probably a fair bit less as the space is somewhat limited in the step area. I will use probably 4 layers of glass on the outside and maybe 2 or 3 on the inside. I had planned to use 1/2 plywood to replace the core part.
My main concern is getting the cloth to stay in place during the overhead work on the outside of the hull.
I haven't worked with epoxy and cloth in an over head situation before so would appreciate any suggestions people may have.
I may have to wait a bit before completing this as it still is dropping well below 10 c (50F) at night here. I really don't want to add the complications of having to heat
the hull in order to get the epoxy to cure.
Again thanks for posting your questions Harvey!
Cheers
Ron |
|
| Back to top |
|
|
journey on
Joined: 03 Mar 2005
Posts: 3595
City/Region: Valley Centre
State or Province: CA
C-Dory Year: 2005
C-Dory Model: 25 Cruiser
Vessel Name: journey on
Photos: Journey On
|
| Posted: Sat Mar 18, 2017 11:27 pm Post subject: |
|
|
Just a thought on the ground as opposed to bonding. It's a chassis ground meant to dump stray high frequency voltage into ground. That kind of frequency will treat the bottom paint as a capacitor and go right through it. So if your green wire comes from your VHF or MFA or any other electronics, allow it to be attached to something in proximity to water. I lay it along the bottom inside of the hull though I've used those bronze grounding plates when I've had SSB.
One interesting fact is that high frequency current travels only on the outside of a conductor. That's why they use flat strips of copper for the ultimate ground plane. I use common stranded wire.
Bonding is a different subject in which I'm not well versed. Nor can I give advice on how to fiberglass. And Judy demmands the flush head, so I can't get rid of the thru hull.
Boris |
|
| Back to top |
|
|
hardee
Joined: 30 Oct 2006
Posts: 12632
City/Region: Sequim
State or Province: WA
C-Dory Year: 2005
C-Dory Model: 22 Cruiser
Vessel Name: Sleepy-C
Photos: SleepyC
|
| Posted: Sun Mar 19, 2017 2:10 am Post subject: |
|
|
Thanks to all for the great responses.
Ron, glad I could help, and thanks for sharing your experience. My boat is the same year so I'm hoping it will be about the same result. My through hull is in the aft sump, right next to the transom, and aft under the splash well. Not going to be room for a very large "grind out" but I might be able to get out from the hole about an inch. Don't expect to find coring there in the sump basin.
Working "up" under the bottom where the work is hanging in your face is not going to be easy. I wonder if it would be easier to tape of the bottom of the repair, and then fill it in from the top. That wouldn't work for putting glass fabric, mat or tape over the taper ground edges to the hole though. I was thinking I could get this done with the boat on the trailer but the FG guy would rather have the boat in his shope and up on blocking stands.
Harvey
SleepyC
 |
|
| Back to top |
|
|
thataway
Joined: 02 Nov 2003
Posts: 20808
City/Region: Pensacola
State or Province: FL
C-Dory Year: 2007
C-Dory Model: 25 Cruiser
Vessel Name: thataway
Photos: Thataway
|
| Posted: Sun Mar 19, 2017 4:31 pm Post subject: |
|
|
Some folks cover the entire bottom of large boats working upside down with glass cloth and epoxy.
I have done a lot of this working on boats with osmosis. Mix fairly small batches of resin fairly "hot"--(but use the proper ratio--not like MEKP with polyester resins. The concentric circles of glass cloth will stick fine overhead. (small circles first) The type of grinding Ron did should be fine and his schedule sounds good.
Harvey--I would try and go out more than an inch--and definitely glass on the bottom. Just above is where folks occasionally get in trouble. reports have been that there is a reduced amount of core in this area--so you will find out when you take out the thru hull. I personally would use a round dowel rod rather than laminated plywood. Do the bottom glass first, then push the round core replacement in from above, with plenty of epoxy around it. That should cinch sealing the hull. Be sure and clean the edges of the hole well; get rid of any other sealants. |
|
| Back to top |
|
|
AstoriaDave
Joined: 31 Oct 2005
Posts: 994
City/Region: Astoria
State or Province: OR
|
| Posted: Sun Mar 19, 2017 6:31 pm Post subject: |
|
|
Harvey, to reinforce what Dr Bob said about working overhead with epoxy and glass: I have never worked large areas. Most have been a few square inches, with maybe one as large as 12 x 12 inches, but working overhead is straightforward, largely because epoxy resin is relatively viscous, and thickens as it cures, allowing successive layers of glass to go on in one continuous operation.
Very important to work with small batches of resin and get them out of the pot and onto the work area ASAP.
I usually brush or roll on a generous amount of resin, using normal hardener unless it is cold, in which case I switch to fast hardener. Then using gloved fingers, I smooth in place glass precut for the area where the resin is, and squeegee lightly from the center to the edges, leaving some excess outside the glass. You will be applying successive layers of glass to build up the center and feather out to the perimeter, which you can do as long as the resin remains thin enough to wet out each successive layer.
When the first batch is exhausted, mix up another small batch and repeat the process, lightly squeegeeing each layer as you go. Successive layers applied this way will form a monolithic patch with chemical bonding throughout. When the patch reaches the green stage, fill the weave with successive coats of resin. Clean off excessive buildup with a scraper (easier when it is green, not fully cured). When it is fully hardened, fair it all with a large sanding block, followed by use of a ROS, walking the grit down to whatever you like for smoothness.
This is easier to do than to describe. And it might be good to practice with a square of plywood using the resin and glass you choose, to fine tune your technique. When I have worked larger jobs, it was handy for a reliable assistant to mix the resin, allowing me to concentrate on the glass and resin application. |
|
| Back to top |
|
|
hardee
Joined: 30 Oct 2006
Posts: 12632
City/Region: Sequim
State or Province: WA
C-Dory Year: 2005
C-Dory Model: 22 Cruiser
Vessel Name: Sleepy-C
Photos: SleepyC
|
| Posted: Thu Mar 23, 2017 7:58 pm Post subject: |
|
|
On the side of the through hull fitting/ball-valve, there is a black wire attached via a size 8 or 10 machine screw, and it looks to be bronze or brass. it has had some corrosion, and the threads are pretty much shot. I was able to back it out, but there is nothing there to grab to go back in and hold the wire in place.
The local hardware store has brass screws or Stainless. I am trying to find which is the most compatible. If I have the chart figured, a Stainless steel screw would have less galvanic corrosion than a brass one since it is closer to the bronze on the chart.
Or do I need to find the mfg of the through hull and get an OEM screw from them?
Harvey
SleepyC
 |
|
| Back to top |
|
|
|
 Search
 Private Messages
 Profile
 Log in
 Register
 Help
Help
