| View previous topic :: View next topic |
| Author |
Message |
jkidd
Joined: 23 Oct 2006
Posts: 1615
City/Region: Northern, Utah
State or Province: UT
C-Dory Year: 2007
C-Dory Model: 22 Cruiser
Vessel Name: Voyager
Photos: Voyager (JK)
|
 Posted: Mon Jan 14, 2013 9:49 pm Post subject: Posted: Mon Jan 14, 2013 9:49 pm Post subject: |
 |
|
Hi Sunbeam
I need to tackle some of these myself so keep the information coming.
_________________
Jody Kidd
KE7WNG
Northern, Utah
 |
|
| Back to top |
|
 |
Sunbeam
Joined: 23 Feb 2012
Posts: 3990
City/Region: Out 'n' About
State or Province: Other
C-Dory Year: 2002
C-Dory Model: 22 Cruiser
Photos: Sunbeam
|
| Posted: Mon Jan 14, 2013 9:59 pm Post subject: |
|
|
| jkidd wrote: | Hi Sunbeam
I need to tackle some of these myself so keep the information coming. |
Thanks for the encouragement - I've certainly spent plenty of (enjoyable) time looking through your photo album and picking up tips  |
|
| Back to top |
|
|
Sunbeam
Joined: 23 Feb 2012
Posts: 3990
City/Region: Out 'n' About
State or Province: Other
C-Dory Year: 2002
C-Dory Model: 22 Cruiser
Photos: Sunbeam
|
| Posted: Mon Jan 14, 2013 11:16 pm Post subject: |
|
|
Since the topic of the (lower) transom drain has come up, and since I've been working on it recently, I figured why not post what I have. As a side note, realizing that unless I wait to post any details until I have "fully completed" tasks, then partial ones will end up being broken up into discontiguous posts, I considered waiting. But I figured then I'd forget details along the way, and plus if I ended up with a "backlog" of stuff to post it might just get too overwhelming and chore-like and I wouldn't post at all. So I'm going to just go ahead with things that may only be partially completed (but it will all be in this thread). I hope that's suitable.
So, the lower drain, which I call the "transom drain" in my mind (as opposed to the splashwell drain). Having already taken care of the fuel tank cleats, this was the number one worry I had about the core. A thin brass tube, below the waterline and probably not well-bedded, running through unprotected core... what could possibly go wrong?  Thing is, for awhile I wasn't sure how I wanted to tackle it. Did I want to re-create the tube style drain? Or did I want to completely close out the core and go back in with a "garboard drain" style setup. I think that somewhere in my brain I already knew I wanted to do the latter, but there is always that resistance to "cutting up" a perfectly good boat, isn't there? Thing is, for awhile I wasn't sure how I wanted to tackle it. Did I want to re-create the tube style drain? Or did I want to completely close out the core and go back in with a "garboard drain" style setup. I think that somewhere in my brain I already knew I wanted to do the latter, but there is always that resistance to "cutting up" a perfectly good boat, isn't there?
I got as far as removing the tube and finding that there was just a small amount of damp core directly beneath it (Whew! But then my boat's never been kept in the water, and was mostly stored indoors, so I wasn't surprised as much as I was relieved.), and then I decided to move up to the splashwell drain because that would give me a chance to try out my fiberglass tube method, which was one of the options for the transom drain.
So here we go:
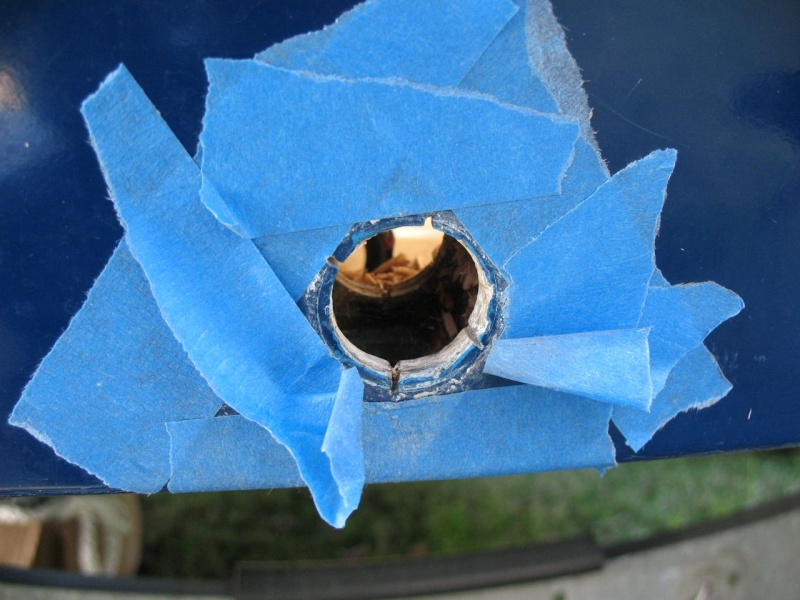
First step was to remove the old tube. I masked off around it and then used a hacksaw blade to make several lengthwise cuts in the tube. It's thin and not hard to cut.
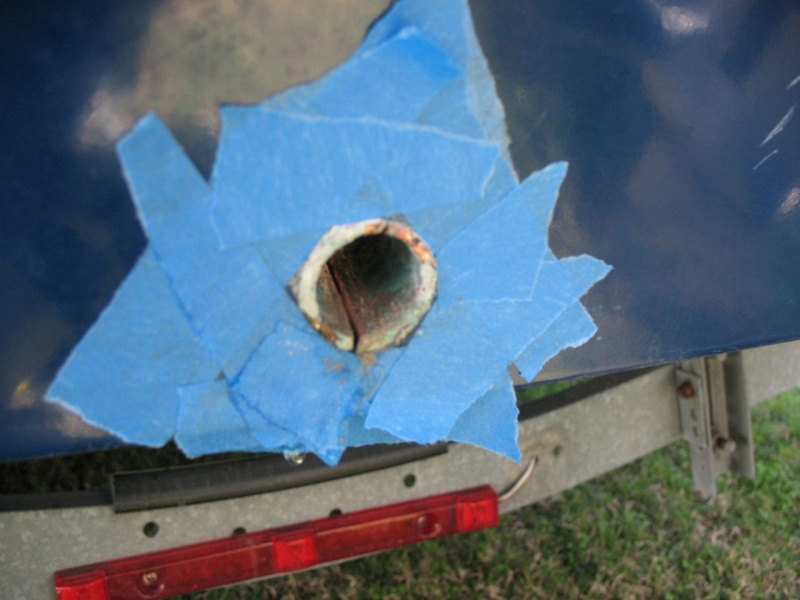
As I was getting through the 6 o'clock cut, water suddenly began to lubricate my saw blade. Not good! You can see it in this photo.
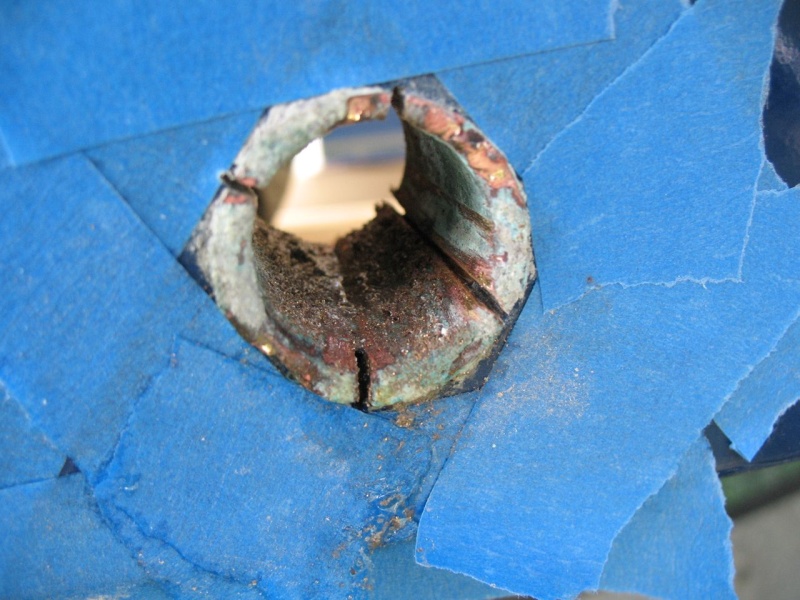
Next I used a hammer and cold chisel and gently tapped down one of the "leaves."
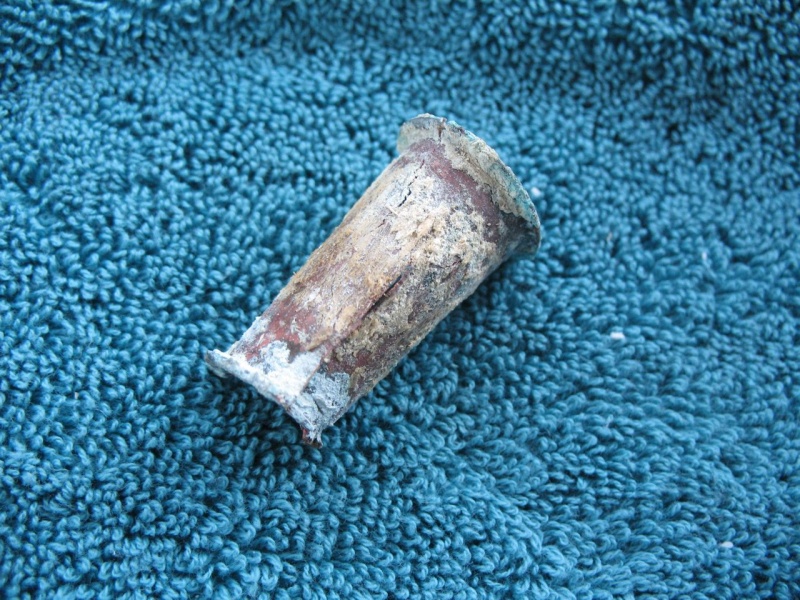
Which I then grabbed with a vise grips and pulled the tube out. Again, scanty use of sealant, as you can see.
Tube removed, outside view:
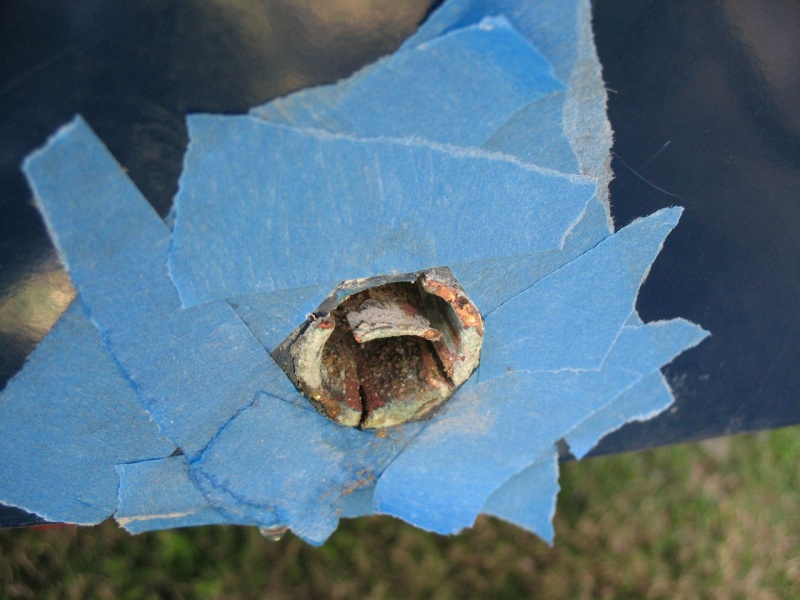
Inside view (see P.S. below on the two smaller holes)

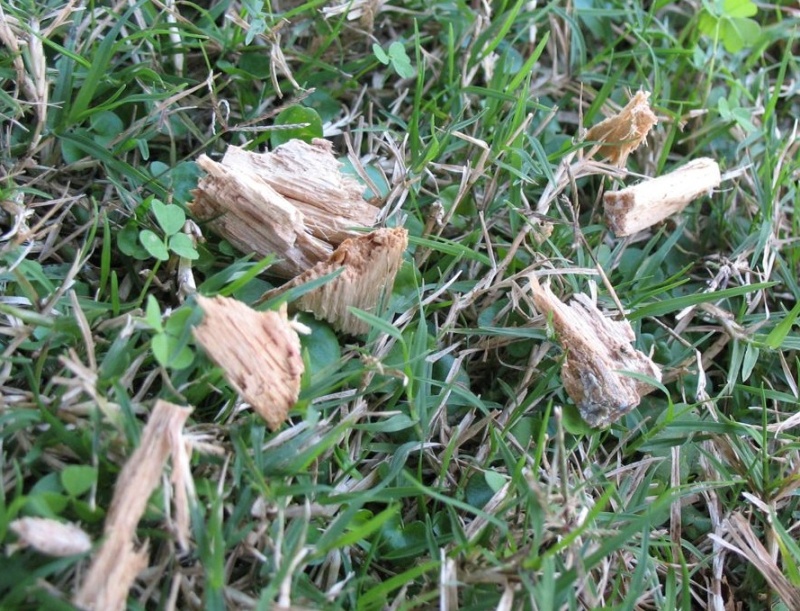
Fingers crossed, I started extracting core. Happily, I only found damp core in the small area beneath the tube, and maybe 1-2" across. I removed that and adjacent dry core in (possible) preparation for epoxy treatment and bonding in a new tube.
Slightly damp core, removed.
Then I paused the job, for a few reasons.
1) Somehow I had boneheadedly ordered 1" square tubing instead of the round tubing. Round was on the way but would be a few days in coming due to the holidays/shipping.
2) I still wasn't sure I wanted to go back in with a tube at all, so I wanted more time and information (decided to proceed with the splashwell drain first so that I could work with the tube and see how it went - in the splashwell I knew I was not going to eliminate the tube setup).
3) There was a lot of rain in the forecast before the round tube would arrive, and I wanted a dry spell for the job.
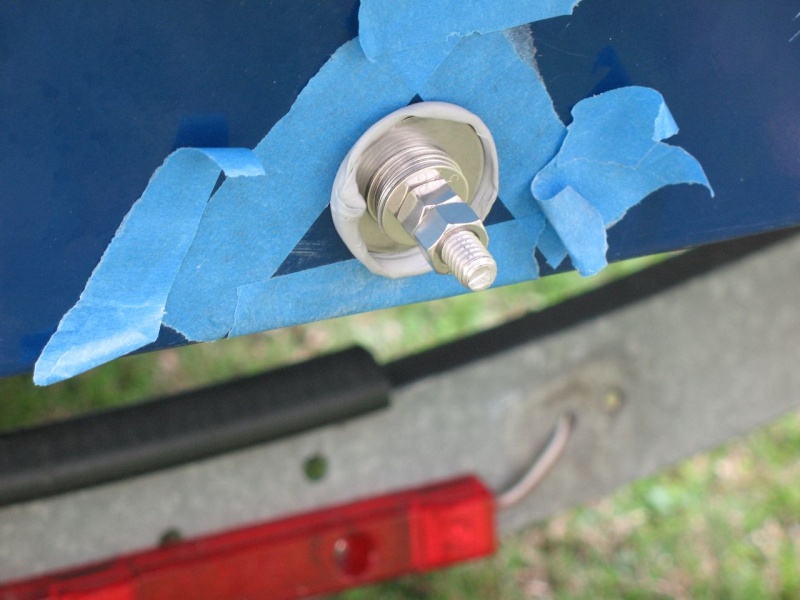
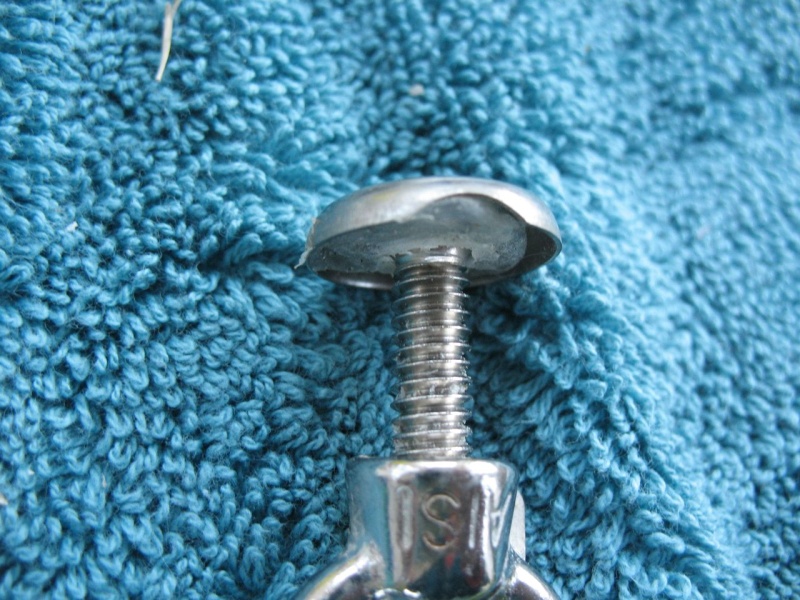
So, how to seal the area while I waited? What I did was make up a plug consisting of a 3/8" bolt and two large fender washers (plus some smaller washers to get past the shoulder of the bolt and into the threaded area). I covered the washers and under the bolt head liberally with butyl tape, and then I installed it, favoring the lower side of the holes.
Plug, outside:
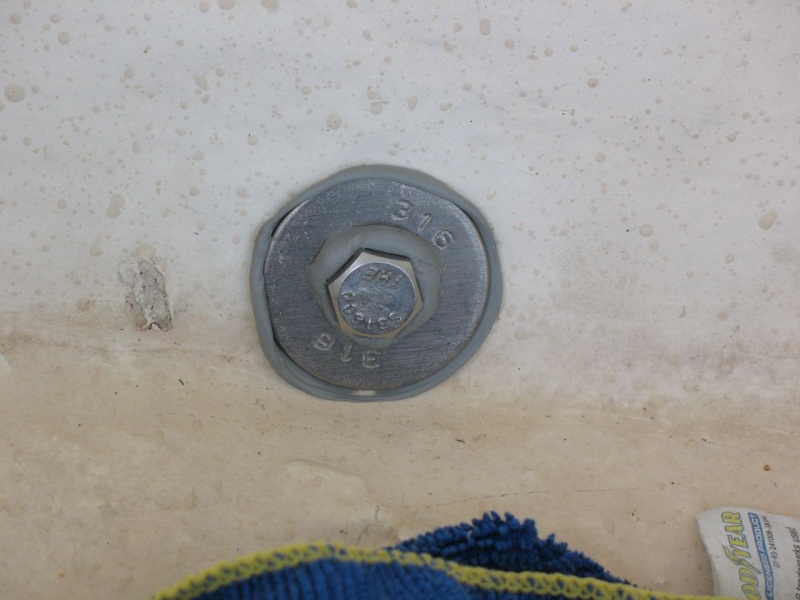
And inside:
A few days ago, a dry two-day weather window appeared, and, having decided how to tackle the job (minus those small details that you have to refine once you're "in there"), I removed the plug in preparation. There had been quite a bit of rain in the meantime, and although I bailed and bilge-pumped, there were still times that water sat in the sump (I have the boat outside at the moment at a friend's shop, and although I have a tarp that covers it all, the rain came with very strong wind so I elected not to use the tarp). I slightly held my breath as I removed the plug.... dry as a bone! I had all the core removed from beneath the drain hole (so it was just bare fiberglass), so I knew if any moisture had gotten in, that area would be damp or wet or full of water, but it was dry. Ahhhh.
To be continued...
Sunbeam 
P.S. By the way, the two smaller holes in the "inside, tube removed" photo are where a bilge pump was fastened into the sump with screws. Although this "sump" area is depressed, it is still cored, but the core is just thinner (and said core runs into the transom core with no particular division). Happily, the core was completely dry, but I still removed some in preparation for filling with thickened epoxy. Actually, this is where I got the butyl/plug idea, because I similarly had to postpone filling these holes at one point in time, and so I used butyl and two screws to plug them. Later (and after there had been water in the sump), the core was still completely dry when I removed the "plugs." |
|
| Back to top |
|
|
Sunbeam
Joined: 23 Feb 2012
Posts: 3990
City/Region: Out 'n' About
State or Province: Other
C-Dory Year: 2002
C-Dory Model: 22 Cruiser
Photos: Sunbeam
|
| Posted: Tue Jan 15, 2013 12:30 am Post subject: |
|
|
I want to make a comment on the splashwell fiberglass drain tube I installed, just to clarify something that I might not have said as well as I could have.
While I'm quite happy with the basic function and installation of the tube, and would do it that way again, I'm not sure about the gelcoating of it. I'm not a gelcoat pro by any stretch of the imagination, and while I filleted the tube to make for a smooth transition, I'm still not sure if it will make for a "good" gelcoat base. What I mean is, I think it's possible that the gelcoat would still end up being vulnerable to chips on the end of the tube. It's also possible the tube could be cut flush and then gelcoated, but again I'm not as sure how gelcoat functions (as compared to epoxy) in these types of areas, so I'll want to consult with someone more knowledgeable.
These "unsure bits" are why I set it up so that I could easily trim the tube, forget the gelcoating, and place a through hull inside the tube. The mushroom flange (splashwell) and nut (transom) would cover everything that's not still original gelcoat. Essentially, the through hull would be "decorative," although I would still bed it in sealant. I now wish I had taken a photo when I had a through hull just set into the hole (pre-tube-installation, just to see how it looked). I thought it looked nice.
Sunbeam |
|
| Back to top |
|
|
BrentB
Joined: 15 Jul 2006
Posts: 4419
City/Region: Greenwood
State or Province: IN
Photos: BrentB
|
| Posted: Tue Jan 15, 2013 9:22 am Post subject: |
|
|
Will yo be adding ball or falpper type scuppers?
I find Sharpie brand markers ink with fades quickly b/c I use them everyday at work. Have you considered using a label maker or painting the increments?
_________________
Brent Barrett |
|
| Back to top |
|
|
Sunbeam
Joined: 23 Feb 2012
Posts: 3990
City/Region: Out 'n' About
State or Province: Other
C-Dory Year: 2002
C-Dory Model: 22 Cruiser
Photos: Sunbeam
|
| Posted: Tue Jan 15, 2013 11:42 am Post subject: |
|
|
| BrentB wrote: | | Will yo be adding ball or falpper type scuppers? |
I hadn't planned to, but then I didn't know that water backing up into the splashwell through that drain hole was a problem... is it? If I had known/planned for that, then I probably would have looked for a flapper-type fitting from the get go. (Augh!)
| BrentB wrote: | | I find Sharpie brand markers ink with fades quickly b/c I use them everyday at work. Have you considered using a label maker or painting the increments? |
You know, I was wondering about that, which is one reason I haven't marked the tank (beyond lines on blue tape yet). I do have a super-permanent Sharpie (I guess it's one step beyond the everyday permanent type), but I still wasn't sure that was the best method. Seems that not much sticks well to this type of plastic. I do have one of those thin-plastic-tape type label makers. What sort of paint were you thinking of?
Thanks for the questions/ideas,
Sunbeam |
|
| Back to top |
|
|
BrentB
Joined: 15 Jul 2006
Posts: 4419
City/Region: Greenwood
State or Province: IN
Photos: BrentB
|
| Posted: Tue Jan 15, 2013 1:22 pm Post subject: |
|
|
We found if you cover the Sharpie marks with clear packaging tape, it will fade less. We use several different label printers and label stocks. For common tasks, we use a Brother printer and (correction) TZ laminated series tape. It works fine but have not tried on a plastic tank. I have not marked my tank but thought the following should work. Mark each level with a mark (line and gallons) then mask around it with painter's tape, mask off remainding areas with newspaper and spray with black enamel
Thanks for posting your projects. |
|
| Back to top |
|
|
Sunbeam
Joined: 23 Feb 2012
Posts: 3990
City/Region: Out 'n' About
State or Province: Other
C-Dory Year: 2002
C-Dory Model: 22 Cruiser
Photos: Sunbeam
|
| Posted: Tue Jan 15, 2013 1:38 pm Post subject: |
|
|
| BrentB wrote: | | ...Mark each level with a mark (line and gallons) then mask around it with painter's tape, mask off remainding areas with newspaper and spray with black enamel |
You know, now that you mention it, I noticed that on my new fuel tanks the "label" was characters molded into the tank and then spraypainted over (at least that's what it looks like) to make them stand out. I happen to have a can of "Fusion" spray paint that's meant for plastics, so I think I'll try spraying a small area on the bottom of the tank and see how easily (or if) it scratches off. There won't be any UV or scratching to speak of on the side of the tank, but still nice to test. I have noticed a fair amount of condensation on the side of the tank (when the weather changes faster than the water temperature), so I've considered adding some insulation (although not where my marks would be). I don't know how much of a problem it really is though.
One slight mod I made is to add cleats under the shelf that's above the water tank to support it instead of it "hanging" by steel angle brackets as it was originally. The location of the brackets changed slightly once I fully supported the tank, so I had to modify the shelf support in any case. Now I can easily lift up the shelf and look into the tank compartment. I'll probably just keep an eye on it to see if it's worth messing around with insulation (not to "insulate" the water but to keep condensation at bay if it turned out there were enough to run down and around/out of the locker).
Would you mind commenting further on splashwell drain tube backwash? You had asked if I planned to add a flapper, but without any appreciable practical experience with the boat (yet), I didn't know backwash through the drain tube was an issue. What's been your experience?
Sunbeam |
|
| Back to top |
|
|
BrentB
Joined: 15 Jul 2006
Posts: 4419
City/Region: Greenwood
State or Province: IN
Photos: BrentB
|
| Posted: Tue Jan 15, 2013 1:48 pm Post subject: |
|
|
I have a different boat with ball type scupper and my cockpit is well drained. I know there are severel factors involved with deck drains and have not used the boat without them but seems like a good idea to prevent back wash
best |
|
| Back to top |
|
|
rogerbum
Joined: 21 Nov 2004
Posts: 5922
City/Region: Kenmore
State or Province: WA
C-Dory Year: 2008
C-Dory Model: 255 Tomcat
Vessel Name: Meant to be
Photos: SeaDNA
|
| Posted: Tue Jan 15, 2013 2:08 pm Post subject: |
|
|
For the splashwell drain, no scupper is needed.
_________________
Roger on Meant to be |
|
| Back to top |
|
|
Sunbeam
Joined: 23 Feb 2012
Posts: 3990
City/Region: Out 'n' About
State or Province: Other
C-Dory Year: 2002
C-Dory Model: 22 Cruiser
Photos: Sunbeam
|
| Posted: Tue Jan 15, 2013 2:11 pm Post subject: |
|
|
| BrentB wrote: | | I have a different boat with ball type scupper and my cockpit is well drained. I know there are severel factors involved with deck drains and have not used the boat without them but seems like a good idea to prevent back wash |
Ah, okay, thanks for clarifying. On the 22 Cruiser the cockpit is not self-draining, so there is no drain for it (unless you are on the hard and take the lower drain plug out). The splashwell drain (on which I replaced the original brass tube with the fiberglass tube) just drains the splashwell (motorwell), which is fairly small and on which the top lip isn't all that high either (where the motors clamp to). My guess is that -- on those occasions when it would happen - any significant water would be coming right over the open top and completely eclipsing any small amount that would be backing up through the drain tube. Of course those with more actual experience with their 22's are welcome to chime in, as I'm just going by educated guess here.
Here is a photo of the whole thing for perspective (not my boat but another, similar 22):

Sunbeam |
|
| Back to top |
|
|
BrentB
Joined: 15 Jul 2006
Posts: 4419
City/Region: Greenwood
State or Province: IN
Photos: BrentB
|
| Posted: Tue Jan 15, 2013 2:35 pm Post subject: |
|
|
Thanks
My mistake |
|
| Back to top |
|
|
Sunbeam
Joined: 23 Feb 2012
Posts: 3990
City/Region: Out 'n' About
State or Province: Other
C-Dory Year: 2002
C-Dory Model: 22 Cruiser
Photos: Sunbeam
|
| Posted: Tue Jan 15, 2013 2:59 pm Post subject: |
|
|
| BrentB wrote: | Thanks
My mistake |
But understandable if you thought I was working on a cockpit drain close to the waterline, so I'm glad you brought it up. And I appreciated your comments on the Sharpie since I was already wondering if that was a good choice. Now I'm going to test out the Fusion paint |
|
| Back to top |
|
|
Grazer
Joined: 16 Dec 2011
Posts: 183
City/Region: Yukon
State or Province: YT
C-Dory Year: 2004
C-Dory Model: 22 Cruiser
Vessel Name: C-Horse
Photos: Grazer
|
| Posted: Thu Jan 17, 2013 1:40 am Post subject: |
|
|
| Keep up the great work Sunbeam! I appreciate following your thread and learning others tips and techniques. |
|
| Back to top |
|
|
Sunbeam
Joined: 23 Feb 2012
Posts: 3990
City/Region: Out 'n' About
State or Province: Other
C-Dory Year: 2002
C-Dory Model: 22 Cruiser
Photos: Sunbeam
|
| Posted: Thu Jan 17, 2013 7:29 pm Post subject: |
|
|
Just a minor update, but I finished installing the new anchor-locker drain clamshell today. First let me backtrack. I had mentioned that there was a small eyenut in the locker that was apparently meant to fasten the bitter end of the anchor rode to. There were a few things I didn't really like about it:
1) It seemed a bit dainty to me.
2) It was attached to the bulkhead between the anchor locker and the V-berth with no particular backing - just a thin finishing washer on the V-berth side (and that's not exactly a massive bulkhead).
3) The hole it went through led into the V-berth (on the level of the edge of the cushions) and the fitting was poorly bedded and bedded on the wrong side only (back of finishing washer on V-berth side was filled with silicone). Any water leaking through would have soaked the underside of V-berth cushions (and as the anchor locker was built, the drain hole for the anchor locker was above the level of this hole).
Here's what it looks like:

The "bedding" of silicone in the finishing washer (which pulled right off the boat like it was never there; luckily I don't need to try to clean out the washer:
So anyway, that's removed and I'll fill the hole with thickened epoxy, and probably put a small fiberglass patch on the anchor-locker side (not really necessary, but I'll be doing other stuff with the same materials anyway).
Today I went to put the new anchor clamshell on. I was re-using the apex hole, so I screwed the clamshell into place with that and then marked and drilled small holes in new locations for the other two fasteners (of the two disused holes, one was eclipsed by the new drain hole and the other was previously filled with thickened epoxy and will be under the flange of the new clamshell). Then I removed the clamshell and chamfered the two new holes a bit, and then proceeded to drill them out to the proper size (which is rather larger in fiberglass than wood for a given screw size). I used blue tape "flags" on the drill bits as visual depth stops. Once I had the final diameter and depth holes, I chamfered again to keep the gelcoat from cracking and to give a bit of a well for sealant (not that this particular piece of hardware is a critical seal).
I felt the screws (re-used the ~3/8" long screws from the original clam) could be a tad shorter, so I ground off 3/32" or so from the pointy end. I decided to put a bit of thickened epoxy into the fastener holes before installing the clam -- I have a couple of small squeeze bottles of West System "G/flex" epoxy, and with those it's easy to mix up just a wee batch. I cleaned everything up with denatured alcohol, put a very thin layer of butyl tape on the clam flange and around the base of the fasteners, then mixed up a bit of epoxy and wet out the holes (pipe cleaner), after which I thickened it slightly with colloidial silica and put a bit more in each hole. Then I installed the clam and cleaned up around the outside. Ahhh, much nicer than looking at the drain hole(s)!

Next time I'm doing something with "regular" epoxy and cloth I'll fill the disused hole from the eye nut.
Sunbeam |
|
| Back to top |
|
|
|
|
You cannot post new topics in this forum
You cannot reply to topics in this forum
You cannot edit your posts in this forum
You cannot delete your posts in this forum
You cannot vote in polls in this forum
You cannot attach files in this forum
You can download files in this forum
|
|
 Search
 Private Messages
 Profile
 Log in
 Register
 Help
Help
