| View previous topic :: View next topic |
| Author |
Message |
Bob&Alicia
Joined: 29 Aug 2015
Posts: 50
City/Region: Athens
State or Province: GA
C-Dory Year: 2007
C-Dory Model: 25 Cruiser
Photos: Bob&Alicia
|
 Posted: Sun Apr 23, 2017 10:38 am Post subject: Posted: Sun Apr 23, 2017 10:38 am Post subject: |
 |
|
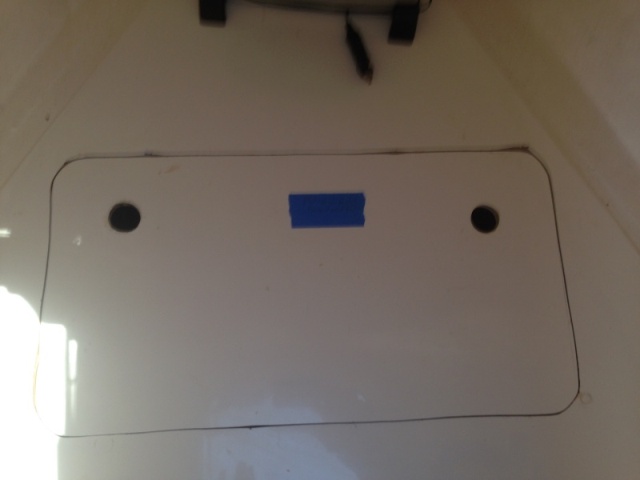
I was able to get the measurements this AM for the cutouts.
Measurements:
Port: 27"x14.5 and 4 inches from the inside edge
Starboard":21"x11.75 and 3.5 inches from inside edge
Forward: 27"x14.5 and 7 inches from inside edge
_________________
Bob and Alicia |
|
| Back to top |
|
 |
Tom on Icarus
Joined: 15 Sep 2007
Posts: 175
City/Region: Campbell River, Vancouver Island
State or Province: BC
C-Dory Year: 2008
C-Dory Model: 25 Cruiser
Vessel Name: Tranquil~C
Photos: Tranquil~C
|
| Posted: Mon Apr 24, 2017 10:33 am Post subject: |
|
|
Thanks for posting your hatch sizes Bob and Alicia. They are a bit bigger than those that I was planning but it is good to know that you have no issues with their sizes. I may make mine a bit larger.
Cheers, Tom
_________________
22 Cruiser "Icarus" 2005 - 2011
25 Cruiser "Tranquil~C" 2011 - 2019
30 Commander (to be named) 2019 - |
|
| Back to top |
|
|
Bob&Alicia
Joined: 29 Aug 2015
Posts: 50
City/Region: Athens
State or Province: GA
C-Dory Year: 2007
C-Dory Model: 25 Cruiser
Photos: Bob&Alicia
|
| Posted: Tue May 09, 2017 10:15 pm Post subject: |
|
|
I have completed the project. Some take-aways:
- I like the cut-outs being used as the hatch covers
- I used West Systems Epoxy 105 and 205 hardner and Wood Flour as a filler.
-Two coats on the air dried fir. Used 1x2's
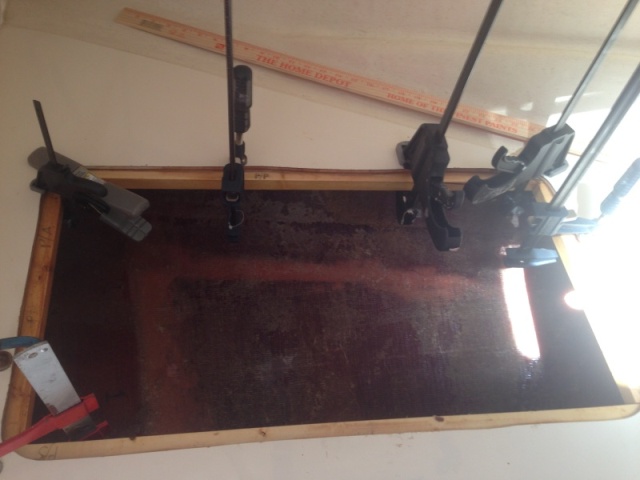
- I cut the long edge pieces 2.5 inches longer at either end. This allowed the board to have full contact with the underside of the berth versus just about an inch
- I watched several West Systems videos on Youtube
- I sanded with 120 grit the part of the board I was gluing as well as the underside of the berth
- Cleaned underside of berth with Acetone
- Applied a coat of un-thickened epoxy to both board and underside of berth to wet it out. The left over resin was then thickened. I had a runny peanut butter and later moved to toothpaste. I marked a line on each board to show the area to apply epoxy including where the entire board would be stuck to underside so that I could quickly work the epoxy.
- Takes about 4 pumps of epoxy to do each opening using a West Systems metering system
- Once I put the board in place I applied a small clamp with light pressure. Just enough to hold it. Each board had 3 clamps. Make sure I had everything lined up. I then lightly tightened the clamp some more. Waited a few minutes testing the consistency of my epoxy in the cup. Once it seemed to firm up a little more I tightened it down a little more. Any that came out the back was then Filleted like you would chalking to make a bead of it between the board and the underside of the berth. Any in the front was removed. We have a Harbor Freight so I have collected a basket full of clamps. I must have 20.
-Once cured about a day later I added un-thickened epoxy to the exposed edge of the cut. There is plywood sandwiched into the layers of the berth. I didn't want this exposed. I allowed the the epoxy to run into where the berth and lip boards meet to fill any small gaps. Excess was removed. I just kept working the brush around the exposed edge letting it soak it up.
-I did a fit test. Any where that the gap was tight I sanded that down. I don't expect a lot of expansion but wanted a small cap between hatch board and frame.
- I sanded the edge of the hatch boards and coated the edge with two coats of epoxy. This creates a barrier.
I have pushed down on the hatch frame and everything seems good. The hatch boards fit well. Not the best cutting job. You can tell I've never done a lot of board cutting. The storage is great. I think most of the hanging locker and under the dinette can go there. This will open up much more day to day storage.
[/img] http://www.c-brats.com/modules.php?set_albumName=V-Berth-Storage-Project&id=Clamp_edges_V_Berth&op=modload&name=gallery&file=index&include=view_photo.php [img][/img]
[img]https://drive.google.com/open?id=0B2WuF9OC8jVYMjNuSEdJOGxMRnc[/img] |
|
| Back to top |
|
|
Bob&Alicia
Joined: 29 Aug 2015
Posts: 50
City/Region: Athens
State or Province: GA
C-Dory Year: 2007
C-Dory Model: 25 Cruiser
Photos: Bob&Alicia
|
| Posted: Tue May 09, 2017 10:29 pm Post subject: |
|
|
More pictures in our Album
 |
|
| Back to top |
|
|
Marco Flamingo
Joined: 09 Jul 2015
Posts: 1155
City/Region: Seattle
State or Province: WA
C-Dory Year: 2004
C-Dory Model: 16 Cruiser
Vessel Name: Limpet
Photos: Limpet
|
| Posted: Tue May 23, 2017 12:08 pm Post subject: |
|
|
I'm late to this thread, but I did a simple access hatch that may be helpful to others considering access hatches. AZEK (PVC lumber) makes a trim board that is 12 inches wide by 1 inch thick. If you can get by with an opening that is only 12 inches wide, this stuff works really nice. I had some left over from other projects, but if you buy a full board you will probably find other uses. I cut my under V-berth hatch out of the board by slicing off the length that I wanted and shaping it. Trace around it for the opening to be cut. Instead of using the glassed over ply cutout (which I found to be heavy and clunky as a cover) I have a very lightweight AZEK hatch.
I first tried gluing strips on the underside as shown above, but the epoxy failed, I tried adding mechanical fastenings, but ultimately changed that design. I used 1 inch wide by 1/8 thick aluminum strips like these https://www.amazon.com/M-D-Building-Products-60749-48-Inch/dp/B000I1AP38/ref=sr_1_16?ie=UTF8&qid=1495554894&sr=8-16&keywords=1+inch+aluminum+barwith countersunk screws to make a 3/16th inch lip around two edges of the AZEK hatch. The 1/8 height of the aluminum strip isn't noticeable through my ThermaRest pad.
I saved 2 pounds and have an access hatch that cannot fit large objects. Both benefits on a CD 16.
Mark |
|
| Back to top |
|
|
|
 Search
 Private Messages
 Profile
 Log in
 Register
 Help
Help
