| View previous topic :: View next topic |
| Author |
Message |
RichardM
Joined: 28 Mar 2012
Posts: 96
City/Region: Akron
State or Province: OH
C-Dory Year: 2007
C-Dory Model: 22 Cruiser
Vessel Name: Pangur Ban
Photos: Pangur Ban
|
 Posted: Wed Sep 16, 2015 3:40 pm Post subject: Posted: Wed Sep 16, 2015 3:40 pm Post subject: |
 |
|
| Thanks for the idea on relief holes. I'll be filling from the top so my first challenge is to seal the bottom holes to keep epoxy from dropping through. West System seems to like packing tape ... wonder why? I called their tech line today and the tech recommended using 404 filler because it has high compression strength. Found some at a local shop. |
|
| Back to top |
|
 |
Sunbeam
Joined: 23 Feb 2012
Posts: 3990
City/Region: Out 'n' About
State or Province: Other
C-Dory Year: 2002
C-Dory Model: 22 Cruiser
Photos: Sunbeam
|
| Posted: Wed Sep 16, 2015 5:52 pm Post subject: |
|
|
I've always used tape and it works great. Two variations:
1) Good quality clear packing tape, such as from 3M. Advantage is you can see through it to see how you are doing. Disadvantages are that it does not seal as well on lumpy surfaces, and it can be a tiny bit harder to remove.
2) Good old blue tape. Seals well and removes easily, but you can't see through it.
With either type, just do a bit of "pressing and molding" it onto the surface vs. just lobbing it up there.
One other thing you might check. A couple of the underside nuts/washers on my bow pulpit were not contacting the underside of the deck very "fairly." Basically, the under deck surface was not flat, so only part of the washer would "dig in" and the other part wouldn't touch at all. On a couple I was able to just lightly sand/remove a couple of bumps. On a couple of others I took a fender washer, wrapped in in clear tape (makes a good "mold release"), and put some thickened epoxy on the underside of the deck, then pushed the washer up into it to make a flat surface. After it cured, removed it and had a flat surface.
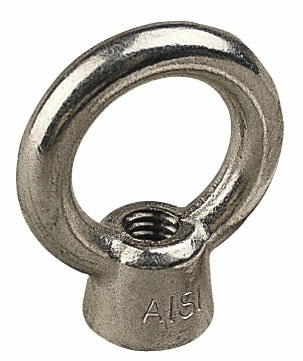
One more note (well, for now  ). I purposely used a few "extra long" machine screws when putting the rail back on (I purchased new 316 stainless fasteners from McMaster-Carr). Then I put eye nuts on the underside, which can double as a place to hang or attach things. Like this one from Sea Dog: ). I purposely used a few "extra long" machine screws when putting the rail back on (I purchased new 316 stainless fasteners from McMaster-Carr). Then I put eye nuts on the underside, which can double as a place to hang or attach things. Like this one from Sea Dog:
 |
|
| Back to top |
|
|
RichardM
Joined: 28 Mar 2012
Posts: 96
City/Region: Akron
State or Province: OH
C-Dory Year: 2007
C-Dory Model: 22 Cruiser
Vessel Name: Pangur Ban
Photos: Pangur Ban
|
| Posted: Fri Sep 18, 2015 7:41 pm Post subject: |
|
|
Today I reinstalled the bow pulpit using butyl tape as sealant. Sailrite has a nice video promoting this method: http://www.sailrite.com/Butyl-Tape-Bedding-Deck-Hardware-Sealant-Video-Demo
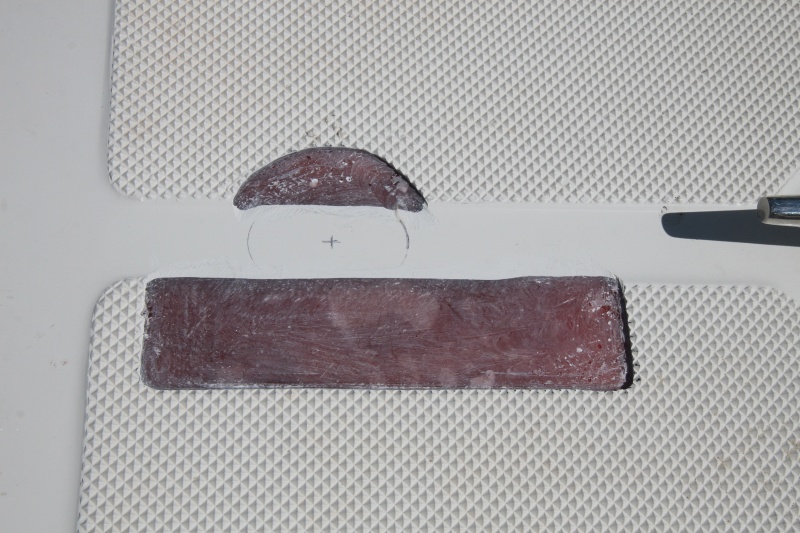
While waiting for a helper to arrive, I removed the windlass. I'd hoped not to find the same problem there. Silly me. Again I found wet core material. The windlass mounting holes are close to the big through-deck hole, so hogging out the core opened it all the way to the side. That made inspection easier but refilling harder. Right now the second "fill" of epoxy is curing in those holes, and when it is partly cured I'll finish off with a third and final pour. My wife says I should go into business doing this for rich people.... |
|
| Back to top |
|
|
Jack in Alaska
Joined: 17 Aug 2004
Posts: 1192
City/Region: Anchorage/Ninilchik
State or Province: AK
C-Dory Year: 2005
C-Dory Model: 26 Pro Angler
Vessel Name: HIGH TIDE II
Photos: HIGH TIDE II
|
| Posted: Sat Sep 19, 2015 2:02 am Post subject: |
|
|
Another thing to look at on the old C-Dorys is the bow railing somehow gets water in it and it settles into the vertical pieces. My railing actually "exploded" from the water freezing inside the tube. I also drilled an eighth inch hole in the remaining verticals to relieve the water. Quite a lot drained out.
_________________
On the HIGH TIDE-II, wife Carolyn and I.....Another summer fishing on the HIGH TIDE II in the Cook Inlet at Cape Ninilchik, Alaska.
HIGH TIDE-II; 2005 26' ProAngler; 2003 200 Honda / 2009 9.9 Honda high thrust
No. CD026021I405; AK-5008-AK
MSSI No. 338143486(cancelled)
HIGH TIDE; 1983 Angler Classic 22'; 90 Honda/ 9.9 Tohatsu-sold 2009 to son Dan (flatfishfool)
Stolen & stripped in Aug. 18
Bare hull & trailer sold in Nov. |
|
| Back to top |
|
|
RichardM
Joined: 28 Mar 2012
Posts: 96
City/Region: Akron
State or Province: OH
C-Dory Year: 2007
C-Dory Model: 22 Cruiser
Vessel Name: Pangur Ban
Photos: Pangur Ban
|
| Posted: Sat Sep 19, 2015 11:13 am Post subject: |
|
|
Sunbeam, that's a great idea about eye nuts. Clever solution to a common problem. Jack, I've heard of stanchions exploding from the force of freezing water on sailboats. Not easy to fix!
With the windlass off it is easy to see one source of leaks: it sits partly on the nonskid and partly off. The original flexible base pad was too thin to create a seal and has deteriorated and broken. I've emailed Lewmar to ask if a thicker pad is available. Any advice on how to remount the windlass securely? |
|
| Back to top |
|
|
Sunbeam
Joined: 23 Feb 2012
Posts: 3990
City/Region: Out 'n' About
State or Province: Other
C-Dory Year: 2002
C-Dory Model: 22 Cruiser
Photos: Sunbeam
|
| Posted: Sat Sep 19, 2015 12:49 pm Post subject: |
|
|
Sounds like you are well on your way to a deck you can not worry about. Good you caught it when you did.
On the windlass: I've never been completely comfortable with things mounted on non-skid, and even more when they are partially on and partially off.
One good solution can be seen in "Voyager's" album (a lot of good photos of his windlass install). What he did is grind off the non-skid in the areas that end up under the windlass pad, so that it's all one level (the level of the non-non-skid). Here is a link and one photo (but there are more of the process at the link):
http://www.c-brats.com/modules.php?set_albumName=Upgrades&op=modload&name=gallery&file=index&include=view_album.php
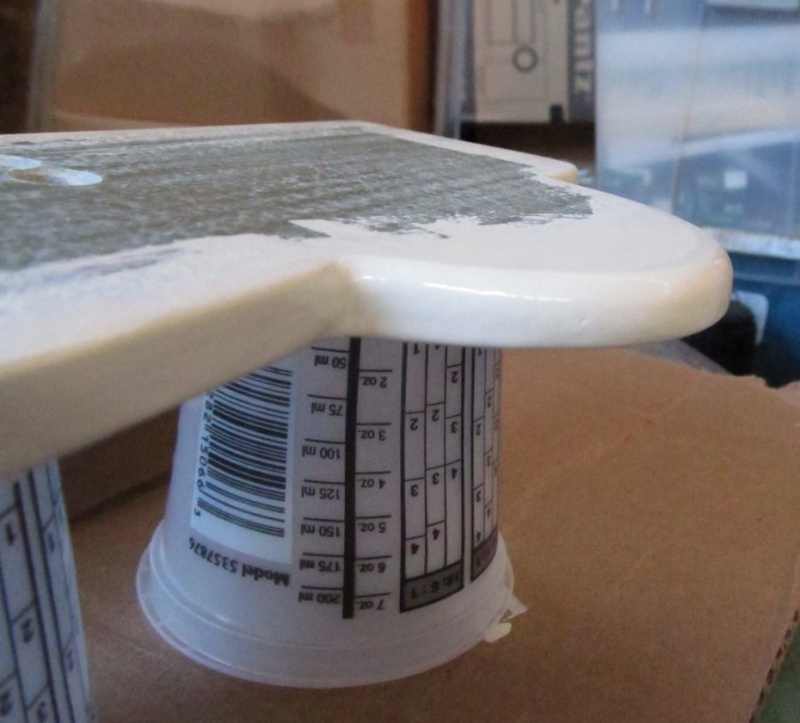
Because I like to try stuff, I have done a test patch of a different method. Totally unnecessary of course, it works fine the other way, etc. Anyway, first thing was that I wanted my windlass up on a little "pad." I like to mount things this way when possible, and also that little bit of more height would make it so that I could bring a line around the base to the cleat with a little nicer lead (this is a Lewmar 700 horizontal). So I made a pad out of, IIRC, 3/8" fiberglass board. Rounded on the edges, etc.
Then my idea was why not cast epoxy on the bottom to match the non-skid, and I could have an installation that was like a "flat" deck, only without grinding off the non-skid. I'd just bed this "keyed" pad as I would anything else.
I waxed the non-skid in the area in question, then "buttered" a test piece of fiberglass (to simulate the pad), pressed it in place until the "points" of the nonskid just touched the pad, and then let it cure to a fairly solid but slightly green stage. Then popped it off, trimmed the edges with a utility knife, and let it cure completely. When I then set it on the deck it "locked in" perfectly.
So, I think that's probably what I will do to mount the windlass. I realize this isn't what most people (or maybe anyone else) would do, and it's not necessary or maybe even ideal, but I like it. Just figured I'd mention it since we're tossing around ideas.
I ended up deciding not to mount the windlass (yet) since my near-future cruising was going to be mostly shallow water cruising, but I imagine I will mount it before anything "deep" where I'm putting out/bringing in tons of rode.
I don't have any photos of my test "reverse non-skid" piece, but here are two of the pad while I was making it. The fiberglass board is from McMaster-Carr.

Anyway, in summary, I prefer not to bed to non-skid, so I'd either remove it or do a "reverse non-skid" pad like I tried out. Of course, once you remove the core and fill with thickened epoxy, leaks won't be so much of a concern. |
|
| Back to top |
|
|
RichardM
Joined: 28 Mar 2012
Posts: 96
City/Region: Akron
State or Province: OH
C-Dory Year: 2007
C-Dory Model: 22 Cruiser
Vessel Name: Pangur Ban
Photos: Pangur Ban
|
| Posted: Sat Sep 19, 2015 8:55 pm Post subject: |
|
|
| Your reverse non-skid pad looks great. My windlass is also a Lewmar V700. I'd thought of grinding down the nonskid but I'm reluctant to cut into things -- need to get over that, apparently -- and the photos from Voyager are reassuring. Also thought of building a "pad" of 4200 by applying it in sufficient thickness to fill the nonskid and all the space remaining under the windlass. It's possible that either butyl tape or BoatLife Calk would do the same thing, too, and they appear to stay more flexible than 4200 (good or bad under a windlass?). And we can see whether Lewmar offers a thicker pad themselves. Right now the epoxy fill material is hardening and I'm building a box in which to mount the windlass breaker and up/down switch, since my dash is already filled. |
|
| Back to top |
|
|
RichardM
Joined: 28 Mar 2012
Posts: 96
City/Region: Akron
State or Province: OH
C-Dory Year: 2007
C-Dory Model: 22 Cruiser
Vessel Name: Pangur Ban
Photos: Pangur Ban
|
| Posted: Sat Sep 19, 2015 9:09 pm Post subject: |
|
|
| And one more possible material: rope caulk. One of my sailing mags just carried an article by an old sailor who says he's used hardware store rope caulk for bedding deck hardware for 15 years and never had a failure. I got out an old box from the basement where it's been around more than 30 years, and it was starting to dry out but still flexible enough to use under a door sill. In use, it feels a lot like butyl tape, perhaps a little more dense. Will try to find out what is in it. |
|
| Back to top |
|
|
Sunbeam
Joined: 23 Feb 2012
Posts: 3990
City/Region: Out 'n' About
State or Province: Other
C-Dory Year: 2002
C-Dory Model: 22 Cruiser
Photos: Sunbeam
|
| Posted: Sat Sep 19, 2015 10:17 pm Post subject: |
|
|
If you are reluctant to grind down the non-skid, and you don't want to bed straight to it (understandable), and you like the idea of a pad..... then maybe consider the "reverse non-skid" way?
Sounds like you are getting pretty comfortable with epoxy.
Basically, here is what I would do when it comes time to mount the windlass if I opt for the "reverse non-skid" way:
1) figure out exactly where I want it (I did this already, but of course I would do it again and mark things off, etc.).
2) Wax the deck well around the area (plus mask off, etc.)
3) Butter the bottom of the pad with thickened epoxy and press it down right where I want it.
4) Let it cure to the advanced green stage (holds its shape, but still somewhat workable with a utility knife).
5) Pull it off the deck and trim the edges flush.
6) Then when I go to mount the windlass, bed it. Might use butyl, or might use caulk for the better "flowiness."
It's too bad I don't have a photo of my test sample. And I'm not where I can get to it right now.
OTOH, this is a bit "outside the box," so maybe not the type of thing to encourage others to do when I haven't even done it yet (except for my trial sample). If I don't do it this way, I'll be sanding off the non-skid just like Voyager did. Sure, if I go to change windlasses there will be a "mark"; but on the other hand, presumably a new windlass would be going on, and at that point one could grind off an area, say, 2" around the new windlass (to cover up any overlaps from the old one), and simply paint or gelcoat it. This is a common look on sailboats where there is often a 1-2" smooth glossy area around stanchion bases, divisions in the non-skid, etc.
As I think about it, if I were going to "encourage" you to do it any certain way, I guess I'd recommend the latter. Just follow Voyager's excellent model in the album.
I would use butyl if doing it that way. |
|
| Back to top |
|
|
Marco Flamingo
Joined: 09 Jul 2015
Posts: 1167
City/Region: Seattle
State or Province: WA
C-Dory Year: 2004
C-Dory Model: 16 Cruiser
Vessel Name: Limpet
Photos: Limpet
|
| Posted: Mon Oct 26, 2015 8:15 pm Post subject: |
|
|
To answer the original question re have others found leaking pulpit mounts, YES. One spot was quite bad. The others are hard to say. All had a dab of bath tub caulk under the mount point. The holes were really discolored and one had a little soft spot, but that could happen even without a leak at that location.
Here's the problem with a leak in a balsa core. The spot where the leak occurs gets wet enough to rot and the surrounding wood gets moisture loaded. Another fitting, maybe several feet away has metal through deck fastenings that aren't leaking. On a cold night, the coldest spot in the moist balsa core is that metal fastener transmitting the cold from outside. That creates condensation right on the fastener. On a warm morning with sun on the deck, the inside of the boat may still be cold. Again, that cold metal fastener is going to attract condensation from the moist wood. That is how fittings that aren't actually leaking can look like they are leaking and even support rot. It makes diagnosis difficult.
I'm still tearing my boat apart and will be posting more pictures. My latest find is that many of the little snap fittings for my bimini go right into the balsa. I can't drill those out very big or the replaced snap fastener won't cover the epoxy filled hole.
Mark |
|
| Back to top |
|
|
Sunbeam
Joined: 23 Feb 2012
Posts: 3990
City/Region: Out 'n' About
State or Province: Other
C-Dory Year: 2002
C-Dory Model: 22 Cruiser
Photos: Sunbeam
|
| Posted: Mon Oct 26, 2015 9:04 pm Post subject: |
|
|
Another potential problem (which you are probably well aware of by now) is that if the balsa around a fitting/fastener gets damp/soft, then oftentimes the fastener is tightened, the core compresses - now you have a dish to funnel even more water in, more compression, etc. This is worse with individual washers than backing plates, but of course water in the core is never great.
One of the nice things about the thickened epoxy annulus is that not only does it help to seal off the core, but you now have what amounts to a compression post too, for tightening the fasteners against. |
|
| Back to top |
|
|
san juanderer
Joined: 12 Aug 2014
Posts: 235
City/Region: Stanwood
State or Province: WA
C-Dory Year: 1990
C-Dory Model: 22 Angler
|
| Posted: Mon Oct 26, 2015 11:47 pm Post subject: Rebedding deck hardware |
|
|
After all the core repair work; camfer ( with a camfer drill bit) the top surface to be caulked. This provides a place for the sealant to ( o-ring ) around the fastener shank. Also solves the problem of all the sealant from sqeezeing out. With machine bolt hardware, turn the nut not the bolt shank. With screw hardware, no choice but to turn the shank.
Sad, that builders won't take the time to seal properly !
alan
_________________
Cdory 22 Angler
SeaSport 24XL, Etec 250 hp (sold)
Rosborough RF246 (sold)
Commander 30 Sportfish (sold)
Olympic 26 XL (sold)
Glassply 19 (sold)
Olympic 23 (sold)
Bayliner 38 Motoryacht (sold)
Olympic 20 (sold)
Fiberform 16 (sold)
Olympic 18 (sold) |
|
| Back to top |
|
|
Sunbeam
Joined: 23 Feb 2012
Posts: 3990
City/Region: Out 'n' About
State or Province: Other
C-Dory Year: 2002
C-Dory Model: 22 Cruiser
Photos: Sunbeam
|
| Posted: Tue Oct 27, 2015 11:47 am Post subject: |
|
|
| Good point on the chamfer. I have an older drill with a chuck that is a pain to operate, so I reduced it to chamfer-only status, and just keep a chamfer bit in it at all times. In addition to the benefits you mentioned, the beveled top surface also helps to prevent spider cracking, if the top surface is gelcoated (without the chamfer, cracks tend to radiate out from the hole - many were like this on my C-Dory, luckily most/all of them were under hardware and/or the new chamfer superseded them). |
|
| Back to top |
|
|
|
|
You cannot post new topics in this forum
You cannot reply to topics in this forum
You cannot edit your posts in this forum
You cannot delete your posts in this forum
You cannot vote in polls in this forum
You cannot attach files in this forum
You cannot download files in this forum
|
|
 Search
 Private Messages
 Profile
 Log in
 Register
 Help
Help
